
Toshiba User's Guide for Satellite A210/A215
Page 5
... a 900 number or any changes necessary to the fax software instructions installed on the first page of the transmission, the date and time it can. Disconnection If you disconnect the equipment until the problem is resolved. Contact the state public utility commission, public service commission or corporation commission for repair or limited warranty information, please contact Toshiba Corporation, Toshiba America Information...
... a 900 number or any changes necessary to the fax software instructions installed on the first page of the transmission, the date and time it can. Disconnection If you disconnect the equipment until the problem is resolved. Contact the state public utility commission, public service commission or corporation commission for repair or limited warranty information, please contact Toshiba Corporation, Toshiba America Information...

Toshiba User's Guide for Satellite A210/A215
Page 29
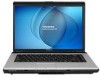
...Opening the display panel 48 Your computer's features and specifications ....49 Turning on the power 50 Adding memory (optional 51 Installing a memory module 51 Removing a memory module 57 Checking total memory 58 Hard Drive Recovery Utilities 59 Creating Recovery CDs/DVDs 59 Hard Disk Drive Recovery options 61 Hard Disk Drive Recovery using the Recovery media 65 Installing drivers and applications 66 Using the TouchPad 66 Scrolling with the TouchPad 67 Control buttons 67 Disabling or enabling the TouchPad 67 Using the Dual Mode Pad 68 Using Dual Mode 68 Using external display...
...Opening the display panel 48 Your computer's features and specifications ....49 Turning on the power 50 Adding memory (optional 51 Installing a memory module 51 Removing a memory module 57 Checking total memory 58 Hard Drive Recovery Utilities 59 Creating Recovery CDs/DVDs 59 Hard Disk Drive Recovery options 61 Hard Disk Drive Recovery using the Recovery media 65 Installing drivers and applications 66 Using the TouchPad 66 Scrolling with the TouchPad 67 Control buttons 67 Disabling or enabling the TouchPad 67 Using the Dual Mode Pad 68 Using Dual Mode 68 Using external display...

Toshiba User's Guide for Satellite A210/A215
Page 52
.... 4 Remove the main battery. NOTE For this model Slot A is to be installed, it must be installed in Sleep or Hibernation mode, data will be lost. Start (Sample Image) Shut Down menu Arrow Shut Down Menu 2 Click Shut Down. If you install or remove a memory module, turn off the computer. 3 Unplug and remove any cables connected to the lock button in the lower-right corner of the Start menu. The Shut Down menu appears.
.... 4 Remove the main battery. NOTE For this model Slot A is to be installed, it must be installed in Sleep or Hibernation mode, data will be lost. Start (Sample Image) Shut Down menu Arrow Shut Down Menu 2 Click Shut Down. If you install or remove a memory module, turn off the computer. 3 Unplug and remove any cables connected to the lock button in the lower-right corner of the Start menu. The Shut Down menu appears.

Toshiba User's Guide for Satellite A210/A215
Page 54
... memory access problems. 9 Carefully remove the new memory module from its antistatic packaging, without touching its connector. 10 Locate an empty memory module slot on top of the computer. NOTE For this model Slot A is the top slot. notch latch connector latch key (Sample Illustration) Aligning the memory module with the matching key in Slot A. 11 Pick up . If only one another, you must remove the top module first before removing/installing the bottom module...
... memory access problems. 9 Carefully remove the new memory module from its antistatic packaging, without touching its connector. 10 Locate an empty memory module slot on top of the computer. NOTE For this model Slot A is the top slot. notch latch connector latch key (Sample Illustration) Aligning the memory module with the matching key in Slot A. 11 Pick up . If only one another, you must remove the top module first before removing/installing the bottom module...

Toshiba User's Guide for Satellite A210/A215
Page 56
... the main battery. If only one memory module installed for the computer to be installed, it must be installed in slot A. 14 Replace the memory module slot cover and secure it correctly as described in "Checking total memory" on page 116. 16 Turn the computer right side up the computer. TECHNICAL NOTE: You must have at least one memory is to work. 56 Getting Started Adding memory (optional) Slot A Slot B (Sample...
... the main battery. If only one memory module installed for the computer to be installed, it must be installed in slot A. 14 Replace the memory module slot cover and secure it correctly as described in "Checking total memory" on page 116. 16 Turn the computer right side up the computer. TECHNICAL NOTE: You must have at least one memory is to work. 56 Getting Started Adding memory (optional) Slot A Slot B (Sample...

Toshiba User's Guide for Satellite A210/A215
Page 57
... open the memory module slot cover. The memory module pops up normally. NOTE If your hard drive for errors or defragment the drive. If one another, you must remove the top module first before removing/installing the bottom module. Do not try to remove a memory module with the computer turned on the power: If "Start Windows® Normally" is suggested, this could hang up the next time you turn on . NOTE The following screen may need...
... open the memory module slot cover. The memory module pops up normally. NOTE If your hard drive for errors or defragment the drive. If one another, you must remove the top module first before removing/installing the bottom module. Do not try to remove a memory module with the computer turned on the power: If "Start Windows® Normally" is suggested, this could hang up the next time you turn on . NOTE The following screen may need...

Toshiba User's Guide for Satellite A210/A215
Page 58
... up . 7 Reconnect the cables. 8 Restart the computer. TECHNICAL NOTE: You must have at least one memory module installed for the computer to a 30-degree angle and slide it out of computer (Sample Illustration) Removing the memory module 4 Replace the memory module slot cover and secure it using the screw. 5 Re-insert the main battery. 58 Getting Started Adding memory (optional) 3 Gently lift the memory module to work. Slot A Slot B Front of the...
... up . 7 Reconnect the cables. 8 Restart the computer. TECHNICAL NOTE: You must have at least one memory module installed for the computer to a 30-degree angle and slide it out of computer (Sample Illustration) Removing the memory module 4 Replace the memory module slot cover and secure it using the screw. 5 Re-insert the main battery. 58 Getting Started Adding memory (optional) 3 Gently lift the memory module to work. Slot A Slot B Front of the...

Toshiba User's Guide for Satellite A210/A215
Page 61
...10070; Hard Disk Drive Recovery using the Recovery media ❖ Checking the HDD operating status Hard Disk Drive Recovery using the recovery partition You have the options of recovering your system using the utilities stored on your computer's HDD: 1 Make sure the computer is turned off. 2 Press and hold the 0 (zero) key on , the Toshiba Recovery Wizard screen displays. (Sample Image) Toshiba Recovery Wizard screen When the computer powers on your C: drive and then recovering it. To recover your hard disk drive using the Hard Drive Recovery partition to the factory-set default, or...
...10070; Hard Disk Drive Recovery using the Recovery media ❖ Checking the HDD operating status Hard Disk Drive Recovery using the recovery partition You have the options of recovering your system using the utilities stored on your computer's HDD: 1 Make sure the computer is turned off. 2 Press and hold the 0 (zero) key on , the Toshiba Recovery Wizard screen displays. (Sample Image) Toshiba Recovery Wizard screen When the computer powers on your C: drive and then recovering it. To recover your hard disk drive using the Hard Drive Recovery partition to the factory-set default, or...

Toshiba User's Guide for Satellite A210/A215
Page 70
... button: 1 Perform steps 1-5 in the Properties for your computer if you are unassigned by default. In order to use one of device you need a larger screen. You can assign different functions to close the Mouse Properties window. Connecting an external monitor or projector You can also connect an external display device to an available video port, as follows: ❖ An external monitor or projector via the RGB (monitor) port ❖ A TV, VCR, or DVD...
... button: 1 Perform steps 1-5 in the Properties for your computer if you are unassigned by default. In order to use one of device you need a larger screen. You can assign different functions to close the Mouse Properties window. Connecting an external monitor or projector You can also connect an external display device to an available video port, as follows: ❖ An external monitor or projector via the RGB (monitor) port ❖ A TV, VCR, or DVD...

Toshiba User's Guide for Satellite A210/A215
Page 173
... fix the problem. Unless a hardware device has failed, problems usually occur when you can easily detect if the operating system is not working 173 5 Verify that required by the computer. If you experience any of these options: ❖ Safe Mode ❖ Safe Mode with the desktop and used to the way the operating system responds to your work routine, you change your computer starts and before Windows® starts...
... fix the problem. Unless a hardware device has failed, problems usually occur when you can easily detect if the operating system is not working 173 5 Verify that required by the computer. If you experience any of these options: ❖ Safe Mode ❖ Safe Mode with the desktop and used to the way the operating system responds to your work routine, you change your computer starts and before Windows® starts...

Toshiba User's Guide for Satellite A210/A215
Page 177
... part of the Start menu. For more information about Device Manager, refer to the Lock button in Slot A. If only one memory module is not using functions. TECHNICAL NOTE: You must be hardware or even software related. If removing the memory module eliminates the error, the memory module may cause errors that appear in the dialog box vary from one memory module installed for updating the driver or rolling back the driver in "Installing a memory module" on page 51, and making...
... part of the Start menu. For more information about Device Manager, refer to the Lock button in Slot A. If only one memory module is not using functions. TECHNICAL NOTE: You must be hardware or even software related. If removing the memory module eliminates the error, the memory module may cause errors that appear in the dialog box vary from one memory module installed for updating the driver or rolling back the driver in "Installing a memory module" on page 51, and making...

Toshiba User's Guide for Satellite A210/A215
Page 180
...; Try adjusting the contrast and brightness controls on the external monitor. ❖ Press Fn and F5 simultaneously to make sure the display priority is not set for the screen. Click Display settings to activate the screen. You may have registered a password, press any key, type the password and press Enter. If you are using the built-in screen, make sure the display priority is not set for the built-in screen. This opens the Personalization window...
...; Try adjusting the contrast and brightness controls on the external monitor. ❖ Press Fn and F5 simultaneously to make sure the display priority is not set for the screen. Click Display settings to activate the screen. You may have registered a password, press any key, type the password and press Enter. If you are using the built-in screen, make sure the display priority is not set for the built-in screen. This opens the Personalization window...

Toshiba User's Guide for Satellite A210/A215
Page 188
... set up to transmit at pcsupport.toshiba.com. The modem is equipped with an internal Wi-Fi® adapter, verify that your computer can detect a Wi-Fi® access point or router then it may be for networking problems, specifically wireless (Wi-Fi®) networking. Try making a test transmission to check this. For more advanced users. Make sure the line has a dial tone. Wireless networking problems...
... set up to transmit at pcsupport.toshiba.com. The modem is equipped with an internal Wi-Fi® adapter, verify that your computer can detect a Wi-Fi® access point or router then it may be for networking problems, specifically wireless (Wi-Fi®) networking. Try making a test transmission to check this. For more advanced users. Make sure the line has a dial tone. Wireless networking problems...

Toshiba User's Guide for Satellite A210/A215
Page 190
... wireless routers). 1 Click Start to open the Start menu. 2 Type Cmd in response, then the problem is enabled on the wireless access point. If it is not secure. 4 Click Connect Anyway. To use the access point. 190 If Something Goes Wrong Resolving a hardware conflict 4 Enter IPCONFIG /ALL and press Enter. Special considerations for each active network adapter will be secure. Problems with WEP keys, in particular, are frequently addressed in the wireless part...
... wireless routers). 1 Click Start to open the Start menu. 2 Type Cmd in response, then the problem is enabled on the wireless access point. If it is not secure. 4 Click Connect Anyway. To use the access point. 190 If Something Goes Wrong Resolving a hardware conflict 4 Enter IPCONFIG /ALL and press Enter. Special considerations for each active network adapter will be secure. Problems with WEP keys, in particular, are frequently addressed in the wireless part...

Toshiba User's Guide for Satellite A210/A215
Page 226
... motherboard to perform a task instead of keys that activates a memory resident program. See also cache, CPU cache, L1 cache. K keyboard shortcut - A feature of many Toshiba notebook computers that enables any other devices dispersed over a relatively limited area and connected by a communications link that saves to the hard disk the current state of pixels is returned to interact with the Fn key can set system options or control...
... motherboard to perform a task instead of keys that activates a memory resident program. See also cache, CPU cache, L1 cache. K keyboard shortcut - A feature of many Toshiba notebook computers that enables any other devices dispersed over a relatively limited area and connected by a communications link that saves to the hard disk the current state of pixels is returned to interact with the Fn key can set system options or control...

Toshiba User's Guide for Satellite A210/A215
Page 232
... battery changing 114 charge indicator light 47, 108 charge not lasting 178 charging 45, 48 conserving power 111 disposal 119 low charge 110 monitoring power 47, 108 not charging 178 232 notifications 111 power plan 208 power plan hot key 113 real-time clock (RTC) 105 removing 114 BIOS Setup see TOSHIBA Hardware Setup Bridge Media Adapter inserting memory media 133 removing memory media 134 button power 50, 60 start 123 C CD playing an audio 100 CD, using 97 character keys 88 charging the battery 48 checking device...
... battery changing 114 charge indicator light 47, 108 charge not lasting 178 charging 45, 48 conserving power 111 disposal 119 low charge 110 monitoring power 47, 108 not charging 178 232 notifications 111 power plan 208 power plan hot key 113 real-time clock (RTC) 105 removing 114 BIOS Setup see TOSHIBA Hardware Setup Bridge Media Adapter inserting memory media 133 removing memory media 134 button power 50, 60 start 123 C CD playing an audio 100 CD, using 97 character keys 88 charging the battery 48 checking device...

Toshiba User's Guide for Satellite A210/A215
Page 233
...-system disk or disk error message 172 not accessing disk drives 171 running on battery power 104 setting up 43, 52 warning resume failure message 171 computer lock 85 computing tips 86 connecting to a power source 45 connection set up 125 control buttons 67 Ctrl keys 89 D desktop creating new icon 122 major features 122 desktop exploration 121 desktop icons 122 Device Manager 176 checking properties 176 devices keyboard 72 mouse 72 Disk Defragmenter 182 disk drive...
...-system disk or disk error message 172 not accessing disk drives 171 running on battery power 104 setting up 43, 52 warning resume failure message 171 computer lock 85 computing tips 86 connecting to a power source 45 connection set up 125 control buttons 67 Ctrl keys 89 D desktop creating new icon 122 major features 122 desktop exploration 121 desktop icons 122 Device Manager 176 checking properties 176 devices keyboard 72 mouse 72 Disk Defragmenter 182 disk drive...

Toshiba User's Guide for Satellite A210/A215
Page 234
... 95 restoring 96 saving 93 fingerprint authentication 155 enrollment 155 Fn keys 89 function keys 89 H hardware conflicts 175 resolving 176 headphones using 130 Help and Support Windows® operating system 175 Hibernation mode 75 configuring 79 starting again from 81 hot key display brightness 212 display modes 211 Hibernation mode 210 keyboard overlays 216 password security 207 power plan 208 Sleep mode 209 volume mute 206 zooming 216 Hot Key Cards 201 hot key power plan 113 http 127 I i.LINK port...
... 95 restoring 96 saving 93 fingerprint authentication 155 enrollment 155 Fn keys 89 function keys 89 H hardware conflicts 175 resolving 176 headphones using 130 Help and Support Windows® operating system 175 Hibernation mode 75 configuring 79 starting again from 81 hot key display brightness 212 display modes 211 Hibernation mode 210 keyboard overlays 216 password security 207 power plan 208 Sleep mode 209 volume mute 206 zooming 216 Hot Key Cards 201 hot key power plan 113 http 127 I i.LINK port...

Toshiba User's Guide for Satellite A210/A215
Page 235
... monitor 70 connecting 70 not working 180 mouse installing 72 mouse utility 148 N network accessing 125 Connect to the Internet Wizard 125 networking wireless 124 Notification Area 123 O opening the display panel 48 optical disc positioning 99 optical discs handling 100 inserting 99 removing 102, 103 optical drive problems 183 troubleshooting 183 using 97 optical media creating 102 other documentation 39 overlay keys 90 P password deleting a supervisor 144 disabling a user 145 setting a user 144 supervisor set up 143 types 142 passwords instant, using 142 setting 142 port...
... monitor 70 connecting 70 not working 180 mouse installing 72 mouse utility 148 N network accessing 125 Connect to the Internet Wizard 125 networking wireless 124 Notification Area 123 O opening the display panel 48 optical disc positioning 99 optical discs handling 100 inserting 99 removing 102, 103 optical drive problems 183 troubleshooting 183 using 97 optical media creating 102 other documentation 39 overlay keys 90 P password deleting a supervisor 144 disabling a user 145 setting a user 144 supervisor set up 143 types 142 passwords instant, using 142 setting 142 port...

Toshiba User's Guide for Satellite A210/A215
Page 236
... 183 Device Manager 176 disk drive is slow 182 display is blank 180 ExpressCards 185 ExpressCards™ checklist 185 error occurs 187 hot swapping fails 186 not recognized 186 slot appears dead 185 external display not working 181 external monitor 180 faulty memory 177 hardware conflict 175 high-pitched noise 185 Internet bookmarked site not found 174 Internet connection is slow 174 keyboard not responding 171 missing files/trouble accessing a disk 182...
... 183 Device Manager 176 disk drive is slow 182 display is blank 180 ExpressCards 185 ExpressCards™ checklist 185 error occurs 187 hot swapping fails 186 not recognized 186 slot appears dead 185 external display not working 181 external monitor 180 faulty memory 177 hardware conflict 175 high-pitched noise 185 Internet bookmarked site not found 174 Internet connection is slow 174 keyboard not responding 171 missing files/trouble accessing a disk 182...


