User Manual
Page 9
...Setting the sleep timer 43 Setting Automatic Power Down 43 Setting No Signal Power Down 43 Displaying TV status information 44 Viewing support information 44 Resetting to Factory Defaults 44 Power failure 44 Chapter 7: Picture and sound controls 45 Selecting the picture size 45 Scrolling the picture 47 Using ...feature 50 MPEG NR 50 DNR 50 Auto Brightness Sensor 50 Backlight Adjustment Pro 50 ColorMaster 51 Base Color Adjustment 51 Color temperature 51 Resetting to the factory default 51 Setting the Expert Picture Settings 51 Test Pattern 51 RGB Filter 51 White Balance 51...
...Setting the sleep timer 43 Setting Automatic Power Down 43 Setting No Signal Power Down 43 Displaying TV status information 44 Viewing support information 44 Resetting to Factory Defaults 44 Power failure 44 Chapter 7: Picture and sound controls 45 Selecting the picture size 45 Scrolling the picture 47 Using ...feature 50 MPEG NR 50 DNR 50 Auto Brightness Sensor 50 Backlight Adjustment Pro 50 ColorMaster 51 Base Color Adjustment 51 Color temperature 51 Resetting to the factory default 51 Setting the Expert Picture Settings 51 Test Pattern 51 RGB Filter 51 White Balance 51...
User Manual
Page 10
... remote to operate other devices . . . 79 Device code setup 79 Searching for a device code 80 Locking the volume keys 80 Clearing the remote's programming 80 Resetting to the factory default 80 Operating the TV with combination buttons 81 Remote control codes 82 Limited United States Warranty for LCD Televisions 88 Limited...
... remote to operate other devices . . . 79 Device code setup 79 Searching for a device code 80 Locking the volume keys 80 Clearing the remote's programming 80 Resetting to the factory default 80 Operating the TV with combination buttons 81 Remote control codes 82 Limited United States Warranty for LCD Televisions 88 Limited...
User Manual
Page 16
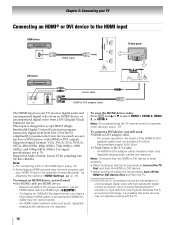
... for reception of high-definition video signals. For proper operation, the length of the HDMI-to select HDMI 1, HDMI 2, HDMI 3, or HDMI 4. This input is reset properly: • When turning on electronic components, turn off electronic components, turn on your HDMI TV due to the adoption of new standards. A conventional HDMI...
... for reception of high-definition video signals. For proper operation, the length of the HDMI-to select HDMI 1, HDMI 2, HDMI 3, or HDMI 4. This input is reset properly: • When turning on electronic components, turn off electronic components, turn on your HDMI TV due to the adoption of new standards. A conventional HDMI...
User Manual
Page 24
... a language. OK Channel Tuning Mode Auto Select Auto, Digital, or Standard (- Press . Chapter 4: Initial Setup and Menu Initial Setup When you first turn on or reset the TV, the Initial Setup window will appear every time you turn on p. 32). However, if you do not need to skip this step. ANT...
... a language. OK Channel Tuning Mode Auto Select Auto, Digital, or Standard (- Press . Chapter 4: Initial Setup and Menu Initial Setup When you first turn on or reset the TV, the Initial Setup window will appear every time you turn on p. 32). However, if you do not need to skip this step. ANT...

User Manual
Page 26
... Sleep Timer Game Timer PICTURE SOUND 60 56 57 (Device select) 67 (Device select) 65 (Device select) 66 69 42 43 39 Picture Mode 48 Reset 48 Backlight 48 Contrast 48 Brightness 48 Color 48 Tint 48 Sharpness 48 Advanced Picture Settings 49 Expert Picture Settings 51 TheaterLock 52 MTS 52...
... Sleep Timer Game Timer PICTURE SOUND 60 56 57 (Device select) 67 (Device select) 65 (Device select) 66 69 42 43 39 Picture Mode 48 Reset 48 Backlight 48 Contrast 48 Brightness 48 Color 48 Tint 48 Sharpness 48 Advanced Picture Settings 49 Expert Picture Settings 51 TheaterLock 52 MTS 52...
User Manual
Page 27
... 2nd Layer SETUP 3rd Layer Menu Language ANT/CABLE In Auto Tuning Manual Tuning TV Settings Quick Setup Location Software Upgrade Software Licenses System Information Reset TV Page 28 28 28 29 28, 29, 32, 35, 38 28 28 60 60 44 44 Quick menu Quick menu helps you access some...
... 2nd Layer SETUP 3rd Layer Menu Language ANT/CABLE In Auto Tuning Manual Tuning TV Settings Quick Setup Location Software Upgrade Software Licenses System Information Reset TV Page 28 28 28 29 28, 29, 32, 35, 38 28 28 60 60 44 44 Quick menu Quick menu helps you access some...

User Manual
Page 31
...: The TV mode select button will be restricted to select an input source for that mode. 5 Repeat the procedure for 2 seconds and release it. To reset Auto Input: Select...
...: The TV mode select button will be restricted to select an input source for that mode. 5 Repeat the procedure for 2 seconds and release it. To reset Auto Input: Select...

User Manual
Page 32
... can tune both analog and digital channels normally. p. 28). 1 > Settings > SETUP > TV Settings > . You can only tune digital channels. 3 Press C or c to factory defaults, highlight Reset and press . p. 39). 5 Select On or Off. 6 To return to select a mode. Press the dash ( - ) button. The History List is cleared, but the Favorites List...
... can tune both analog and digital channels normally. p. 28). 1 > Settings > SETUP > TV Settings > . You can only tune digital channels. 3 Press C or c to factory defaults, highlight Reset and press . p. 39). 5 Select On or Off. 6 To return to select a mode. Press the dash ( - ) button. The History List is cleared, but the Favorites List...
User Manual
Page 36
... menus. VChip system only. 1 > Settings > PREFERENCES > Parental Control and Locks > . A box with an "5" indicates a rating that classify the content of Parental Controls and Locks are reset. As you select. Entering a new PIN code 1 > Settings > PREFERENCES > PIN Setting > . Note: The PIN code cannot be not available if no PIN has been set...
... menus. VChip system only. 1 > Settings > PREFERENCES > Parental Control and Locks > . A box with an "5" indicates a rating that classify the content of Parental Controls and Locks are reset. As you select. Entering a new PIN code 1 > Settings > PREFERENCES > PIN Setting > . Note: The PIN code cannot be not available if no PIN has been set...
User Manual
Page 42
... on . Time until Power On Desired length of time until the TV turns on the input signal format. Sampling Clock Helps to view. Press . To reset PC Settings: Select Reset. Volume Volume level. If the picture is disrupted momentarily when adjusting the PC settings.
... on . Time until Power On Desired length of time until the TV turns on the input signal format. Sampling Clock Helps to view. Press . To reset PC Settings: Select Reset. Volume Volume level. If the picture is disrupted momentarily when adjusting the PC settings.
User Manual
Page 44
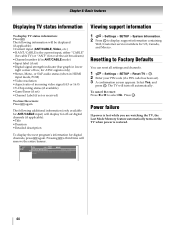
... No. The following information will display for off automatically. The TV will remove the entire banner. To cancel the reset: Press C or c to Factory Defaults You can reset all settings and channels. 1 > Settings > SETUP > Reset TV > . Press . The following additional information (only available for ANT/CABLE input) will be displayed (if applicable): •...
... No. The following information will display for off automatically. The TV will remove the entire banner. To cancel the reset: Press C or c to Factory Defaults You can reset all settings and channels. 1 > Settings > SETUP > Reset TV > . Press . The following additional information (only available for ANT/CABLE input) will be displayed (if applicable): •...
User Manual
Page 48
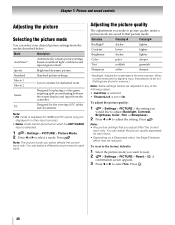
Standard Standard picture settings. Note: • PC mode is set to 0. (Settings are saved to that you want to reset. 2 > Settings > PICTURE > Reset > OK . To adjust the picture quality: 1 > Settings > PICTURE > the setting you select affects the current input only.... • AutoView is selected. • TheaterLock is available for HDMI and PC inputs only (not displayed for darkened room. To reset to adjust the setting. OK 48 Mode Description AutoView® Automatically adjusts picture settings based on a Sharpness value, the Edge Enhancer effect...
Standard Standard picture settings. Note: • PC mode is set to 0. (Settings are saved to that you want to reset. 2 > Settings > PICTURE > Reset > OK . To adjust the picture quality: 1 > Settings > PICTURE > the setting you select affects the current input only.... • AutoView is selected. • TheaterLock is available for HDMI and PC inputs only (not displayed for darkened room. To reset to adjust the setting. OK 48 Mode Description AutoView® Automatically adjusts picture settings based on a Sharpness value, the Edge Enhancer effect...

User Manual
Page 50
... 2 Press B or b to display the adjustment window. Auto Brightness Sensor When the Auto Brightness function of all points to the factory defaults, select Reset on the screen. Press . To cancel the adjustment when selecting a point, select Cancel on the screen. Press OK . Press . OK 3 Press...the frame rate from 0 to 100. OK 2 Press B or b to select ClearFrame. 3 Press C or c to adjust the level. To reset the adjustments of Auto Brightness Sensor Settings is set to On, the TV optimizes the backlighting levels to suit ambient light conditions. 1 > Settings > PICTURE...
... 2 Press B or b to display the adjustment window. Auto Brightness Sensor When the Auto Brightness function of all points to the factory defaults, select Reset on the screen. Press . To cancel the adjustment when selecting a point, select Cancel on the screen. Press OK . Press . OK 3 Press...the frame rate from 0 to 100. OK 2 Press B or b to select ClearFrame. 3 Press C or c to adjust the level. To reset the adjustments of Auto Brightness Sensor Settings is set to On, the TV optimizes the backlighting levels to suit ambient light conditions. 1 > Settings > PICTURE...
User Manual
Page 51
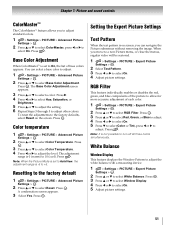
.... 3 Press B or b to adjust the level. OK 3 Press B or b to select Color Temperature. 4 Press C or c to select a color. Resetting to select Reset. OK 2 Press B or b to the factory default 1 > Settings > PICTURE > Advanced Picture Settings > . OK A confirmation screen appears. 3 Select Yes..... 51 OK 3 Press B or b to select Window Display. 4 Press C or c to adjust. Press . To reset the adjustments to the factory defaults, select Reset on screen, you can select a base color to allow for more accurate adjustment of base colors appears. OK Color temperature ...
.... 3 Press B or b to adjust the level. OK 3 Press B or b to select Color Temperature. 4 Press C or c to select a color. Resetting to select Reset. OK 2 Press B or b to the factory default 1 > Settings > PICTURE > Advanced Picture Settings > . OK A confirmation screen appears. 3 Select Yes..... 51 OK 3 Press B or b to select Window Display. 4 Press C or c to adjust. Press . To reset the adjustments to the factory defaults, select Reset on screen, you can select a base color to allow for more accurate adjustment of base colors appears. OK Color temperature ...
User Manual
Page 52
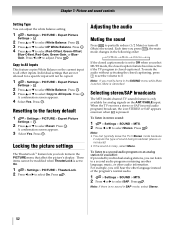
... OK 2 Press B or b to adjust. Press . Press . Gain. Press C or c to select White Balance. Press . Press . OK A confirmation screen appears. 4 Select Yes. Press . OK Resetting to select Reset. OK 2 Press B or b to the factory default 1 > Settings > PICTURE > Expert Picture Settings > . OK A confirmation screen appears. 3 Select Yes. Press . OK Locking the picture settings...
... OK 2 Press B or b to adjust. Press . Press . Gain. Press C or c to select White Balance. Press . Press . OK A confirmation screen appears. 4 Select Yes. Press . OK Resetting to select Reset. OK 2 Press B or b to the factory default 1 > Settings > PICTURE > Expert Picture Settings > . OK A confirmation screen appears. 3 Select Yes. Press . OK Locking the picture settings...

User Manual
Page 58
.... IP Address Setup Note: The settings in Auto Setup is set to On, then Auto Setup in the UP Address Setup menu will also be reset to the previous value. 7 Press B or b to highlight Subnet Mask, and edit in the same way as IP Address. 8 Press B or b to highlight Default Gateway... number will be set to that selected in the IP Address Setup menu. If Auto Setup is linked to On. Note: Other items will be reset to the previous value. 7 Press B or b to highlight Secondary DNS Address, and edit in Auto Setup is set to highlight the field you . • The...
.... IP Address Setup Note: The settings in Auto Setup is set to On, then Auto Setup in the UP Address Setup menu will also be reset to the previous value. 7 Press B or b to highlight Subnet Mask, and edit in the same way as IP Address. 8 Press B or b to highlight Default Gateway... number will be set to that selected in the IP Address Setup menu. If Auto Setup is linked to On. Note: Other items will be reset to the previous value. 7 Press B or b to highlight Secondary DNS Address, and edit in Auto Setup is set to highlight the field you . • The...
User Manual
Page 70
... Possible causes may occur in this Troubleshooting section or the recommended solution has not worked, perform the Reset Factory Defaults procedure (- Try another device, use this chapter for 5 seconds or more to reset the TV. If your TV's problem is properly set -top box, etc.) try setting the...• If the TV stops responding to the remote control or TV control panel and you are watching (such as expected, perform the Reset Factory Defaults procedure (- If no sound, try using either the PC IN terminal or an HDMI terminal, ensure that particular input source. ...
... Possible causes may occur in this Troubleshooting section or the recommended solution has not worked, perform the Reset Factory Defaults procedure (- Try another device, use this chapter for 5 seconds or more to reset the TV. If your TV's problem is properly set -top box, etc.) try setting the...• If the TV stops responding to the remote control or TV control panel and you are watching (such as expected, perform the Reset Factory Defaults procedure (- If no sound, try using either the PC IN terminal or an HDMI terminal, ensure that particular input source. ...
User Manual
Page 71
... Logo ( ) are connected properly (- The DMS name is not displayed • The LAN cables, if used (- If the problem persists, use the Reset Factory Defaults procedure (- See "TV stops responding to the channel memory (- p. 35). • A closed -caption feature (- V-Chip systems only (- ... compatible network settings. (continued) 71 Unblock the channel (- If the problem persists, clear all channels from the router and the television for Toshiba HDMI® CEC compatible devices. • Ensure HDMI cables with the latest HDMI TV products due to new standards. p. 14). For...
... Logo ( ) are connected properly (- The DMS name is not displayed • The LAN cables, if used (- If the problem persists, use the Reset Factory Defaults procedure (- See "TV stops responding to the channel memory (- p. 35). • A closed -caption feature (- V-Chip systems only (- ... compatible network settings. (continued) 71 Unblock the channel (- If the problem persists, clear all channels from the router and the television for Toshiba HDMI® CEC compatible devices. • Ensure HDMI cables with the latest HDMI TV products due to new standards. p. 14). For...
User Manual
Page 80
... mode 1 Press CABLE/SAT. 2 While holding down Q, press 8, 9, 0, 1. 80 To unlock the remote's volume keys: 1 While holding down Q, press 8, 9, 0, 0. The CABLE/SAT mode is unlocked. Resetting to the factory default You can clear all programmed remote control features not related to "Device code setup" and...
... mode 1 Press CABLE/SAT. 2 While holding down Q, press 8, 9, 0, 1. 80 To unlock the remote's volume keys: 1 While holding down Q, press 8, 9, 0, 0. The CABLE/SAT mode is unlocked. Resetting to the factory default You can clear all programmed remote control features not related to "Device code setup" and...

User Manual
Page 92
... quality 48 Picture size 45 PIN code 36 R Remote control Battery installation 22 Buttons 23 Device code table 82 Functional key chart 77 Programming 79 Reset TV 44 RGB Filter 51 RGB Range 41 S SAP 52 Shared inputs 30 Sleep Timer 43 Software keyboard 59 Static Gamma 49 Stereo sound 52...
... quality 48 Picture size 45 PIN code 36 R Remote control Battery installation 22 Buttons 23 Device code table 82 Functional key chart 77 Programming 79 Reset TV 44 RGB Filter 51 RGB Range 41 S SAP 52 Shared inputs 30 Sleep Timer 43 Software keyboard 59 Static Gamma 49 Stereo sound 52...


