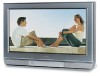
User Manual
Page 2
... all! This manual will help you use with a PC. 0303 2 2 Remember that the voltage inside this product may reach for proper use of this manual completely, and keep these safety tips in particular, specifies that the cable ground shall be connected to the grounding system of the building, as close to the point of cable entry as a VCR, remote control, or toy...
... all! This manual will help you use with a PC. 0303 2 2 Remember that the voltage inside this product may reach for proper use of this manual completely, and keep these safety tips in particular, specifies that the cable ground shall be connected to the grounding system of the building, as close to the point of cable entry as a VCR, remote control, or toy...
User Manual
Page 4
... screen. For example, viewing letterbox style (16:9) media on for long periods of the following formats or images: • Fixed Images, such as a ladder or screwdriver) can become permanently ingrained in safe operating condition. 29) WARNING: RISK OF ELECTRIC SHOCK! Never attempt to a Toshiba Authorized Service Center. Never spill liquids or push objects of any home theater component connected to install any of time...
... screen. For example, viewing letterbox style (16:9) media on for long periods of the following formats or images: • Fixed Images, such as a ladder or screwdriver) can become permanently ingrained in safe operating condition. 29) WARNING: RISK OF ELECTRIC SHOCK! Never attempt to a Toshiba Authorized Service Center. Never spill liquids or push objects of any home theater component connected to install any of time...

User Manual
Page 5
... remote control to operate your other devices 17 Cable TV converter/satellite receiver, VCR and DVD player code tables 18 Learning about the remote control ...20 Setting up your TV ...21 Starting setup ...21 Changing the on-screen display language ...21 Image tilt correction ...22 Adding channels to the TV's memory ...22 Using the TV's features ...23 Adjusting the channel settings ...23 Using the locks menu ...24 Selecting a password ...24 Using the V-Chip (parental control) feature 25 Locking channels ...26 Locking the video inputs...
... remote control to operate your other devices 17 Cable TV converter/satellite receiver, VCR and DVD player code tables 18 Learning about the remote control ...20 Setting up your TV ...21 Starting setup ...21 Changing the on-screen display language ...21 Image tilt correction ...22 Adding channels to the TV's memory ...22 Using the TV's features ...23 Adjusting the channel settings ...23 Using the locks menu ...24 Selecting a password ...24 Using the V-Chip (parental control) feature 25 Locking channels ...26 Locking the video inputs...
User Manual
Page 8
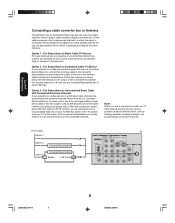
... you use the Converter/Descrambler box to the Antenna Jack on the back of the television. Option 1 : For Subscribers to Basic Cable TV Service For basic cable service not requiring a Converter/Descrambler box, connect the incoming 75 ohm Coaxial Cable directly to select channels. Set the television to the output of a Converter/ Descrambler box, you cannot program using the remote control, such as labeling channels, blocking channels, and programming your TV Connecting a cable converter box or Antenna This television has an...
... you use the Converter/Descrambler box to the Antenna Jack on the back of the television. Option 1 : For Subscribers to Basic Cable TV Service For basic cable service not requiring a Converter/Descrambler box, connect the incoming 75 ohm Coaxial Cable directly to select channels. Set the television to the output of a Converter/ Descrambler box, you cannot program using the remote control, such as labeling channels, blocking channels, and programming your TV Connecting a cable converter box or Antenna This television has an...

User Manual
Page 14
... hear sound by connecting analog audio cables. To connect an HDMI device, you will need: • one HDMI-to-DVI adapter cable (HDMI type A connector) For proper operation, the length of an HDMI-to-DVI adapter cable should not encounter difficulty if you will need to set the HDMI audio input setting to "DVI" to hear the analog audio (see page 40.) Some CDVs (Video CDs) may not output digital audio signals. Connecting your TV Connecting an HDMI™ or a DVI device to accept HDCP[3] program...
... hear sound by connecting analog audio cables. To connect an HDMI device, you will need: • one HDMI-to-DVI adapter cable (HDMI type A connector) For proper operation, the length of an HDMI-to-DVI adapter cable should not encounter difficulty if you will need to set the HDMI audio input setting to "DVI" to hear the analog audio (see page 40.) Some CDVs (Video CDs) may not output digital audio signals. Connecting your TV Connecting an HDMI™ or a DVI device to accept HDCP[3] program...
User Manual
Page 16
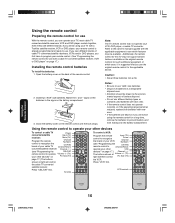
... a fire. 2. VCR controls Using the Remote Control J3S40121B(E)_P16-23 16 16 24/02/2005, 6:06 PM Open the battery cover on page 17.) Channel 3 4 The buttons shown at right will be using the remote control for a long time, remove the batteries to use "AAA" size batteries. • Dispose of your VCR Input (TV) Power Channel Numbers (see "Programming the CH RTN remote control to the owner's manual supplied with a Toshiba satellite receiver, VCR or DVD player, your other...
... a fire. 2. VCR controls Using the Remote Control J3S40121B(E)_P16-23 16 16 24/02/2005, 6:06 PM Open the battery cover on page 17.) Channel 3 4 The buttons shown at right will be using the remote control for a long time, remove the batteries to use "AAA" size batteries. • Dispose of your VCR Input (TV) Power Channel Numbers (see "Programming the CH RTN remote control to the owner's manual supplied with a Toshiba satellite receiver, VCR or DVD player, your other...
User Manual
Page 17
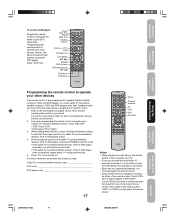
... remote control. • Some newer VCRs are capable of working on pages 18 and 19) to enter the three-digit code for your remote control. 1. For future reference, write down RECALL, press the Channel Number buttons to find the one that works. 2. Power Input (TV) Recall Mute (TV) Number buttons Volume +/- (TV) DVD Pic Size (TV) DVD MENU LM ENTER DVD controls M DVD Skip/Search / TOP Menu DVD Clear M Connecting your TV Using the Remote Control Setting up your TV Programming the remote control...
... remote control. • Some newer VCRs are capable of working on pages 18 and 19) to enter the three-digit code for your remote control. 1. For future reference, write down RECALL, press the Channel Number buttons to find the one that works. 2. Power Input (TV) Recall Mute (TV) Number buttons Volume +/- (TV) DVD Pic Size (TV) DVD MENU LM ENTER DVD controls M DVD Skip/Search / TOP Menu DVD Clear M Connecting your TV Using the Remote Control Setting up your TV Programming the remote control...

User Manual
Page 20
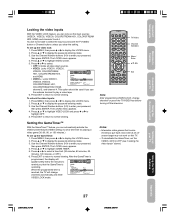
...) MENU/ENTER allows access to channels (page 23) Channel 3 / 4 VOL +/- Using the Remote Control Learning about the remote control POWER turns the TV on and off SLEEP programs the TV to turn off at a set time (page 37) TV/VIDEO selects the video input source (page 27) CH 3 / 4 cycles through programmed channels (page 22) TV selects TV mode CBL/SAT selects CBL/SAT mode (page 16) VCR selects VCR mode (page 16) DVD selects DVD mode (page 17) TV/Video Recall Channel Numbers CHANNEL NUMBERS allow direct access to programming menus, and sets programmed menu...
...) MENU/ENTER allows access to channels (page 23) Channel 3 / 4 VOL +/- Using the Remote Control Learning about the remote control POWER turns the TV on and off SLEEP programs the TV to turn off at a set time (page 37) TV/VIDEO selects the video input source (page 27) CH 3 / 4 cycles through programmed channels (page 22) TV selects TV mode CBL/SAT selects CBL/SAT mode (page 16) VCR selects VCR mode (page 16) DVD selects DVD mode (page 17) TV/Video Recall Channel Numbers CHANNEL NUMBERS allow direct access to programming menus, and sets programmed menu...

User Manual
Page 22
....) SETUP CLOSED CAPTION PICTURE SIZE PICTURE SCROLL CINEMA MODE ASPECT IMAGE TILT :SELECT OFF VIDEO ON 0 :ADJUST Adding channels to display the SETUP menu. 3. Programming channels automatically Your TV can add or erase specific channels manually. Press M until the SETUP menu appears. 2. When channel programming is cycling through all active channels and store them in the channel memory. If you are adding a channel, you use an antenna, choose TV. To adjust the image tilt: 1. Follow the steps below to view the programmed channels. SETUP LANGUAGE CLOCK SET...
....) SETUP CLOSED CAPTION PICTURE SIZE PICTURE SCROLL CINEMA MODE ASPECT IMAGE TILT :SELECT OFF VIDEO ON 0 :ADJUST Adding channels to display the SETUP menu. 3. Programming channels automatically Your TV can add or erase specific channels manually. Press M until the SETUP menu appears. 2. When channel programming is cycling through all active channels and store them in the channel memory. If you are adding a channel, you use an antenna, choose TV. To adjust the image tilt: 1. Follow the steps below to view the programmed channels. SETUP LANGUAGE CLOCK SET...

User Manual
Page 25
...-PG / TV-14 / TV-MA M O V I E R AT I N G ON / OFF OFF 3. C H I P T V R AT I N G OFF disable V-Chip program blocking by :SELECT :ADJUST rating. 5. LOCKS V-CHIP SET V- Press ENTER. Press L or M to enter your password: 1. See "Using the V-Chip (parental control) feature" (below), "Locking channels" (page 26), "Locking video inputs" (page 27), "Setting the GameTimerTM" (page 27) or "Using the front panel lock feature" (page 28.) To change your password. Use the Channel Number buttons (0-9) to highlight MOVIE RATING.
...-PG / TV-14 / TV-MA M O V I E R AT I N G ON / OFF OFF 3. C H I P T V R AT I N G OFF disable V-Chip program blocking by :SELECT :ADJUST rating. 5. LOCKS V-CHIP SET V- Press ENTER. Press L or M to enter your password: 1. See "Using the V-Chip (parental control) feature" (below), "Locking channels" (page 26), "Locking video inputs" (page 27), "Setting the GameTimerTM" (page 27) or "Using the front panel lock feature" (page 28.) To change your password. Use the Channel Number buttons (0-9) to highlight MOVIE RATING.

User Manual
Page 26
... channels from the list of locked channels. Press EXIT to return to select the following: LOCKS LOCK CH LOCK VIDEO LOCK GAME TIMER F R O N T PA N E L L O C K N E W PA S S W O R D :SELECT OFF OFF OFF :ADJUST • SET- 7. You can still be viewed if you clear the setting. To lock channels: 1. Press or to normal viewing. Then press ENTER. • CLEAR- Note: After programming CH LOCK, change channels before turning off the television. Press MENU, then press or to display the LOCKS menu. 2. Use the Channel Number buttons (0-9) to normal viewing...
... channels from the list of locked channels. Press EXIT to return to select the following: LOCKS LOCK CH LOCK VIDEO LOCK GAME TIMER F R O N T PA N E L L O C K N E W PA S S W O R D :SELECT OFF OFF OFF :ADJUST • SET- 7. You can still be viewed if you clear the setting. To lock channels: 1. Press or to normal viewing. Then press ENTER. • CLEAR- Note: After programming CH LOCK, change channels before turning off the television. Press MENU, then press or to display the LOCKS menu. 2. Use the Channel Number buttons (0-9) to normal viewing...
User Manual
Page 27
... HDMI. • VIDEO +: Locks VIDEO1, VIDEO2, VIDEO3, COLORSTREAM HD1, LOCKS LOCK CH LOCK VIDEO LOCK GAME TIMER OFF OFF / VIDEO / VIDEO+ OFF FRONT PANEL LOCK NEW PASSWORD :SELECT OFF :ADJUST COLORSTREAM HD2, HDMI, channel 3, and channel 4. Press L or M to highlight VIDEO LOCK and press or to enter your password, then press ENTER. Use the Channel Number buttons (0-9) to highlight OFF. 5. When the programmed time is reached, the TV will change channels or press the TV/VIDEO key before turning off the television. To set up...
... HDMI. • VIDEO +: Locks VIDEO1, VIDEO2, VIDEO3, COLORSTREAM HD1, LOCKS LOCK CH LOCK VIDEO LOCK GAME TIMER OFF OFF / VIDEO / VIDEO+ OFF FRONT PANEL LOCK NEW PASSWORD :SELECT OFF :ADJUST COLORSTREAM HD2, HDMI, channel 3, and channel 4. Press L or M to highlight VIDEO LOCK and press or to enter your password, then press ENTER. Use the Channel Number buttons (0-9) to highlight OFF. 5. When the programmed time is reached, the TV will change channels or press the TV/VIDEO key before turning off the television. To set up...

User Manual
Page 30
... TIMER ON TIMER 6:00AM OFF TIMER 12:00AM CH003 CLEAR CLEAR :SELECT :ADJUST END :EXIT 7. Press EXIT to return to highlight CLOCK SET. 3. SETUP LANGUAGE CLOCK SET TV / CABLE CH PROGRAM ADD / ERASE :SELECT SETUP LANGUAGE CLOCK SET TV / CABLE CH PROGRAM ADD / ERASE :SELECT ENGLISH 12:00AM CABLE ADD :ADJUST ENGLISH 8:30AM CABLE ADD :ADJUST Setting the ON/OFF timer This feature allows you program the ON TIMER to "DAILY," the TV will turn on timer (off timer): Select...
... TIMER ON TIMER 6:00AM OFF TIMER 12:00AM CH003 CLEAR CLEAR :SELECT :ADJUST END :EXIT 7. Press EXIT to return to highlight CLOCK SET. 3. SETUP LANGUAGE CLOCK SET TV / CABLE CH PROGRAM ADD / ERASE :SELECT SETUP LANGUAGE CLOCK SET TV / CABLE CH PROGRAM ADD / ERASE :SELECT ENGLISH 12:00AM CABLE ADD :ADJUST ENGLISH 8:30AM CABLE ADD :ADJUST Setting the ON/OFF timer This feature allows you program the ON TIMER to "DAILY," the TV will turn on timer (off timer): Select...

User Manual
Page 34
... Using the TV's Features J3S40121B(E)_P31-37 34 24/02/2005, 6:07 PM To set the CINEMA MODE to select VIDEO in step 2 above. SETUP CLOSED CAPTION PICTURE SIZE PICTURE SCROLL CINEMA MODE ASPECT IMAGE TILT :SELECT OFF FILM / VIDEO ON 0 :ADJUST To set mode If the signal does not include aspect information, the picture size you selected on pages 31 and 32 is input. • If you view a DVD movie (3:2 pulldown processed) from a DVD player connected to the ColorStream (component video) inputs...
... Using the TV's Features J3S40121B(E)_P31-37 34 24/02/2005, 6:07 PM To set the CINEMA MODE to select VIDEO in step 2 above. SETUP CLOSED CAPTION PICTURE SIZE PICTURE SCROLL CINEMA MODE ASPECT IMAGE TILT :SELECT OFF FILM / VIDEO ON 0 :ADJUST To set mode If the signal does not include aspect information, the picture size you selected on pages 31 and 32 is input. • If you view a DVD movie (3:2 pulldown processed) from a DVD player connected to the ColorStream (component video) inputs...

User Manual
Page 36
... COLOR TEMPERATURE DISPLAY FORMAT SVM RESET :SELECT ON/OFF COOL 1080i HIGH :ADJUST 3. Note: SVM is useful when receiving a broadcast with a weak signal (especially a Cable channel) or playing a video cassette or disc damaged by selecting from three preset color temperatures-cool, medium, and warm-as described in step 3. To turn off the SVM: Select OFF in your TV picture. Press L or M to display the PICTURE menu. 2. This feature has three modes...
... COLOR TEMPERATURE DISPLAY FORMAT SVM RESET :SELECT ON/OFF COOL 1080i HIGH :ADJUST 3. Note: SVM is useful when receiving a broadcast with a weak signal (especially a Cable channel) or playing a video cassette or disc damaged by selecting from three preset color temperatures-cool, medium, and warm-as described in step 3. To turn off the SVM: Select OFF in your TV picture. Press L or M to display the PICTURE menu. 2. This feature has three modes...

User Manual
Page 37
... to Toshiba Connecting your TV Using the Remote Control Resetting your picture adjustments The RESET function returns your picture quality adjustments to the following situations: • when a video tape has been dubbed • when the signal reception is weak • when the signal reception is operating. To cancel the sleep timer: Repeatedly press SLEEP until the TV turns off. Using the closed caption signal may appear on -screen display of information not related to the program...
... to Toshiba Connecting your TV Using the Remote Control Resetting your picture adjustments The RESET function returns your picture quality adjustments to the following situations: • when a video tape has been dubbed • when the signal reception is weak • when the signal reception is operating. To cancel the sleep timer: Repeatedly press SLEEP until the TV turns off. Using the closed caption signal may appear on -screen display of information not related to the program...

User Manual
Page 38
... audio program (SAP): 1. AUDIO MTS BASS TREBLE BALANCE STABLE SOUND SPEAKERS STEREO 25 25 0 OFF ON :SELECT :ADJUST 3. Selecting stereo/SAP broadcasts The multi-channel TV sound (MTS) feature provides high-fidelity stereo sound. When the TV receives a stereo or SAP broadcast, the word "STEREO" or "SAP" displays on-screen every time you turn off , the screen will see the current program on the screen but hear music instead of the program's normal audio. AUDIO...
... audio program (SAP): 1. AUDIO MTS BASS TREBLE BALANCE STABLE SOUND SPEAKERS STEREO 25 25 0 OFF ON :SELECT :ADJUST 3. Selecting stereo/SAP broadcasts The multi-channel TV sound (MTS) feature provides high-fidelity stereo sound. When the TV receives a stereo or SAP broadcast, the word "STEREO" or "SAP" displays on-screen every time you turn off , the screen will see the current program on the screen but hear music instead of the program's normal audio. AUDIO...

User Manual
Page 40
... and play media with analog audio output (for details on connecting an HDMI or a DVI device to display the following on -screen information Press RECALL to the TV's HDMI input. AUDIO BBE HDMI RESET :SELECT OFF HDMI / DVI :ADJUST Displaying on -screen information: • Clock • Channel number or VIDEO mode selected • Channel label (if preset) • Stereo or SAP (second audio program) audio status • Content rating • On timer, Sleep timer (if preset) • Picture size STEREO SAP TV-PG L V ON TIMER 12:00AM SLEEP TIMER...
... and play media with analog audio output (for details on connecting an HDMI or a DVI device to display the following on -screen information Press RECALL to the TV's HDMI input. AUDIO BBE HDMI RESET :SELECT OFF HDMI / DVI :ADJUST Displaying on -screen information: • Clock • Channel number or VIDEO mode selected • Channel label (if preset) • Stereo or SAP (second audio program) audio status • Content rating • On timer, Sleep timer (if preset) • Picture size STEREO SAP TV-PG L V ON TIMER 12:00AM SLEEP TIMER...
User Manual
Page 41
... channel. • Adjust the TINT and/or COLOR in VIDEO mode. No sound, picture OK • The sound may have broadcast difficulties. Try another channel. • Check the antenna connections. • If you are viewing the TV and the power is set to "CABLE." Black box on screen • Select OFF in your absence. The V-Chip password does not work in the PICTURE menu. • If you are using a video input, make sure the TV/VIDEO button is plugged...
... channel. • Adjust the TINT and/or COLOR in VIDEO mode. No sound, picture OK • The sound may have broadcast difficulties. Try another channel. • Check the antenna connections. • If you are viewing the TV and the power is set to "CABLE." Black box on screen • Select OFF in your absence. The V-Chip password does not work in the PICTURE menu. • If you are using a video input, make sure the TV/VIDEO button is plugged...
User Manual
Page 43
... the date of repair required, either the service will be performed in your home or the set will come to change, modify, or extend the terms of the U.S.A. THEREFORE, THE ABOVE LIMITATIONS OR EXCLUSIONS MAY NOT APPLY TO YOU UNDER SUCH CIRCUMSTANCES. Important Safeguards Welcome to Toshiba Connecting your TV Using the Remote Control Limited United States Warranty for repair and returned...
... the date of repair required, either the service will be performed in your home or the set will come to change, modify, or extend the terms of the U.S.A. THEREFORE, THE ABOVE LIMITATIONS OR EXCLUSIONS MAY NOT APPLY TO YOU UNDER SUCH CIRCUMSTANCES. Important Safeguards Welcome to Toshiba Connecting your TV Using the Remote Control Limited United States Warranty for repair and returned...


