User Manual
Page 3
Table of Contents A Consumer Guide to Product Safety ...3 -6 Safety Instructions FCC Information Laser Safety Set up Installation and Maintenance ...7 Battery Backup Installation Battery Backup System Maintenance Controls and Indicators ...8 Clock Display ...9 Setting Clock Time ...10 Listening to Compact Discs...10-11 High Speed Musical Search Skip Tracks Repeat Play Random Play Program Play Listening...
Table of Contents A Consumer Guide to Product Safety ...3 -6 Safety Instructions FCC Information Laser Safety Set up Installation and Maintenance ...7 Battery Backup Installation Battery Backup System Maintenance Controls and Indicators ...8 Clock Display ...9 Setting Clock Time ...10 Listening to Compact Discs...10-11 High Speed Musical Search Skip Tracks Repeat Play Random Play Program Play Listening...
User Manual
Page 7
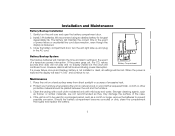
... is a good idea to save all packing materials from the front or top of the radio, if applicable. For backup operation, refer to Product Safety Set Up 1. A Consumer Guide to Battery Backup System. 6 Remove radio and all packing materials in case the unit ever needs to an AC outlet, out... back or bottom of excess dust, dirt, heat, water, moisture, vibration, and strong magnetic fields. 5. Note: Backup battery should be returned for the first time. Remove any labels from source of the radio. 4. Plug the AC cord into an outlet. Do not remove any feature labels, fact tags, or clear...
... is a good idea to save all packing materials from the front or top of the radio, if applicable. For backup operation, refer to Product Safety Set Up 1. A Consumer Guide to Battery Backup System. 6 Remove radio and all packing materials in case the unit ever needs to an AC outlet, out... back or bottom of excess dust, dirt, heat, water, moisture, vibration, and strong magnetic fields. 5. Note: Backup battery should be returned for the first time. Remove any labels from source of the radio. 4. Plug the AC cord into an outlet. Do not remove any feature labels, fact tags, or clear...
User Manual
Page 8
Installation and Maintenance Battery Backup Installation 1. If the unit is restored the display will maintain the time and alarm settings in the event of excessive heat. 2. Should the battery compartment become corroded or dirty, clean the compartment thoroughly and replace the battery. 7 Battery Backup ...If the power goes out, the CD, nature sounds and radio will not play and no display visible but the clock will maintain the correct time in the AC cord. Place the unit on natural wood or wood with mild soap and water. Clean the casing with a soft cloth moistened ...
Installation and Maintenance Battery Backup Installation 1. If the unit is restored the display will maintain the time and alarm settings in the event of excessive heat. 2. Should the battery compartment become corroded or dirty, clean the compartment thoroughly and replace the battery. 7 Battery Backup ...If the power goes out, the CD, nature sounds and radio will not play and no display visible but the clock will maintain the correct time in the AC cord. Place the unit on natural wood or wood with mild soap and water. Clean the casing with a soft cloth moistened ...
User Manual
Page 11
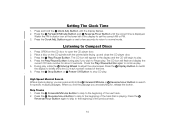
... the ᕣ Play/Pause Button. When you find the passage you can press and hold the ᕤ Clock Adj. Button until the correct time is displayed. Button again or wait a few seconds to return to briefly show the CD track number instead of the display to Compact Discs 1.... track that is playing, you are searching for specific musical passages. High Speed Musical Search While a track is playing. Press the Clock Adj. Setting The Clock Time 1. The CD icon will begin to search for , release the button. Press the ¹ Forward/Minute Button to skip to continue play ....
... the ᕣ Play/Pause Button. When you find the passage you can press and hold the ᕤ Clock Adj. Button until the correct time is displayed. Button again or wait a few seconds to return to briefly show the CD track number instead of the display to Compact Discs 1.... track that is playing, you are searching for specific musical passages. High Speed Musical Search While a track is playing. Press the Clock Adj. Setting The Clock Time 1. The CD icon will begin to search for , release the button. Press the ¹ Forward/Minute Button to skip to continue play ....
User Manual
Page 13
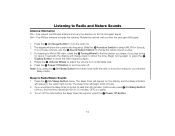
... FM wire antenna and vary the direction to show the radio frequency again. 4. Begin tuning again or press the ᕩ Display Button to find the time interval (90-60-30-15 minutes, OFF) you choose sounds, use the ƺ Sound Select Switch to turn the radio off the radio before the... and the Sleep indicator will appear in the upper right corner. Slide the ƽ Function Switch to turn off . The sleep timer will show the time. For listening to AM or FM radio, rotate the ƾ Tuning Wheel to Radio/Nature Sounds 1. If you desire. Sleep to find the strongest AM...
... FM wire antenna and vary the direction to show the radio frequency again. 4. Begin tuning again or press the ᕩ Display Button to find the time interval (90-60-30-15 minutes, OFF) you choose sounds, use the ƺ Sound Select Switch to turn the radio off the radio before the... and the Sleep indicator will appear in the upper right corner. Slide the ƽ Function Switch to turn off . The sleep timer will show the time. For listening to AM or FM radio, rotate the ƾ Tuning Wheel to Radio/Nature Sounds 1. If you desire. Sleep to find the strongest AM...
User Manual
Page 14
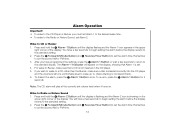
.... Press and hold the ᕧ Alarm-1 Button until the display is flashing and the Alarm-2 icon is left at the currently set the correct AM or PM time. 3. Remember to set the alarm time. Wake to Radio or Nature Sound 1. Press the ¹ Forward/Minute Button and ᕦ Reverse/Hour Button to...the CD player. 5. Alarm Operation Important! • To wake to the CD Player or Buzzer you must set Alarm 1 to the desired wake time. • To wake to the Radio or Nature Sound, set the alarm time. To re-arm, press the ᕧ Alarm 1 Button for 2 seconds. For wake to a CD rather...
.... Press and hold the ᕧ Alarm-1 Button until the display is flashing and the Alarm-2 icon is left at the currently set the correct AM or PM time. 3. Remember to set the alarm time. Wake to Radio or Nature Sound 1. Press the ¹ Forward/Minute Button and ᕦ Reverse/Hour Button to...the CD player. 5. Alarm Operation Important! • To wake to the CD Player or Buzzer you must set Alarm 1 to the desired wake time. • To wake to the Radio or Nature Sound, set the alarm time. To re-arm, press the ᕧ Alarm 1 Button for 2 seconds. For wake to a CD rather...

User Manual
Page 15
...following day. To disarm the alarm, press the ᕨ Alarm 2 Button once. To re-arm, press the ᕨ Alarm 2 Button for approximately one alarm is set, pressing the ᕡ Power Off Button to stop the alarm that is sounding will not affect the other alarm, which will turn on the display... automatically reset for the same time the following day, press the corresponding alarm button once until the alarm indicator is turned off. • If the alarm is not turned off once it sounds, it is set for. • If you 've made your Alarm2 wake up sound settings. Use the ƽ Function ...
...following day. To disarm the alarm, press the ᕨ Alarm 2 Button once. To re-arm, press the ᕨ Alarm 2 Button for approximately one alarm is set, pressing the ᕡ Power Off Button to stop the alarm that is sounding will not affect the other alarm, which will turn on the display... automatically reset for the same time the following day, press the corresponding alarm button once until the alarm indicator is turned off. • If the alarm is not turned off once it sounds, it is set for. • If you 've made your Alarm2 wake up sound settings. Use the ƽ Function ...
User Manual
Page 16
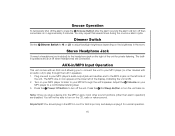
You may repeat this several times during the one end in jack on the CD, radio or nature sound. AUX-in speakers. 1. Note: Once you to connect the unit to your ... ᕡ Power Off Button to turn off then come back on in the room. You will turn on the left of the unit. Dimmer Switch Set the ƿ Dimmer Switch to HI or LO to a comfortable listening level. 3. Adjust the ƹ Volume on your MP3 player's audio output jack and another...
You may repeat this several times during the one end in jack on the CD, radio or nature sound. AUX-in speakers. 1. Note: Once you to connect the unit to your ... ᕡ Power Off Button to turn off then come back on in the room. You will turn on the left of the unit. Dimmer Switch Set the ƿ Dimmer Switch to HI or LO to a comfortable listening level. 3. Adjust the ƹ Volume on your MP3 player's audio output jack and another...
User Manual
Page 17
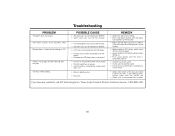
...icons are not on the display • The wrong alarm icon was on the display • The alarm was not set correctly for AM/PM • A CD was not inserted into the CD player • The CD was inserted ...a wall switch that is off • Dirty or defective disc • Dirty lens REMEDY • Check the alarm time setting • Press the Alarm Button until the Alarm icon appears on the display • Make sure the alarm you wish... Clean with a commercial lens cleaner If you have any questions, call SDI Technologies Inc. Timex Audio Products Division Customer Service, 1-800-888-4491 16
...icons are not on the display • The wrong alarm icon was on the display • The alarm was not set correctly for AM/PM • A CD was not inserted into the CD player • The CD was inserted ...a wall switch that is off • Dirty or defective disc • Dirty lens REMEDY • Check the alarm time setting • Press the Alarm Button until the Alarm icon appears on the display • Make sure the alarm you wish... Clean with a commercial lens cleaner If you have any questions, call SDI Technologies Inc. Timex Audio Products Division Customer Service, 1-800-888-4491 16

User Manual
Page 18
...try and gain better reception • Raise the volume with the volume dial • Disconnect the headphones Unit shuts off unexpectedly Cannot set the clock or alarm time • Unit was in the Sleep Mode instead of Power On Mode • The unit was turned On by the alarm ... button once to turn the unit back on • Press the Time Set button when setting the time or slide one of the Alarm-1 or Alarm-2 switches to the "Set" position when setting the alarm times If you have any questions, call SDI Technologies Inc. Timex Audio Products Division Customer Service, 1-800-888-4491 17
...try and gain better reception • Raise the volume with the volume dial • Disconnect the headphones Unit shuts off unexpectedly Cannot set the clock or alarm time • Unit was in the Sleep Mode instead of Power On Mode • The unit was turned On by the alarm ... button once to turn the unit back on • Press the Time Set button when setting the time or slide one of the Alarm-1 or Alarm-2 switches to the "Set" position when setting the alarm times If you have any questions, call SDI Technologies Inc. Timex Audio Products Division Customer Service, 1-800-888-4491 17


