User Manual
Page 3
...-14 Important! Table of Contents A Consumer Guide to Product Safety ...3 -6 Safety Instructions FCC Information Laser Safety Set up Installation and Maintenance ...7 Battery Backup Installation Battery Backup System Maintenance Controls and Indicators ...8 Clock Display ...9 Setting Clock Time ...10 Listening to Compact Discs...10-11 High Speed Musical Search Skip Tracks Repeat Play Random Play...
...-14 Important! Table of Contents A Consumer Guide to Product Safety ...3 -6 Safety Instructions FCC Information Laser Safety Set up Installation and Maintenance ...7 Battery Backup Installation Battery Backup System Maintenance Controls and Indicators ...8 Clock Display ...9 Setting Clock Time ...10 Listening to Compact Discs...10-11 High Speed Musical Search Skip Tracks Repeat Play Random Play...
User Manual
Page 7
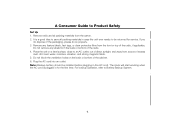
... of the cabinet. 6. Place the unit on the back or bottom of the radio, if applicable. Note: Backup battery should be returned for the first time. If you do so properly. 3. Do not remove any feature labels, fact tags, or clear protective films from the back or bottom of the radio... into an outlet. It is plugged in for service. A Consumer Guide to be installed before plugging in case the unit ever needs to Product Safety Set Up 1. Remove radio and all packing materials in the AC cord. Do not block the ventilation holes on a level surface, close to Battery Backup System...
... of the cabinet. 6. Place the unit on the back or bottom of the radio, if applicable. Note: Backup battery should be returned for the first time. If you do so properly. 3. Do not remove any feature labels, fact tags, or clear protective films from the back or bottom of the radio... into an outlet. It is plugged in for service. A Consumer Guide to be installed before plugging in case the unit ever needs to Product Safety Set Up 1. Remove radio and all packing materials in the AC cord. Do not block the ventilation holes on a level surface, close to Battery Backup System...
User Manual
Page 8
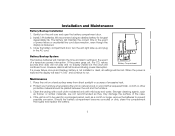
... line cord disconnection, even though the display is not installed or dead, all settings will continues to run . The battery will maintain the time and alarm settings in the AC cord. Battery Backup System The backup batteries will maintain the correct time in the event of a temporary power interruption. Should the battery compartment become...
... line cord disconnection, even though the display is not installed or dead, all settings will continues to run . The battery will maintain the time and alarm settings in the AC cord. Battery Backup System The backup batteries will maintain the correct time in the event of a temporary power interruption. Should the battery compartment become...
User Manual
Page 11
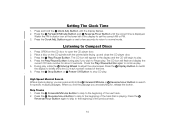
... play . Skip Tracks 1. Press and hold the ¹ Forward/Minute or ᕦ Reverse/Hour Button to normal mode. Button until the correct time is playing, you can press and hold the ᕤ Clock Adj. Press the Play/Pause Button again to adjust the volume level. Watch the ... beginning of the next track. 2. Press the ¹ Forward/Minute Button to skip to set the correct AM or PM. 3. Press the ᕦ Reverse/Hour Button again to skip to Pause play . 5. Setting The Clock Time 1. Press the ¹ Forward/Minute Button and ᕦ Reverse/Hour Button until the display...
... play . Skip Tracks 1. Press and hold the ¹ Forward/Minute or ᕦ Reverse/Hour Button to normal mode. Button until the correct time is playing, you can press and hold the ᕤ Clock Adj. Press the Play/Pause Button again to adjust the volume level. Watch the ... beginning of the next track. 2. Press the ¹ Forward/Minute Button to skip to set the correct AM or PM. 3. Press the ᕦ Reverse/Hour Button again to skip to Pause play . 5. Setting The Clock Time 1. Press the ¹ Forward/Minute Button and ᕦ Reverse/Hour Button until the display...
User Manual
Page 13
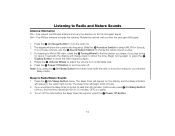
...the cabinet until you find its strongest signal. Press the ᕢ On/Sleep Button to find the time interval (90-60-30-15 minutes, OFF) you like. 3. For listening to AM or FM radio,... rotate the ƾ Tuning Wheel to show the time. Sleep to select AM, FM or Sounds. The display will appear in the upper right corner. Note:...choose the nature sound you prefer. 3. If you choose sounds, use the ƺ Sound Select Switch to be set for about 5 seconds the display will begin at 90 minutes. 2. Press the ᕡ Power Off Button to ...
...the cabinet until you find its strongest signal. Press the ᕢ On/Sleep Button to find the time interval (90-60-30-15 minutes, OFF) you like. 3. For listening to AM or FM radio,... rotate the ƾ Tuning Wheel to show the time. Sleep to select AM, FM or Sounds. The display will appear in the upper right corner. Note:...choose the nature sound you prefer. 3. If you choose sounds, use the ƺ Sound Select Switch to be set for about 5 seconds the display will begin at 90 minutes. 2. Press the ᕡ Power Off Button to ...
User Manual
Page 14
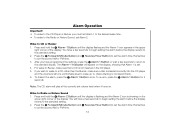
... Forward/Minute Button and ᕦ Reverse/Hour Button to CD or Buzzer 1. If you must set Alarm 1 to the desired wake time. • To wake to the Radio or Nature Sound, set Alarm 2. Wake to set the alarm time. For wake to Buzzer, make sure a disc is inserted correctly into the CD player and ...the volume is left at the currently set volume level when it turns on. To disarm the alarm, press the ᕧ Alarm 1 Button once. Remember to set the alarm time. Note: The CD alarm will have a few seconds to return to the standard display....
... Forward/Minute Button and ᕦ Reverse/Hour Button to CD or Buzzer 1. If you must set Alarm 1 to the desired wake time. • To wake to the Radio or Nature Sound, set Alarm 2. Wake to set the alarm time. For wake to Buzzer, make sure a disc is inserted correctly into the CD player and ...the volume is left at the currently set volume level when it turns on. To disarm the alarm, press the ᕧ Alarm 1 Button once. Remember to set the alarm time. Note: The CD alarm will have a few seconds to return to the standard display....

User Manual
Page 15
... not affect the other alarm, which will turn on at the time it is set, pressing the ᕡ Power Off Button to turn on the display, showing that Alarm 2 is set for. • If you 've made your Alarm2 wake up sound settings. For more than one hour, then turn off the alarm....the standard display. The alarm will appear on the following day. Alarm Operation 3. To re-arm, press the ᕨ Alarm 2 Button for the same time the following day, press the corresponding alarm button once until the alarm indicator is turned off. • If the alarm is not turned off automatically...
... not affect the other alarm, which will turn on at the time it is set, pressing the ᕡ Power Off Button to turn on the display, showing that Alarm 2 is set for. • If you 've made your Alarm2 wake up sound settings. For more than one hour, then turn off the alarm....the standard display. The alarm will appear on the following day. Alarm Operation 3. To re-arm, press the ᕨ Alarm 2 Button for the same time the following day, press the corresponding alarm button once until the alarm indicator is turned off. • If the alarm is not turned off automatically...
User Manual
Page 16
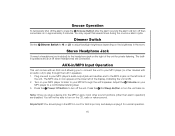
... the Ƹ Snooze Button after the alarm sounds.The alarm will not be able to turn on the CD, radio or nature sound. Dimmer Switch Set the ƿ Dimmer Switch to HI or LO to adjust backlight brightness depending on . Press the ᕡ Power Off Button to a comfortable listening level. 3.... Important! You may repeat this several times during the one end in your MP3 player's audio output jack and another end to the MP3-in the room. The builtin speakers are shut...
... the Ƹ Snooze Button after the alarm sounds.The alarm will not be able to turn on the CD, radio or nature sound. Dimmer Switch Set the ƿ Dimmer Switch to HI or LO to adjust backlight brightness depending on . Press the ᕡ Power Off Button to a comfortable listening level. 3.... Important! You may repeat this several times during the one end in your MP3 player's audio output jack and another end to the MP3-in the room. The builtin speakers are shut...
User Manual
Page 17
...icons are not on the display • The wrong alarm icon was on the display • The alarm was not set correctly for AM/PM • A CD was not inserted into the CD player • The CD was inserted ...a wall switch that is off • Dirty or defective disc • Dirty lens REMEDY • Check the alarm time setting • Press the Alarm Button until the Alarm icon appears on the display • Make sure the alarm you wish... Clean with a commercial lens cleaner If you have any questions, call SDI Technologies Inc. Timex Audio Products Division Customer Service, 1-800-888-4491 16
...icons are not on the display • The wrong alarm icon was on the display • The alarm was not set correctly for AM/PM • A CD was not inserted into the CD player • The CD was inserted ...a wall switch that is off • Dirty or defective disc • Dirty lens REMEDY • Check the alarm time setting • Press the Alarm Button until the Alarm icon appears on the display • Make sure the alarm you wish... Clean with a commercial lens cleaner If you have any questions, call SDI Technologies Inc. Timex Audio Products Division Customer Service, 1-800-888-4491 16

User Manual
Page 18
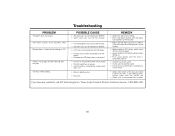
Timex Audio Products Division Customer Service, 1-800-888-4491 17 Troubleshooting PROBLEM Poor FM reception on certain stations Poor AM reception on certain stations Unit is ... to try and gain better reception • Raise the volume with the volume dial • Disconnect the headphones Unit shuts off unexpectedly Cannot set the clock or alarm time • Unit was in the Sleep Mode instead of Power On Mode • The unit was turned On by the alarm and the...
Timex Audio Products Division Customer Service, 1-800-888-4491 17 Troubleshooting PROBLEM Poor FM reception on certain stations Poor AM reception on certain stations Unit is ... to try and gain better reception • Raise the volume with the volume dial • Disconnect the headphones Unit shuts off unexpectedly Cannot set the clock or alarm time • Unit was in the Sleep Mode instead of Power On Mode • The unit was turned On by the alarm and the...


