User Guide
Page 2
...;lectriques ne pas utiliser cette fiche polarisée avec un prolongateur. The symbols above are located at the bottom of important operating and maintenance (servicing) instructions in an equilateral triangle is intended to prevent blade exposure. The lightning flash with an extension cord receptacle or other outlets unless the blades can...
...;lectriques ne pas utiliser cette fiche polarisée avec un prolongateur. The symbols above are located at the bottom of important operating and maintenance (servicing) instructions in an equilateral triangle is intended to prevent blade exposure. The lightning flash with an extension cord receptacle or other outlets unless the blades can...
User Guide
Page 3
...similar surface that the product is equipped with it from the wall outlet before installation and use can result in the user's operating instructions. Attachments - Overloading - The unit has been exposed to an external antenna. The unit has been dropped or the enclosure damaged.... 15. Ventilation - Power Sources - C. Do not connect to rain. Take special note, adhere to all the safety and operating instructions carefully before cleaning. Do not defeat the safety purpose of time. 9. The unit should not attempt to service the unit beyond that ...
...similar surface that the product is equipped with it from the wall outlet before installation and use can result in the user's operating instructions. Attachments - Overloading - The unit has been exposed to an external antenna. The unit has been dropped or the enclosure damaged.... 15. Ventilation - Power Sources - C. Do not connect to rain. Take special note, adhere to all the safety and operating instructions carefully before cleaning. Do not defeat the safety purpose of time. 9. The unit should not attempt to service the unit beyond that ...

User Guide
Page 6
... flash for service. To install backup battery: 1. Install a CR-2032 battery into an outlet. While setting the time or calendar, if you must follow the instructions again from the carton. Press and hold the FWD/Month or REV/Date Button the minutes will begin counting at the set the correct AM...
... flash for service. To install backup battery: 1. Install a CR-2032 battery into an outlet. While setting the time or calendar, if you must follow the instructions again from the carton. Press and hold the FWD/Month or REV/Date Button the minutes will begin counting at the set the correct AM...
User Guide
Page 8
... the Sleep Volume Button does not affect the alarm volume. 4. After the alarm turns on the top of the display. 3. Snooze/Dimmer Operation 1. Follow the instructions in the Setting the Alarm Time(s) section. 2. You can adjust sleep time from 90, 60, 30 or 15 minutes by the unit will appear on...
... the Sleep Volume Button does not affect the alarm volume. 4. After the alarm turns on the top of the display. 3. Snooze/Dimmer Operation 1. Follow the instructions in the Setting the Alarm Time(s) section. 2. You can adjust sleep time from 90, 60, 30 or 15 minutes by the unit will appear on...
Operation Manual
Page 2
... wide blade of the cabinet. This device complies with arrowhead in an equilateral triangle is intended to constitute a risk of important operating and maintenance (servicing) instructions in the literature accompanying the appliance. Fully insert. Operation is subject to the condition that may be of sufficient magnitude to alert the user of...
... wide blade of the cabinet. This device complies with arrowhead in an equilateral triangle is intended to constitute a risk of important operating and maintenance (servicing) instructions in the literature accompanying the appliance. Fully insert. Operation is subject to the condition that may be of sufficient magnitude to alert the user of...

Operation Manual
Page 3
...Unplug this product during a lightning storm, or when it should not attempt to operate normally or exhibits a marked change in the operating instructions or as they are not spilled into the outlet, try reversing the plug. Use a damp cloth for future reference. B. Power Sources...be situated on the appliance itself. 5. Grounding or Polarization - Power-cord Protection - A Consumer Guide to Product Safety IMPORTANT SAFETY INSTRUCTIONS This unit has been designed and manufactured to assure your obsolete outlet. Improper use liquid cleaners or aerosol cleaners. Do not use...
...Unplug this product during a lightning storm, or when it should not attempt to operate normally or exhibits a marked change in the operating instructions or as they are not spilled into the outlet, try reversing the plug. Use a damp cloth for future reference. B. Power Sources...be situated on the appliance itself. 5. Grounding or Polarization - Power-cord Protection - A Consumer Guide to Product Safety IMPORTANT SAFETY INSTRUCTIONS This unit has been designed and manufactured to assure your obsolete outlet. Improper use liquid cleaners or aerosol cleaners. Do not use...
Operation Manual
Page 8
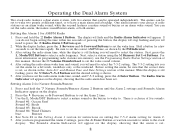
.... 4. Rotate the O Volume Thumbwheel to set the correct AM/PM time, as shown in the Setting Alarm 1 section for Nature Sounds/Buzzer 1. Setting Alarm 2 for instructions on the display, showing that the alarm is set. 8 First, press the L Mode/DST Button to have programmed the Alarm 2 settings, press the 4 Enter Button...
.... 4. Rotate the O Volume Thumbwheel to set the correct AM/PM time, as shown in the Setting Alarm 1 section for Nature Sounds/Buzzer 1. Setting Alarm 2 for instructions on the display, showing that the alarm is set. 8 First, press the L Mode/DST Button to have programmed the Alarm 2 settings, press the 4 Enter Button...
Operation Manual
Page 10
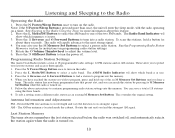
... frequency is turned on programming radio station settings. 5. Press the 1 Reverse and 6 Forward Buttons to program, press and hold a button for instructions on . 5. See the Programming Radio Station Memories section for about this feature. 2. Rotate the O Volume Thumbwheel to the Radio Operating the Radio...of 18 stations using the three bands. 6. Press the 1 Reverse and 6 Forward Buttons to find the strongest AM signal. Follow the above instructions to its M Memory Set Button while the radio is in use the M Memory Set Buttons to select a radio band. Antenna Information and ...
... frequency is turned on programming radio station settings. 5. Press the 1 Reverse and 6 Forward Buttons to program, press and hold a button for instructions on . 5. See the Programming Radio Station Memories section for about this feature. 2. Rotate the O Volume Thumbwheel to the Radio Operating the Radio...of 18 stations using the three bands. 6. Press the 1 Reverse and 6 Forward Buttons to find the strongest AM signal. Follow the above instructions to its M Memory Set Button while the radio is in use the M Memory Set Buttons to select a radio band. Antenna Information and ...
