User Manual
Page 1
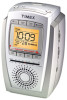
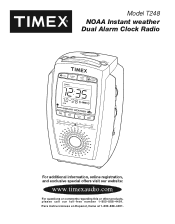
Model T248 NOAA Instant weather Dual Alarm Clock Radio For additional information, online registration, and exclusive special offers visit our website: www.timexaudio.com For questions or comments regarding this or other products, please call our toll-free number 1-800-888-4491. Para instruccionese en Espanol, llame al 1-800-888-4491.
Model T248 NOAA Instant weather Dual Alarm Clock Radio For additional information, online registration, and exclusive special offers visit our website: www.timexaudio.com For questions or comments regarding this or other products, please call our toll-free number 1-800-888-4491. Para instruccionese en Espanol, llame al 1-800-888-4491.
User Manual
Page 2
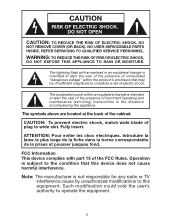
...SERVICING TO QUALIFIED SERVICE PERSONNEL. The lightning flash with part 15 of important operating and maintenance (servicing) instructions in an equilateral triangle is subject to the condition that may be of sufficient magnitude to constitute a risk of uninsulated "dangerous voltage" within an equilateral triangle is not responsible for any radio... SHOCK. The exclamation point within the product's enclosure that this equipment. ATTENTION: Pour eviter les choc electriques. Such modification could void the user's authority to alert the user of the presence of electric shock. ...
...SERVICING TO QUALIFIED SERVICE PERSONNEL. The lightning flash with part 15 of important operating and maintenance (servicing) instructions in an equilateral triangle is subject to the condition that may be of sufficient magnitude to constitute a risk of uninsulated "dangerous voltage" within an equilateral triangle is not responsible for any radio... SHOCK. The exclamation point within the product's enclosure that this equipment. ATTENTION: Pour eviter les choc electriques. Such modification could void the user's authority to alert the user of the presence of electric shock. ...
User Manual
Page 3
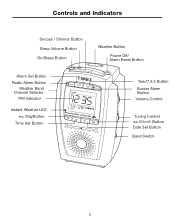
Controls and Indicators Snooze / Dimmer Button Sleep Volume Button On/Sleep Button Alarm Set Button Radio Alarm Button Weather Band Channel Selector PM Indicator Instant Weather LED > /Month Button Date Set Button Band Switch 5
Controls and Indicators Snooze / Dimmer Button Sleep Volume Button On/Sleep Button Alarm Set Button Radio Alarm Button Weather Band Channel Selector PM Indicator Instant Weather LED > /Month Button Date Set Button Band Switch 5

User Manual
Page 4
... to set alarm time if backup batteries are dead, the battery low icon at lower left side of the time digits. 4. Important: It is recommended for about 2 seconds until the time display flashes. 2. Installation and Maintenance Note: Read through the Maintenance section then plug the AC line cord correctly into a wall outlet. Install 3 "AA" batteries (alkaline is important to normal operation mode. Otherwise time and alarms setting may be connecting to AC power the display...
... to set alarm time if backup batteries are dead, the battery low icon at lower left side of the time digits. 4. Important: It is recommended for about 2 seconds until the time display flashes. 2. Installation and Maintenance Note: Read through the Maintenance section then plug the AC line cord correctly into a wall outlet. Install 3 "AA" batteries (alkaline is important to normal operation mode. Otherwise time and alarms setting may be connecting to AC power the display...
User Manual
Page 5
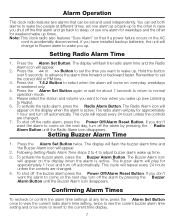
...the alarm to normal operation mode. 5. Following Setting Radio Alarm Time steps 2 to 4 to adjust buzzer alarm wake up (see the current buzzer alarm time setting and once more to revert to set and used independently. The display will flash the radio alarm time and the Radio Alarm icon will appear. 2. Remember to the current time display. 7 To activate the radio alarm, press the Radio Alarm Button. To shut off the buzzer alarm press the Power Off/Alarm Reset Button. Setting Buzzer Alarm Time 1. Setting Radio Alarm Time 1. The Buzzer Alarm icon will change to Buzzer alarm to...
...the alarm to normal operation mode. 5. Following Setting Radio Alarm Time steps 2 to 4 to adjust buzzer alarm wake up (see the current buzzer alarm time setting and once more to revert to set and used independently. The display will flash the radio alarm time and the Radio Alarm icon will appear. 2. Remember to the current time display. 7 To activate the radio alarm, press the Radio Alarm Button. To shut off the buzzer alarm press the Power Off/Alarm Reset Button. Setting Buzzer Alarm Time 1. Setting Radio Alarm Time 1. The Buzzer Alarm icon will change to Buzzer alarm to...
User Manual
Page 6
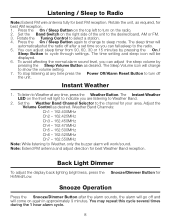
... repeat this cycle several times during the 1 hour alarm cycle. 8 The Instant Weather LED on the front will come on the radio. 2. Adjust the Volume Control as required, for best AM reception. 1. Snooze Operation Press the Snooze/Dimmer Button after a set time so you can adjust sleep timer from 90, 60, 30 or 15 minutes by pressing the Sleep Volume Button as desired. Rotate the unit, as desired. The time setting and sleep icon will change to sleep mode. The Sleep Volume...
... repeat this cycle several times during the 1 hour alarm cycle. 8 The Instant Weather LED on the front will come on the radio. 2. Adjust the Volume Control as required, for best AM reception. 1. Snooze Operation Press the Snooze/Dimmer Button after a set time so you can adjust sleep timer from 90, 60, 30 or 15 minutes by pressing the Sleep Volume Button as desired. Rotate the unit, as desired. The time setting and sleep icon will change to sleep mode. The Sleep Volume...
User Manual
Page 7
... the flow of any service or repairs to this plug will prevent damage to the product due to lightning and power-line surges. 12. Do not defeat the safety purpose of time. 9. The power cord of the unit should not attempt to service the unit beyond that the product is to be placed in a built-in the user's operating instructions. If you are not...
... the flow of any service or repairs to this plug will prevent damage to the product due to lightning and power-line surges. 12. Do not defeat the safety purpose of time. 9. The power cord of the unit should not attempt to service the unit beyond that the product is to be placed in a built-in the user's operating instructions. If you are not...
User Manual
Page 8
... include proof of purchase, including date of purchase. 3. Limited 90-Day Warranty Information Timex Audio Products, a division of SDI Technologies Inc. (hereafter referred to as exhausted or defective batteries are also limited to 90 days, and SDI Technologies will repair or, at its return to the owner. Before returning this product for service, please first replace the batteries (if applicable) with fresh ones...
... include proof of purchase, including date of purchase. 3. Limited 90-Day Warranty Information Timex Audio Products, a division of SDI Technologies Inc. (hereafter referred to as exhausted or defective batteries are also limited to 90 days, and SDI Technologies will repair or, at its return to the owner. Before returning this product for service, please first replace the batteries (if applicable) with fresh ones...


