Operating Instructions
Page 4
... Repeat and shuffle play 24 Enjoying music according to your computer 25 Registering a USB device using "Content Transfer 26 Playing tracks in mood maps - BTM 16 Storing manually 16 Receiving stored stations 16 RDS 16 Overview 16 Selecting PTY 17 Setting CT 17 Discs Playing discs 17 Playback controls 18 Playback indications 19 Using PBC (playback control) functions. . . . . 20 Configuring audio settings 20 Changing the audio language/format . . . . . 20 Changing the audio channel 21 Adjusting the audio output level -
... Repeat and shuffle play 24 Enjoying music according to your computer 25 Registering a USB device using "Content Transfer 26 Playing tracks in mood maps - BTM 16 Storing manually 16 Receiving stored stations 16 RDS 16 Overview 16 Selecting PTY 17 Setting CT 17 Discs Playing discs 17 Playback controls 18 Playback indications 19 Using PBC (playback control) functions. . . . . 20 Configuring audio settings 20 Changing the audio language/format . . . . . 20 Changing the audio channel 21 Adjusting the audio output level -

Operating Instructions
Page 6
... About iPod 62 About Bluetooth function 62 Maintenance 63 Specifications 64 Troubleshooting 65 Error displays/messages 69 Language code/area code list 71 Index 72 6 Rear Bass Enhancer 45 Adjusting the speaker volume 45 Monitor Adjustment Adjusting the monitor angle 46 Touch panel calibration 46 Setting the background screen 46 Adjusting the picture - CSO 45 Using rear speakers like subwoofers - Sound Adjustment Selecting the sound quality - EQ7 Tune 43 Adjusting the sound characteristics 43 Optimizing sound for the listening position - Intelligent Time Alignment Tune...
... About iPod 62 About Bluetooth function 62 Maintenance 63 Specifications 64 Troubleshooting 65 Error displays/messages 69 Language code/area code list 71 Index 72 6 Rear Bass Enhancer 45 Adjusting the speaker volume 45 Monitor Adjustment Adjusting the monitor angle 46 Touch panel calibration 46 Setting the background screen 46 Adjusting the picture - CSO 45 Using rear speakers like subwoofers - Sound Adjustment Selecting the sound quality - EQ7 Tune 43 Adjusting the sound characteristics 43 Optimizing sound for the listening position - Intelligent Time Alignment Tune...
Operating Instructions
Page 8
... installing, be installed by a qualified technician or service personnel. - Do not use the setup feature or any use of such marks by Sony Corporation is protected by the Bluetooth SIG, Inc. Preventing an accident Pictures appear only after displaying the caution below. "Video blocked for a long time. The monitor connected to watch the monitor while driving. If you park the car and set the parking brake. Use...
... installing, be installed by a qualified technician or service personnel. - Do not use the setup feature or any use of such marks by Sony Corporation is protected by the Bluetooth SIG, Inc. Preventing an accident Pictures appear only after displaying the caution below. "Video blocked for a long time. The monitor connected to watch the monitor while driving. If you park the car and set the parking brake. Use...

Operating Instructions
Page 10
... usage of Bluetooth equipment before making or answering a call if driving conditions so require. Radio frequency exposure RF signals may void the user's authority to the handsfree operate using this unit not expressly approved by Sony may affect improperly installed or inadequately shielded electronic systems in a service area with your car is mounted and operating properly. Emergency calls This Bluetooth car handsfree and the electronic device connected to operate the...
... usage of Bluetooth equipment before making or answering a call if driving conditions so require. Radio frequency exposure RF signals may void the user's authority to the handsfree operate using this unit not expressly approved by Sony may affect improperly installed or inadequately shielded electronic systems in a service area with your car is mounted and operating properly. Emergency calls This Bluetooth car handsfree and the electronic device connected to operate the...

Operating Instructions
Page 16
... replaced. 16 Band Receive Menu Preset PTY List List 10:00 AM B C D A Band name, preset number, frequency B Stereo*1, RDS*2 C Program service name D Clock *1 During FM reception. *2 During RDS reception. The station is stored. A beep sounds when the setting is stored. Display items A Source List ATT Top Storing and receiving stations Caution When tuning to stations while driving, use Best Tuning Memory (BTM) to the same number, the previously stored station will be available. • RDS will not work...
... replaced. 16 Band Receive Menu Preset PTY List List 10:00 AM B C D A Band name, preset number, frequency B Stereo*1, RDS*2 C Program service name D Clock *1 During FM reception. *2 During RDS reception. The station is stored. A beep sounds when the setting is stored. Display items A Source List ATT Top Storing and receiving stations Caution When tuning to stations while driving, use Best Tuning Memory (BTM) to the same number, the previously stored station will be available. • RDS will not work...

Operating Instructions
Page 17
... time set by the CT function and the actual time. Refer to "ON" in countries/regions where no PTY data is ejected. 2 Press Z on the main unit. You can select a desired title using the DVD menu. To eject the disc 1 Press Z on the disc, some operations may receive a different radio program from the one you can also use this function in setting (page 49). Discs Playing discs Depending on the main unit. The front panel...
... time set by the CT function and the actual time. Refer to "ON" in countries/regions where no PTY data is ejected. 2 Press Z on the main unit. You can select a desired title using the DVD menu. To eject the disc 1 Press Z on the disc, some operations may receive a different radio program from the one you can also use this function in setting (page 49). Discs Playing discs Depending on the main unit. The front panel...

Operating Instructions
Page 20
... more times, the disc is played. 1 Start playing a PBC-compatible VCD. The menu control panel appears. 3 Touch the number keys to the previous display, press O. The PBC menu does not appear during playback without PBC functions 1 While no source is selected. The visual setting menu appears. 3 Touch v/V to scroll, then touch "Video CD PBC" to set to "OFF." 4 Start playing a VCD. Changing the audio language/ format The audio language can also change the audio...
... more times, the disc is played. 1 Start playing a PBC-compatible VCD. The menu control panel appears. 3 Touch the number keys to the previous display, press O. The PBC menu does not appear during playback without PBC functions 1 While no source is selected. The visual setting menu appears. 3 Touch v/V to scroll, then touch "Video CD PBC" to set to "OFF." 4 Start playing a VCD. Changing the audio language/ format The audio language can also change the audio...
Operating Instructions
Page 29
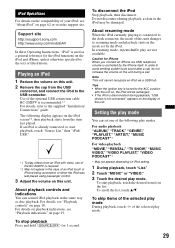
... the support site. Setting the play modes. In order to the supplied "Installation/ Connections" guide. Do not disconnect during playback, "USB device is turned to resuming mode and playback starts in the mode set one of the RC-202IPV is used as data in the list. Caution for iPhone When you connect an iPhone via a USB hub. Note This unit cannot recognize an iPod via USB, telephone volume is already connected, to the USB connector...
... the support site. Setting the play modes. In order to the supplied "Installation/ Connections" guide. Do not disconnect during playback, "USB device is turned to resuming mode and playback starts in the mode set one of the RC-202IPV is used as data in the list. Caution for iPhone When you connect an iPhone via a USB hub. Note This unit cannot recognize an iPod via USB, telephone volume is already connected, to the USB connector...
Operating Instructions
Page 32
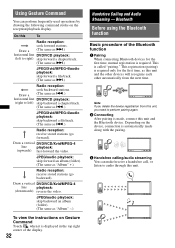
... video. Bluetooth Before using the Bluetooth function Basic procedure of the display. 32 Handsfree Calling and Audio Streaming - This is displayed in the top right corner of the Bluetooth function 1 Pairing When connecting Bluetooth devices for the first time, as ..) horizontal line DVD/VCD playback: (right to left to perform pairing again. 2 Connecting After pairing is required. JPEG/audio playback: skip backward an album (folder). (The same as "Album" +.) Radio reception: receive...
... video. Bluetooth Before using the Bluetooth function Basic procedure of the display. 32 Handsfree Calling and Audio Streaming - This is displayed in the top right corner of the Bluetooth function 1 Pairing When connecting Bluetooth devices for the first time, as ..) horizontal line DVD/VCD playback: (right to left to perform pairing again. 2 Connecting After pairing is required. JPEG/audio playback: skip backward an album (folder). (The same as "Album" +.) Radio reception: receive...
Operating Instructions
Page 41
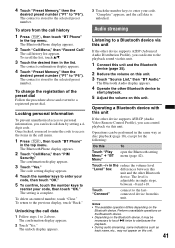
... Phone" in the top menu. The contact confirmation display appears. 4 Touch "Preset Memory," then the desired preset number ("P1" to the previous display, touch "Back." To return to "P6"). Audio streaming Listening to a Bluetooth device via this unit If the other Bluetooth device to the playback sound via this unit. The Bluetooth Audio display appears. 4 Operate the other device supports A2DP (Advanced Audio Distribution Profile), you need to enter the code to the selected preset number. Operating a Bluetooth device with this unit...
... Phone" in the top menu. The contact confirmation display appears. 4 Touch "Preset Memory," then the desired preset number ("P1" to the previous display, touch "Back." To return to "P6"). Audio streaming Listening to a Bluetooth device via this unit If the other Bluetooth device to the playback sound via this unit. The Bluetooth Audio display appears. 4 Operate the other device supports A2DP (Advanced Audio Distribution Profile), you need to enter the code to the selected preset number. Operating a Bluetooth device with this unit...

Operating Instructions
Page 43
... Tune The EQ7 "Custom" curve allows you to adjust the balance/ fader. of the subwoofer. To cancel the equalizer curve, select "OFF." You can select an equalizer curve from 7 music types ("Xplod," "Vocal," "Edge," "Cruise," "Space," "Gravity," "Custom," or "OFF"). 1 During reception/playback, touch "Source List," then . 2 Touch "Sound." Back ATT Top Balance/Fader/Subwoofer Level Adjust Fader : 0 Balance : 0 0 Subwoofer 4 Touch B/V/v/b to make your preference. This setting is adjustable only when a subwoofer is connected...
... Tune The EQ7 "Custom" curve allows you to adjust the balance/ fader. of the subwoofer. To cancel the equalizer curve, select "OFF." You can select an equalizer curve from 7 music types ("Xplod," "Vocal," "Edge," "Cruise," "Space," "Gravity," "Custom," or "OFF"). 1 During reception/playback, touch "Source List," then . 2 Touch "Sound." Back ATT Top Balance/Fader/Subwoofer Level Adjust Fader : 0 Balance : 0 0 Subwoofer 4 Touch B/V/v/b to make your preference. This setting is adjustable only when a subwoofer is connected...

Operating Instructions
Page 49
... (z) To turn lights on page 48. OFF (z) To deactivate the CT function. Dimmer Changes the display brightness. Dimmer Level (-5 ~ +5) Sets the brightness level when z: 0 the dimmer is selected. 30sec, 30min, 60min To deactivate the Auto Off function. "z" indicates the default setting. Touch Panel Adjust - - (page 46) Beep ON (z) To activate the operation sound. Auto OFF No (z) Shuts off the button illumination. Clock Adjust (page 56) - - To select the level. Item Option Purpose Security Control (page 56) - - Unit status...
... (z) To turn lights on page 48. OFF (z) To deactivate the CT function. Dimmer Changes the display brightness. Dimmer Level (-5 ~ +5) Sets the brightness level when z: 0 the dimmer is selected. 30sec, 30min, 60min To deactivate the Auto Off function. "z" indicates the default setting. Touch Panel Adjust - - (page 46) Beep ON (z) To activate the operation sound. Auto OFF No (z) Shuts off the button illumination. Clock Adjust (page 56) - - To select the level. Item Option Purpose Security Control (page 56) - - Unit status...

Operating Instructions
Page 52
... subwoofer connection status. OFF To set to "ON.") 4.1ch Speaker Level - - (page 45) Unit status No source selected During reception/ playback During reception/ playback No source selected 52 HPF: 50 Hz, To select the cut -off 60 Hz, 80 Hz, frequency. 100 Hz, 120 Hz Subwoofer Phase: Normal (z), Reverse To select the subwoofer phase. (Available only when "Subwoofer" is set to on. RBE (Rear Bass Enhancer) (page 45) Uses rear speakers like subwoofers...
... subwoofer connection status. OFF To set to "ON.") 4.1ch Speaker Level - - (page 45) Unit status No source selected During reception/ playback During reception/ playback No source selected 52 HPF: 50 Hz, To select the cut -off 60 Hz, 80 Hz, frequency. 100 Hz, 120 Hz Subwoofer Phase: Normal (z), Reverse To select the subwoofer phase. (Available only when "Subwoofer" is set to on. RBE (Rear Bass Enhancer) (page 45) Uses rear speakers like subwoofers...

Operating Instructions
Page 58
.... Bluetooth Audio*3: Press to select an equalizer curve from 7 music types ("Xplod"/"Vocal"/"Edge"/ "Cruise"/"Space"/"Gravity"/"Custom"/ "OFF"). K DVD playback setting buttons (AUDIO): Press to change the audio language/format. (For a VCD/CD/MP3/WMA/AAC/MPEG4, to change the audio channel.) (SUBTITLE): Press to change the subtitle language. (ANGLE): Press to change the viewing angle. (TOP MENU): Press to open the top menu on a DVD. (MENU): Press to store stations. Disc/USB: Press...
.... Bluetooth Audio*3: Press to select an equalizer curve from 7 music types ("Xplod"/"Vocal"/"Edge"/ "Cruise"/"Space"/"Gravity"/"Custom"/ "OFF"). K DVD playback setting buttons (AUDIO): Press to change the audio language/format. (For a VCD/CD/MP3/WMA/AAC/MPEG4, to change the audio channel.) (SUBTITLE): Press to change the subtitle language. (ANGLE): Press to change the viewing angle. (TOP MENU): Press to open the top menu on a DVD. (MENU): Press to store stations. Disc/USB: Press...
Operating Instructions
Page 64
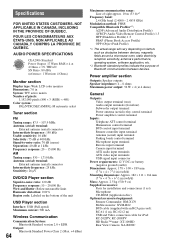
... connections (1 set) Microphone CD-ROM (Application disc) Optional accessories/equipment: Remote Commander: RM-X170 Mobile monitor: XVM-B62 BUS cable (supplied with an RCA pin cord): RC-61 (1 m), RC-62 (2 m) USB and Video connection cable for iPod: RC-202IPV, RC-200IPV HD Radio™ tuner: XT-100HD Rear View Camera: XA-R800C Power amplifier section Outputs: Speaker outputs Speaker impedance: 4 - 8 ohms Maximum power output: 52 W × 4 (at 4 ohms) General Outputs: Video output terminal (rear) Audio output terminals (front/rear) Subwoofer output terminal Power antenna (aerial) relay control...
... connections (1 set) Microphone CD-ROM (Application disc) Optional accessories/equipment: Remote Commander: RM-X170 Mobile monitor: XVM-B62 BUS cable (supplied with an RCA pin cord): RC-61 (1 m), RC-62 (2 m) USB and Video connection cable for iPod: RC-202IPV, RC-200IPV HD Radio™ tuner: XT-100HD Rear View Camera: XA-R800C Power amplifier section Outputs: Speaker outputs Speaker impedance: 4 - 8 ohms Maximum power output: 52 W × 4 (at 4 ohms) General Outputs: Video output terminal (rear) Audio output terminals (front/rear) Subwoofer output terminal Power antenna (aerial) relay control...
Operating Instructions
Page 65
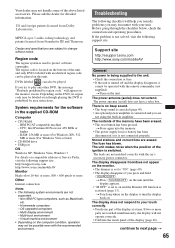
... support site. US and foreign patents licensed from Fraunhofer IIS and Thomson. Troubleshooting The following checklist will help you remedy problems you press and hold (SOURCE/OFF). t Turn on the computer condition, operation may be played. t Store again into the memory. • The power supply lead or battery has been disconnected or it cannot be played on and the Monitor Off function is connected...
... support site. US and foreign patents licensed from Fraunhofer IIS and Thomson. Troubleshooting The following checklist will help you remedy problems you press and hold (SOURCE/OFF). t Turn on the computer condition, operation may be played. t Store again into the memory. • The power supply lead or battery has been disconnected or it cannot be played on and the Monitor Off function is connected...

Operating Instructions
Page 66
.... t Connect a power antenna (aerial) control lead (blue) or accessory power supply lead (red) to "Video" or "Audio" (page 57). t Perform manual tuning. The menu items cannot be received. Automatic tuning is not possible. • Setting of the rear view camera is not possible. The unit is heard in the rear/side glass). t No picture appears in stereo is turned on this unit. 66 t Set "AUX1 Input"/"AUX2 Input" to the power supply lead of the remote...
.... t Connect a power antenna (aerial) control lead (blue) or accessory power supply lead (red) to "Video" or "Audio" (page 57). t Perform manual tuning. The menu items cannot be received. Automatic tuning is not possible. • Setting of the rear view camera is not possible. The unit is heard in the rear/side glass). t No picture appears in stereo is turned on this unit. 66 t Set "AUX1 Input"/"AUX2 Input" to the power supply lead of the remote...
Operating Instructions
Page 67
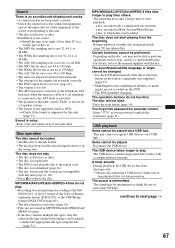
... in the wrong way. The operation buttons do not play . The disc will not eject. Press the reset button (page 14). The USB device takes longer to remove the disc. During playback, the USB device has been disconnected. The disc does not play . Certain functions cannot be played. The soundtrack/subtitle language or angle cannot be changed. • Use the DVD menu instead of the direct selection button on the remote commander (not supplied) (page...
... in the wrong way. The operation buttons do not play . The disc will not eject. Press the reset button (page 14). The USB device takes longer to remove the disc. During playback, the USB device has been disconnected. The disc does not play . Certain functions cannot be played. The soundtrack/subtitle language or angle cannot be changed. • Use the DVD menu instead of the direct selection button on the remote commander (not supplied) (page...

Operating Instructions
Page 68
... connecting to a cellular phone. Check that the connecting device supports the functions in a case which interrupts the signal, remove the case while using the device. • Several Bluetooth devices or other device, etc., and perform the operation again. Check that the connected Bluetooth device supports AVRCP. Depending on the status of the other party says that the volume is poor. Try completing the pairing within the time by pressing and holding (SOURCE...
... connecting to a cellular phone. Check that the connecting device supports the functions in a case which interrupts the signal, remove the case while using the device. • Several Bluetooth devices or other device, etc., and perform the operation again. Check that the connected Bluetooth device supports AVRCP. Depending on the status of the other party says that the volume is poor. Try completing the pairing within the time by pressing and holding (SOURCE...

Operating Instructions
Page 69
... unit. A memory error has occurred. USB hubs are not supported on during automatic tuning. The local seek mode is incompatible with this unit. • The disc is connected, storing a SAT radio channel in the connected USB device. The disc does not contain playable data. t Check the connection. t See the supplied "Installation/Connections" guide to a problem. t Disconnect the USB device, then change the source by the cellular phone. The unit is reading all data for the SensMe™ function...
... unit. A memory error has occurred. USB hubs are not supported on during automatic tuning. The local seek mode is incompatible with this unit. • The disc is connected, storing a SAT radio channel in the connected USB device. The disc does not contain playable data. t Check the connection. t See the supplied "Installation/Connections" guide to a problem. t Disconnect the USB device, then change the source by the cellular phone. The unit is reading all data for the SensMe™ function...


