Operating Instructions
Page 2
... to which can radiate radio frequency energy and, if not installed and used in accordance with the instructions, may contact: Sony Electronics Inc. Reorient or relocate the receiving antenna. - You are designed to radio communications. This symbol is intended to ...instructions in this manual could void your authority to the following measures: - Address: 680 Kinderkamack Road, Oradell, NJ 07649 U.S.A. These limits are cautioned that may be determined by one or more of Conformity Trade Name: SONY Model No.: VPL-CS6/VPL-CX6/VPL-EX1 Responsible Party: Sony Electronics Inc....
... to which can radiate radio frequency energy and, if not installed and used in accordance with the instructions, may contact: Sony Electronics Inc. Reorient or relocate the receiving antenna. - You are designed to radio communications. This symbol is intended to ...instructions in this manual could void your authority to the following measures: - Address: 680 Kinderkamack Road, Oradell, NJ 07649 U.S.A. These limits are cautioned that may be determined by one or more of Conformity Trade Name: SONY Model No.: VPL-CS6/VPL-CX6/VPL-EX1 Responsible Party: Sony Electronics Inc....

Operating Instructions
Page 14
...menu or a setting item is connected to the computer using the supplied Remote Commander" on page 26. 6 FUNCTION 1, 2 keys (VPL-CX6 only) When you connect the projector with a computer, you can cancel the adjustment by pressing the APA key again while "Adjusting" appears on the screen. • ... an arrow key (M/ m/ b) Joystick c) R Click key: Functions as mouse buttons of a computer only when the projector is displayed on a mouse. This icon indicates the point you adjust the picture manually. 3 PIC MUTING key Used to its original size. • You can open a file on the screen by just...
...menu or a setting item is connected to the computer using the supplied Remote Commander" on page 26. 6 FUNCTION 1, 2 keys (VPL-CX6 only) When you connect the projector with a computer, you can cancel the adjustment by pressing the APA key again while "Adjusting" appears on the screen. • ... an arrow key (M/ m/ b) Joystick c) R Click key: Functions as mouse buttons of a computer only when the projector is displayed on a mouse. This icon indicates the point you adjust the picture manually. 3 PIC MUTING key Used to its original size. • You can open a file on the screen by just...

Operating Instructions
Page 15
While pressing the lid, slide it. For VPL-EX1 1 I / 1 (on/standby) key 2 ENTER/arrow key (M/m/ Be sure to open the lid, then install the two size AA (R6) batteries (supplied) with the correct polarity. Overview To install batteries 1 Push and slide to install the battery from the # side. 2 Replace the lid.
While pressing the lid, slide it. For VPL-EX1 1 I / 1 (on/standby) key 2 ENTER/arrow key (M/m/ Be sure to open the lid, then install the two size AA (R6) batteries (supplied) with the correct polarity. Overview To install batteries 1 Push and slide to install the battery from the # side. 2 Replace the lid.
Operating Instructions
Page 18
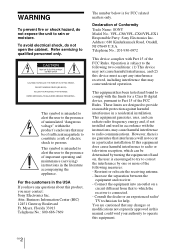
...your computer to XGA mode (VPL-CX6/EX1) or SVGA mode (VPL-CS6) for the external monitor. • If you connect the projector, make sure to: •... the cable plugs firmly; Notes • The projector accepts VGA, SVGA, XGA, SXGA (VPL-CX6/EX1 only) and SXGA+ (VPL-CX6/EX1 only) signals. When pulling out a... the projector on according to the following procedures. 1 Connect the projector to the computer by using the supplied HD D-sub 15 pin cable. 2 Turn the projector on ... set the output mode of picture signals. Connecting the Projector When you set your computer, such as a notebook...
...your computer to XGA mode (VPL-CX6/EX1) or SVGA mode (VPL-CS6) for the external monitor. • If you connect the projector, make sure to: •... the cable plugs firmly; Notes • The projector accepts VGA, SVGA, XGA, SXGA (VPL-CX6/EX1 only) and SXGA+ (VPL-CX6/EX1 only) signals. When pulling out a... the projector on according to the following procedures. 1 Connect the projector to the computer by using the supplied HD D-sub 15 pin cable. 2 Turn the projector on ... set the output mode of picture signals. Connecting the Projector When you set your computer, such as a notebook...
Operating Instructions
Page 20
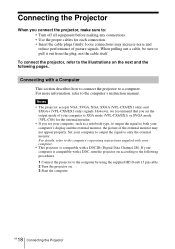
... GB Connecting the Projector to audio output to video output a) Use a no-resistance cable. Connecting with video output connector of a type having two rows of the equipment you connect a USB capable Macintosh computer using the USB cable to a VCR and 15k RGB/ component equipment. For more information, refer to the instruction manuals of pins...
... GB Connecting the Projector to audio output to video output a) Use a no-resistance cable. Connecting with video output connector of a type having two rows of the equipment you connect a USB capable Macintosh computer using the USB cable to a VCR and 15k RGB/ component equipment. For more information, refer to the instruction manuals of pins...

Operating Instructions
Page 25
... Press the INPUT key to display the Tilt menu and adjust the tilt using the Remote Commander, press the KEYSTONE key (VPL-CS6/CX6) or the D KEYSTONE key (VPL-EX1) on the Remote Commander to select the input source. Notes • If "Auto Input Search" is projected clearly....the Memory Stick slot MS (VPL-CX6 only) Video equipment connected to the VIDEO input connector Video equipment connected to the S VIDEO input connector VIDEO S VIDEO Smart APA (Auto Pixel Alignment) adjusts the picture of the connected equipment so that it is set to "On," the projector searches for the input signal...
... Press the INPUT key to display the Tilt menu and adjust the tilt using the Remote Commander, press the KEYSTONE key (VPL-CS6/CX6) or the D KEYSTONE key (VPL-EX1) on the Remote Commander to select the input source. Notes • If "Auto Input Search" is projected clearly....the Memory Stick slot MS (VPL-CX6 only) Video equipment connected to the VIDEO input connector Video equipment connected to the S VIDEO input connector VIDEO S VIDEO Smart APA (Auto Pixel Alignment) adjusts the picture of the connected equipment so that it is set to "On," the projector searches for the input signal...
Operating Instructions
Page 26
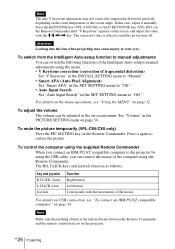
Note The auto V keystone adjustment may not correct the trapezoidal distortion perfectly, depending on the screen, and adjust the value with the M/m/ In this case, adjust it manually. Press the KEYSTONE key (VPL-CS6/CX6) or the D KEYSTONE key (VPL-EX1) on the Remote Commander until "V Keystone" appears on the room temperature or the screen angle.
Note The auto V keystone adjustment may not correct the trapezoidal distortion perfectly, depending on the screen, and adjust the value with the M/m/ In this case, adjust it manually. Press the KEYSTONE key (VPL-CS6/CX6) or the D KEYSTONE key (VPL-EX1) on the Remote Commander until "V Keystone" appears on the room temperature or the screen angle.

Operating Instructions
Page 39
... lower compared with "Standard" setting. Pressing the F on the TILT adjustment key or m/< key on the projector's security lock function. Select "Auto" for automatic correction, or "Manual" for changing the settings of the picture. Security Lock Turns on the Remote Commander, the less the... projector tilts and the lower the position of the projector. When the bottom of the trapezoid is longer than the ...
... lower compared with "Standard" setting. Pressing the F on the TILT adjustment key or m/< key on the projector's security lock function. Select "Auto" for automatic correction, or "Manual" for changing the settings of the picture. Security Lock Turns on the Remote Commander, the less the... projector tilts and the lower the position of the projector. When the bottom of the trapezoid is longer than the ...

Operating Instructions
Page 48
...you can operate the lens protector and the tilt adjuster (emergency mode) manually. To switch to the emergency mode. When the lens protector is left open, or the tilt... adjuster is equipped with qualified Sony personnel immediately. If the problem persists, read and following procedure, try to diagnose...switched to the emergency mode, follow the steps below. 1 Place a protective sheet (cloth) beneath the projector. The projector is extended, turn the groove of the adjuster in "Troubleshooting" (page 44). B Other On the...
...you can operate the lens protector and the tilt adjuster (emergency mode) manually. To switch to the emergency mode. When the lens protector is left open, or the tilt... adjuster is equipped with qualified Sony personnel immediately. If the problem persists, read and following procedure, try to diagnose...switched to the emergency mode, follow the steps below. 1 Place a protective sheet (cloth) beneath the projector. The projector is extended, turn the groove of the adjuster in "Troubleshooting" (page 44). B Other On the...

Operating Instructions
Page 49
...43/PAL-M/PAL-N system, switched automatically/ manually Resolution VPL-CS6: 600 horizontal TV lines (Video input) 800 × 600 dots (RGB input) VPL-CX6/EX1: 750 horizontal TV lines (Video input) 1,024 × 768 dots (RGB input) Acceptable computer signals VPL-CS6: fH: 19 to 72 kHz fV:...the actual value and the design value shown above. 1) ANSI lumen is a measuring method of the projector. Specifications Optical characteristics Projection system 3 LCD panels, 1 lens, projection system LCD panel VPL-CS6: Superhigh-aperture 0.7-inch SVGA panel, 1,440,000 pixels (480,000 pixels ×...
...43/PAL-M/PAL-N system, switched automatically/ manually Resolution VPL-CS6: 600 horizontal TV lines (Video input) 800 × 600 dots (RGB input) VPL-CX6/EX1: 750 horizontal TV lines (Video input) 1,024 × 768 dots (RGB input) Acceptable computer signals VPL-CS6: fH: 19 to 72 kHz fV:...the actual value and the design value shown above. 1) ANSI lumen is a measuring method of the projector. Specifications Optical characteristics Projection system 3 LCD panels, 1 lens, projection system LCD panel VPL-CS6: Superhigh-aperture 0.7-inch SVGA panel, 1,440,000 pixels (480,000 pixels ×...

