
User Guide
Page 2
n2 N Contents Before Use ...6 Documentation ...6 Ergonomic Considerations ...8 Getting Started ...10 Locating Controls and Ports...11 About the Indicator Lights ...17 Connecting a Power Source ...18 Using the Battery Pack ...19 Shutting Down Your Computer Safely ...24 Using Your VAIO Computer ...25 Using the Keyboard ...26 Using the Touch Pad ...28 Using the Optical Disc Drive ...29 Using PC Cards ...38 Using the Memory Stick Media ...41 Using the Internet...44 Using Wireless LAN (WLAN) ...45
n2 N Contents Before Use ...6 Documentation ...6 Ergonomic Considerations ...8 Getting Started ...10 Locating Controls and Ports...11 About the Indicator Lights ...17 Connecting a Power Source ...18 Using the Battery Pack ...19 Shutting Down Your Computer Safely ...24 Using Your VAIO Computer ...25 Using the Keyboard ...26 Using the Touch Pad ...28 Using the Optical Disc Drive ...29 Using PC Cards ...38 Using the Memory Stick Media ...41 Using the Internet...44 Using Wireless LAN (WLAN) ...45

User Guide
Page 3
... External Microphone ...63 Connecting a Universal Serial Bus (USB) Device...64 Connecting a Printer ...67 Connecting an i.LINK Device ...68 Connecting to a Network (LAN) ...70 Customizing Your VAIO Computer ...71 Setting the Password ...72 Setting Up Your Computer with VAIO Central ...75 Using the Power Saving Modes ...76 Managing Power with...
... External Microphone ...63 Connecting a Universal Serial Bus (USB) Device...64 Connecting a Printer ...67 Connecting an i.LINK Device ...68 Connecting to a Network (LAN) ...70 Customizing Your VAIO Computer ...71 Setting the Password ...72 Setting Up Your Computer with VAIO Central ...75 Using the Power Saving Modes ...76 Managing Power with...

User Guide
Page 6
Printed Documentation ❑ Welcome mat - Documentation Your documentation includes printed information and user guides to read on -screen User Guide. Contains an overview of -the-art personal computing. n6 N Before Use Before Use Congratulations on your purchase of this Sony VAIO® computer, and welcome to the on your VAIO computer. Contains safety guidelines and owner information. Sony has combined leading-edge technology in audio, video, computing, and communications to provide state-of connections, setting up information, etc. ❑ Safety information -
Printed Documentation ❑ Welcome mat - Documentation Your documentation includes printed information and user guides to read on -screen User Guide. Contains an overview of -the-art personal computing. n6 N Before Use Before Use Congratulations on your purchase of this Sony VAIO® computer, and welcome to the on your VAIO computer. Contains safety guidelines and owner information. Sony has combined leading-edge technology in audio, video, computing, and communications to provide state-of connections, setting up information, etc. ❑ Safety information -
User Guide
Page 7
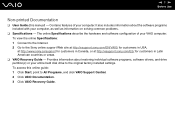
... software programs included with your VAIO computer. n7 N Before Use Non-printed Documentation ❑ User Guide (this online guide: 1 Click Start, point to the Sony online support Web site at http://esupport.sony.com/EN/VAIO/ for customers in USA, at http://www.sony.ca/support for customers in Canada..., or at http://esupport.sony.com/ES/ for customers in Latin American countries or areas. &#...
... software programs included with your VAIO computer. n7 N Before Use Non-printed Documentation ❑ User Guide (this online guide: 1 Click Start, point to the Sony online support Web site at http://esupport.sony.com/EN/VAIO/ for customers in USA, at http://www.sony.ca/support for customers in Canada..., or at http://esupport.sony.com/ES/ for customers in Latin American countries or areas. &#...

User Guide
Page 10
n 10 N Getting Started Getting Started This section describes how to start up your computer with only the supplied accessories connected and set up your VAIO computer. ! Before the first computer startup, do not connect any new hardware that did not normally come with using your system. Upon completion, connect one ...
n 10 N Getting Started Getting Started This section describes how to start up your computer with only the supplied accessories connected and set up your VAIO computer. ! Before the first computer startup, do not connect any new hardware that did not normally come with using your system. Upon completion, connect one ...

User Guide
Page 25
Using Your VAIO Computer This section describes how to get the most out of using your computer. ❑ Using the Keyboard (page 26) ❑ Using the Touch Pad (page 28) ❑ Using the Optical Disc Drive (page 29) ❑ Using PC Cards (page 38) ❑ Using the Memory Stick Media (page 41) ❑ Using the Internet (page 44) ❑ Using Wireless LAN (WLAN) (page 45) n 25 N Using Your VAIO Computer
Using Your VAIO Computer This section describes how to get the most out of using your computer. ❑ Using the Keyboard (page 26) ❑ Using the Touch Pad (page 28) ❑ Using the Optical Disc Drive (page 29) ❑ Using PC Cards (page 38) ❑ Using the Memory Stick Media (page 41) ❑ Using the Internet (page 44) ❑ Using Wireless LAN (WLAN) (page 45) n 25 N Using Your VAIO Computer

User Guide
Page 26
.../F4): speaker volume Fn + 8 (F5/F6): brightness control Fn + /T (F7): display output Functions Turns on and off the built-in speaker volume. n 26 N Using Your VAIO Computer Using the Keyboard Your keyboard is launched.
.../F4): speaker volume Fn + 8 (F5/F6): brightness control Fn + /T (F7): display output Functions Turns on and off the built-in speaker volume. n 26 N Using Your VAIO Computer Using the Keyboard Your keyboard is launched.

User Guide
Page 27
... standard view, as it is disabled during video playback. For details on the power. Combinations/Feature Fn + (F10): zoom Fn + (F12): Hibernate n 27 N Using Your VAIO Computer Functions Changes the screen resolution to magnify/restore your computer's screen view is restored because pressing this command, the states of the system and...
... standard view, as it is disabled during video playback. For details on the power. Combinations/Feature Fn + (F10): zoom Fn + (F12): Hibernate n 27 N Using Your VAIO Computer Functions Changes the screen resolution to magnify/restore your computer's screen view is restored because pressing this command, the states of the system and...

User Guide
Page 28
Press the left button twice. Move your finger along the bottom to scroll vertically. Press the right button (4) once. n 28 N Using Your VAIO Computer Using the Touch Pad The keyboard contains a cursor-pointing device, the touch pad (1). Action Point Click Double-click Right-click Drag Scroll Description Slide ...
Press the left button twice. Move your finger along the bottom to scroll vertically. Press the right button (4) once. n 28 N Using Your VAIO Computer Using the Touch Pad The keyboard contains a cursor-pointing device, the touch pad (1). Action Point Click Double-click Right-click Drag Scroll Description Slide ...

User Guide
Page 29
n 29 N Using Your VAIO Computer Using the Optical Disc Drive Your computer is equipped with the label side facing up and gently push it until the disc clicks into place. To insert a disc 1 Turn on the computer. 2 Press the drive eject button (1) to open the drive. The tray slides out. 3 Place a disc in the middle of the tray with an optical disc drive.
n 29 N Using Your VAIO Computer Using the Optical Disc Drive Your computer is equipped with the label side facing up and gently push it until the disc clicks into place. To insert a disc 1 Turn on the computer. 2 Press the drive eject button (1) to open the drive. The tray slides out. 3 Place a disc in the middle of the tray with an optical disc drive.

User Guide
Page 30
Doing so may cause the computer to malfunction. ✍ If you plan to use an external optical disc drive, connect the drive before you launch any preinstalled CD/DVD program. Do not remove the optical disc when the computer is in gently. ! n 30 N Using Your VAIO Computer 4 Close the tray by pushing it in a power saving mode (Standby or Hibernate).
Doing so may cause the computer to malfunction. ✍ If you plan to use an external optical disc drive, connect the drive before you launch any preinstalled CD/DVD program. Do not remove the optical disc when the computer is in gently. ! n 30 N Using Your VAIO Computer 4 Close the tray by pushing it in a power saving mode (Standby or Hibernate).

User Guide
Page 31
...* Records to see which types of media your specifications for the type of optical disc drive installed on the model you purchased. n 31 N Using Your VAIO Computer Reading and Writing CDs and DVDs Your computer plays and records CDs and DVDs, depending on your model. Check your optical disc drive supports.
...* Records to see which types of media your specifications for the type of optical disc drive installed on the model you purchased. n 31 N Using Your VAIO Computer Reading and Writing CDs and DVDs Your computer plays and records CDs and DVDs, depending on your model. Check your optical disc drive supports.

User Guide
Page 32
...disc or the manufacturer of the recordable disc. ✍ Supports writing data to DVD-R discs compliant with removable cartridge. n 32 N Using Your VAIO Computer ! A DualDisc is available only on the other side. Due to the multiple formats of discs now available, when buying pre-recorded or blank... Writing data to check both playback and recording compatibility with DVD-RAM version 1.0 is designed to playback discs that conform to DVD drives). Sony does NOT guarantee the compatibility of a DualDisc may not play on this product because it does not conform to the CD Standard. ! This...
...disc or the manufacturer of the recordable disc. ✍ Supports writing data to DVD-R discs compliant with removable cartridge. n 32 N Using Your VAIO Computer ! A DualDisc is available only on the other side. Due to the multiple formats of discs now available, when buying pre-recorded or blank... Writing data to check both playback and recording compatibility with DVD-RAM version 1.0 is designed to playback discs that conform to DVD drives). Sony does NOT guarantee the compatibility of a DualDisc may not play on this product because it does not conform to the CD Standard. ! This...

User Guide
Page 33
...and computer's DVD drives may cause writing errors. ❑ Do not switch power modes while using the pre-installed software and while using the VAIO Zone software. This may cause the computer to malfunction. ❑ When using your software. ❑ Only use circular discs. This will affect... touch the surface of the disc irreparably. ❑ Connect and use memory-resident utility software while writing data to a disc. n 33 N Using Your VAIO Computer Notes on writing data to a disc ❑ To make the data on a disc readable on discs. Fingerprints and dust on the surface of ...
...and computer's DVD drives may cause writing errors. ❑ Do not switch power modes while using the pre-installed software and while using the VAIO Zone software. This may cause the computer to malfunction. ❑ When using your software. ❑ Only use circular discs. This will affect... touch the surface of the disc irreparably. ❑ Connect and use memory-resident utility software while writing data to a disc. n 33 N Using Your VAIO Computer Notes on writing data to a disc ❑ To make the data on a disc readable on discs. Fingerprints and dust on the surface of ...

User Guide
Page 34
... have exceeded this may cause some interruptions in audio and video. ❑ When you are labeled on the DVDs to remove a USB device, such as VAIO Zone or WinDVD. If the DVD is playing a DVD. ❑ Region code indicators are playing a DVD (video or audio) and you can change it... saver and exit anti-virus software before playing a disc. ❑ Some discs recorded at 20 or 24 bits may cause a malfunction. n 34 N Using Your VAIO Computer Notes on such software for details. ❑ Close all ," this means that you stop the DVD first. If you change the DVD region code...
... have exceeded this may cause some interruptions in audio and video. ❑ When you are labeled on the DVDs to remove a USB device, such as VAIO Zone or WinDVD. If the DVD is playing a DVD. ❑ Region code indicators are playing a DVD (video or audio) and you can change it... saver and exit anti-virus software before playing a disc. ❑ Some discs recorded at 20 or 24 bits may cause a malfunction. n 34 N Using Your VAIO Computer Notes on such software for details. ❑ Close all ," this means that you stop the DVD first. If you change the DVD region code...

User Guide
Page 35
If the Audio CD window appears, click to open a CD program, such as the SonicStage software. n 35 N Using Your VAIO Computer Playing CDs To play an audio CD 1 Insert a disc into the optical disc drive. 2 If nothing appears on the desktop, then click Start, point to All Programs, and click to select an option.
If the Audio CD window appears, click to open a CD program, such as the SonicStage software. n 35 N Using Your VAIO Computer Playing CDs To play an audio CD 1 Insert a disc into the optical disc drive. 2 If nothing appears on the desktop, then click Start, point to All Programs, and click to select an option.

User Guide
Page 36
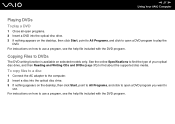
... disc media. Do not strike or shake the computer while writing data onto a disc. 1 Insert a blank disc into the optical disc drive. n 36 N Using Your VAIO Computer Copying Files to CDs See the online Specifications to find the type of your system's hardware configuration. To copy files to a disc !
... disc media. Do not strike or shake the computer while writing data onto a disc. 1 Insert a blank disc into the optical disc drive. n 36 N Using Your VAIO Computer Copying Files to CDs See the online Specifications to find the type of your system's hardware configuration. To copy files to a disc !
User Guide
Page 37
..., and then Reading and Writing CDs and DVDs (page 31) to use a program, see the help file included with the DVD program. n 37 N Using Your VAIO Computer Playing DVDs To play the DVD.
..., and then Reading and Writing CDs and DVDs (page 31) to use a program, see the help file included with the DVD program. n 37 N Using Your VAIO Computer Playing DVDs To play the DVD.

User Guide
Page 38
The Safely Remove Hardware icon appears on the taskbar. You do not need to your system. n 38 N Using Your VAIO Computer To insert a PC Card 1 Insert the PC Card into the slot. Some PC Cards or their functions may not be compatible with the front label facing up. 2 Gently push the PC Card into the PC Card slot with the computer. The PC Card is automatically detected by your computer. Using PC Cards PC Cards allow you to connect portable external devices to shut down the computer before inserting or removing a PC Card. Inserting a PC Card !
The Safely Remove Hardware icon appears on the taskbar. You do not need to your system. n 38 N Using Your VAIO Computer To insert a PC Card 1 Insert the PC Card into the slot. Some PC Cards or their functions may not be compatible with the front label facing up. 2 Gently push the PC Card into the PC Card slot with the computer. The PC Card is automatically detected by your computer. Using PC Cards PC Cards allow you to connect portable external devices to shut down the computer before inserting or removing a PC Card. Inserting a PC Card !

User Guide
Page 39
... manufacturer. For some PC Cards, if you alternate between Normal mode and Standby or Hibernate mode while the card is not recognized. n 39 N Using Your VAIO Computer ✍ Some devices may enter Standby mode.
... manufacturer. For some PC Cards, if you alternate between Normal mode and Standby or Hibernate mode while the card is not recognized. n 39 N Using Your VAIO Computer ✍ Some devices may enter Standby mode.

