CLIE Handbook
Page 1
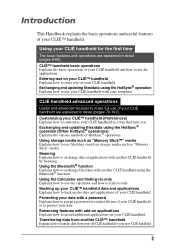
A-BPG-100-11 (1) Handbook © 2003 Sony Corporation CLIÉ™ handheld basic operations Entering text on your CLIÉ™ handheld Exchanging and updating files/data using the HotSync® operation Customizing your CLIÉ™ handheld (Preferences) Exchanging and updating files/data using the HotSync®... Using the Bluetooth® function Using the Calculator and finding records Backing up your CLIÉ™ handheld data and applications Protecting your data with a password Enhancing features with add-on applications Transferring data from another CLIÉ™...
A-BPG-100-11 (1) Handbook © 2003 Sony Corporation CLIÉ™ handheld basic operations Entering text on your CLIÉ™ handheld Exchanging and updating files/data using the HotSync® operation Customizing your CLIÉ™ handheld (Preferences) Exchanging and updating files/data using the HotSync®... Using the Bluetooth® function Using the Calculator and finding records Backing up your CLIÉ™ handheld data and applications Protecting your data with a password Enhancing features with add-on applications Transferring data from another CLIÉ™...
CLIE Handbook
Page 2
... HotSync® operations) Explains the various methods of HotSync® operations. Backing up your data with another CLIÉ handheld by beaming. Protecting your CLIÉ™ handheld data and applications Explains how to find records. Using your data. Using storage media such as "Memory Stick™" media... Explains how to protect your CLIÉ handheld for the first time The basic features and operations are explained in a way that suits you. Beaming Explains how to exchange data or...
... HotSync® operations) Explains the various methods of HotSync® operations. Backing up your data with another CLIÉ handheld by beaming. Protecting your CLIÉ™ handheld data and applications Explains how to find records. Using your data. Using storage media such as "Memory Stick™" media... Explains how to protect your CLIÉ handheld for the first time The basic features and operations are explained in a way that suits you. Beaming Explains how to exchange data or...
CLIE Handbook
Page 3
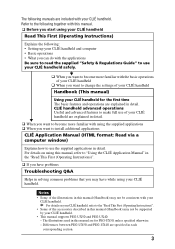
... common problems that you may not be consistent with your CLIÉ handheld. • This manual supports PEG-UX50 and PEG-UX40. - Refer to the "Read This First (Operating Instructions)". • Some of your CLIÉ handheld. For details on your CLIÉ handheld, refer to the following together with this manual (Handbook) may have problems...
... common problems that you may not be consistent with your CLIÉ handheld. • This manual supports PEG-UX50 and PEG-UX40. - Refer to the "Read This First (Operating Instructions)". • Some of your CLIÉ handheld. For details on your CLIÉ handheld, refer to the following together with this manual (Handbook) may have problems...
CLIE Handbook
Page 4
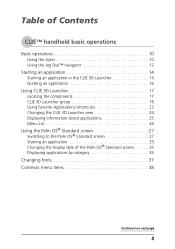
Table of Contents CLIÉ™ handheld basic operations Basic operations 10 Using the stylus 10 Using the Jog Dial™ navigator 12 Starting an application 14 Starting an application in the ...
Table of Contents CLIÉ™ handheld basic operations Basic operations 10 Using the stylus 10 Using the Jog Dial™ navigator 12 Starting an application 14 Starting an application in the ...
CLIE Handbook
Page 5
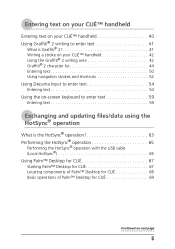
... Using Graffiti® 2 writing to enter text 41 What is Graffiti® 2 41 Writing a stroke on your CLIÉ™ handheld 42 Using the Graffiti® 2 writing area 42 Graffiti® 2 character list 44 Entering text 50 Using navigation strokes and shortcuts 52 Using Decuma Input ...
... Using Graffiti® 2 writing to enter text 41 What is Graffiti® 2 41 Writing a stroke on your CLIÉ™ handheld 42 Using the Graffiti® 2 writing area 42 Graffiti® 2 character list 44 Entering text 50 Using navigation strokes and shortcuts 52 Using Decuma Input ...
CLIE Handbook
Page 6
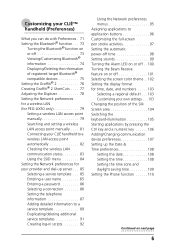
...; 2 76 Creating Graffiti® 2 ShortCuts . . . . 77 Adjusting the Digitizer 78 Setting the Network preferences for a wireless LAN (for PEG-UX50 only 79 Setting a wireless LAN access point manually 79 Searching and setting a wireless LAN access point manually . . . . 81 Connecting your CLIÉ...; handheld to a wireless LAN access point automatically 82 Checking the wireless LAN communication status 83 Using the SSID menu 84 Setting the Network preferences...
...; 2 76 Creating Graffiti® 2 ShortCuts . . . . 77 Adjusting the Digitizer 78 Setting the Network preferences for a wireless LAN (for PEG-UX50 only 79 Setting a wireless LAN access point manually 79 Searching and setting a wireless LAN access point manually . . . . 81 Connecting your CLIÉ...; handheld to a wireless LAN access point automatically 82 Checking the wireless LAN communication status 83 Using the SSID menu 84 Setting the Network preferences...

CLIE Handbook
Page 7
...File Link 114 Customizing HotSync® Manager startup and HotSync® setup options 115 Performing the HotSync® operation via a wireless LAN (for PEG-UX50 only 116 Performing the HotSync® operation using the Bluetooth® function . . . 119 Performing the IR HotSync® operation 123 ...menu items 149 Exchanging files/data without using CLIE Files 150 Notes on starting applications from storage media 151 Beaming Beaming between your CLIÉ handheld and another Palm OS® PDA. . . . . . 153 What you can do with beaming 153 Beaming information 154 Using storage ...
...File Link 114 Customizing HotSync® Manager startup and HotSync® setup options 115 Performing the HotSync® operation via a wireless LAN (for PEG-UX50 only 116 Performing the HotSync® operation using the Bluetooth® function . . . 119 Performing the IR HotSync® operation 123 ...menu items 149 Exchanging files/data without using CLIE Files 150 Notes on starting applications from storage media 151 Beaming Beaming between your CLIÉ handheld and another Palm OS® PDA. . . . . . 153 What you can do with beaming 153 Beaming information 154 Using storage ...
CLIE Handbook
Page 8
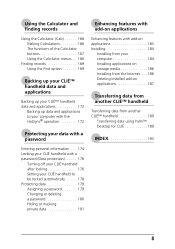
... Transferring data from another CLIÉ™ handheld Transferring data from another CLIÉ™ handheld 189 Transferring data using Palm™ Desktop for CLI 189 INDEX 193 Entering personal information . . . 174 Locking your CLIÉ handheld with a password (Data protection 176 Turning ...off your CLIÉ handheld after locking 176 Setting your CLIÉ handheld to be locked automatically . . . . . 178 ...
... Transferring data from another CLIÉ™ handheld Transferring data from another CLIÉ™ handheld 189 Transferring data using Palm™ Desktop for CLI 189 INDEX 193 Entering personal information . . . 174 Locking your CLIÉ handheld with a password (Data protection 176 Turning ...off your CLIÉ handheld after locking 176 Setting your CLIÉ handheld to be locked automatically . . . . . 178 ...
CLIE Handbook
Page 9
Basic operations 10 Starting an application 14 Using CLIE 3D Launcher 17 Using the Palm OS® Standard screen 27 Changing fonts 37 Common menu items 38 CLIÉ™ handheld basic operations This chapter explains the basic operations of menus that are common to applications and explains how to select character fonts. This chapter also gives an overview of your CLIÉ handheld such as using the stylus and the Jog Dial™ navigator, locating components and starting applications.
Basic operations 10 Starting an application 14 Using CLIE 3D Launcher 17 Using the Palm OS® Standard screen 27 Changing fonts 37 Common menu items 38 CLIÉ™ handheld basic operations This chapter explains the basic operations of menus that are common to applications and explains how to select character fonts. This chapter also gives an overview of your CLIÉ handheld such as using the stylus and the Jog Dial™ navigator, locating components and starting applications.

CLIE Handbook
Page 10
... "CLIÉ™ handheld components" in its holder on your CLIÉ handheld. Note To prevent losing the stylus, always put it back in the "Read This First (Operating Instructions)". CLIÉ™ handheld basic operations Continued on your CLIÉ handheld by directly touching the screen.... A stylus is stored in your CLIÉ handheld after use. The exact storage location varies depending on next page 10...
... "CLIÉ™ handheld components" in its holder on your CLIÉ handheld. Note To prevent losing the stylus, always put it back in the "Read This First (Operating Instructions)". CLIÉ™ handheld basic operations Continued on your CLIÉ handheld by directly touching the screen.... A stylus is stored in your CLIÉ handheld after use. The exact storage location varies depending on next page 10...
CLIE Handbook
Page 11
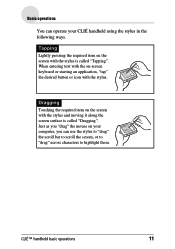
... mouse on -screen keyboard or starting an application, "tap" the desired button or icon with the on your computer, you can operate your CLIÉ handheld using the stylus in the following ways. CLIÉ™...
... mouse on -screen keyboard or starting an application, "tap" the desired button or icon with the on your computer, you can operate your CLIÉ handheld using the stylus in the following ways. CLIÉ™...
CLIE Handbook
Page 12
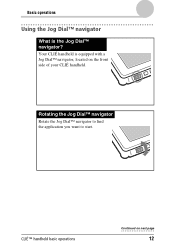
CLIÉ™ handheld basic operations Continued on the front side of your CLIÉ handheld. Basic operations Using the Jog Dial™ navigator What is equipped with a Jog Dial™ navigator, located on next page 12 Rotating the Jog Dial™ navigator Rotate the Jog Dial™ navigator to find the application you want to start. Your CLIÉ handheld is the Jog Dial™ navigator?
CLIÉ™ handheld basic operations Continued on the front side of your CLIÉ handheld. Basic operations Using the Jog Dial™ navigator What is equipped with a Jog Dial™ navigator, located on next page 12 Rotating the Jog Dial™ navigator Rotate the Jog Dial™ navigator to find the application you want to start. Your CLIÉ handheld is the Jog Dial™ navigator?

CLIE Handbook
Page 13
Tip Rotating while pressing the Jog Dial™ navigator In some applications, operations are executed by pressing and rotating the Jog Dial™ navigator. Note The operations you can perform using the Jog Dial™ navigator vary depending on your computer. b For details on the operations of each application, refer to start a selected application. Basic operations Pressing the Jog Dial™ navigator Press the Jog Dial™ navigator to select an item or to the "CLIÉ Application Manual" installed on the application. CLIÉ™ handheld basic operations 13
Tip Rotating while pressing the Jog Dial™ navigator In some applications, operations are executed by pressing and rotating the Jog Dial™ navigator. Note The operations you can perform using the Jog Dial™ navigator vary depending on your computer. b For details on the operations of each application, refer to start a selected application. Basic operations Pressing the Jog Dial™ navigator Press the Jog Dial™ navigator to select an item or to the "CLIÉ Application Manual" installed on the application. CLIÉ™ handheld basic operations 13
CLIE Handbook
Page 14
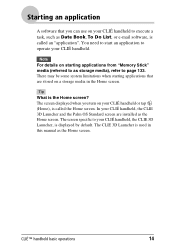
...to page 133. Tip What is the Home screen? The screen specific to execute a task, such as storage media), refer to operate your CLIÉ handheld. There may be some system limitations when starting applications from "Memory Stick" media (referred to as Date Book, To Do List, or e-mail software, is... called the Home screen. In your CLIÉ handheld, the CLIE 3D Launcher and the Palm OS Standard screen are stored on a storage media in this manual as the Home screen. Starting an application...
...to page 133. Tip What is the Home screen? The screen specific to execute a task, such as storage media), refer to operate your CLIÉ handheld. There may be some system limitations when starting applications from "Memory Stick" media (referred to as Date Book, To Do List, or e-mail software, is... called the Home screen. In your CLIÉ handheld, the CLIE 3D Launcher and the Palm OS Standard screen are stored on a storage media in this manual as the Home screen. Starting an application...
CLIE Handbook
Page 15
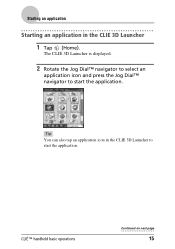
The CLIE 3D Launcher is displayed. 2 Rotate the Jog Dial™ navigator to select an application icon and press the Jog Dial™ navigator to start the application. Tip You can also tap an application icon in the CLIE 3D Launcher 1 Tap (Home). CLIÉ™ handheld basic operations Continued on next page 15 Starting an application Starting an application in the CLIE 3D Launcher to start the application.
The CLIE 3D Launcher is displayed. 2 Rotate the Jog Dial™ navigator to select an application icon and press the Jog Dial™ navigator to start the application. Tip You can also tap an application icon in the CLIE 3D Launcher 1 Tap (Home). CLIÉ™ handheld basic operations Continued on next page 15 Starting an application Starting an application in the CLIE 3D Launcher to start the application.

CLIE Handbook
Page 16
... one of two methods to another by tapping (Home). Note For some applications, you are working on are working on your CLIÉ handheld as follows. CLIÉ™ handheld basic operations 16 b For details, refer to the CLIE 3D Launcher by pressing and holding the BACK button. Starting an application Quitting...
... one of two methods to another by tapping (Home). Note For some applications, you are working on are working on your CLIÉ handheld as follows. CLIÉ™ handheld basic operations 16 b For details, refer to the CLIE 3D Launcher by pressing and holding the BACK button. Starting an application Quitting...
CLIE Handbook
Page 17
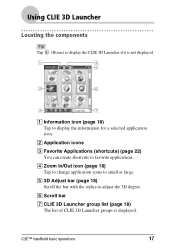
... with the stylus to favorite applications. B Application icons C Favorite Applications (shortcuts) (page 22) You can create shortcuts to adjust the 3D degree. CLIÉ™ handheld basic operations 17 D Zoom In/Out icon (page 18) Tap to change application icons to display the CLIE 3D Launcher if it is displayed. F Scroll...
... with the stylus to favorite applications. B Application icons C Favorite Applications (shortcuts) (page 22) You can create shortcuts to adjust the 3D degree. CLIÉ™ handheld basic operations 17 D Zoom In/Out icon (page 18) Tap to change application icons to display the CLIE 3D Launcher if it is displayed. F Scroll...
CLIE Handbook
Page 18
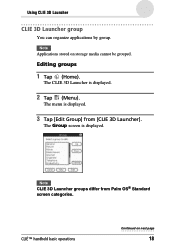
The CLIE 3D Launcher is displayed. Editing groups 1 Tap (Home). The menu is displayed. 3 Tap [Edit Group] from Palm OS® Standard screen categories. CLIÉ™ handheld basic operations Continued on storage media cannot be grouped. Note Applications stored on next page 18 Note CLIE 3D Launcher groups differ from [CLIE 3D Launcher]. The Group screen is displayed. 2 Tap (Menu). Using CLIE 3D Launcher CLIE 3D Launcher group You can organize applications by group.
The CLIE 3D Launcher is displayed. Editing groups 1 Tap (Home). The menu is displayed. 3 Tap [Edit Group] from Palm OS® Standard screen categories. CLIÉ™ handheld basic operations Continued on storage media cannot be grouped. Note Applications stored on next page 18 Note CLIE 3D Launcher groups differ from [CLIE 3D Launcher]. The Group screen is displayed. 2 Tap (Menu). Using CLIE 3D Launcher CLIE 3D Launcher group You can organize applications by group.

CLIE Handbook
Page 19
CLIÉ™ handheld basic operations Continued on next page 19 Name: You can rename groups. Ordering applications listed: Select an application and tap [Up] or [Down] to be ...
CLIÉ™ handheld basic operations Continued on next page 19 Name: You can rename groups. Ordering applications listed: Select an application and tap [Up] or [Down] to be ...

CLIE Handbook
Page 20
Note Groups that do not include an application are not listed in the CLIE 3D Launcher is displayed. 2 Enter a new group name, and then tap [OK]. The order of listed groups in the CLIE 3D Launcher. Creating a new group 1 Tap [New] on next page 20 The New Group screen is changed. CLIÉ™ handheld basic operations Continued on the Group screen. Using CLIE 3D Launcher Ordering listed groups 1 Select a group on the Group screen. 2 tap [Up] or [Down].
Note Groups that do not include an application are not listed in the CLIE 3D Launcher is displayed. 2 Enter a new group name, and then tap [OK]. The order of listed groups in the CLIE 3D Launcher. Creating a new group 1 Tap [New] on next page 20 The New Group screen is changed. CLIÉ™ handheld basic operations Continued on the Group screen. Using CLIE 3D Launcher Ordering listed groups 1 Select a group on the Group screen. 2 tap [Up] or [Down].