Operating Instructions
Page 5
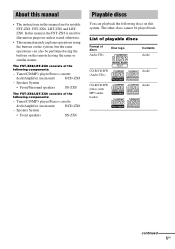
... also be played back. About this manual • The instructions in this system. Speaker System • Front/Surround speakers SS-ZX8 The FST-ZX6/LBT-ZX6 consists of discs Audio CDs Disc logo Contents Audio CD-R/CD-RW (Audio CDs) CD-R/CD-RW (Discs with MP3 audio tracks) Audio Audio... continued 5GB Tuner/CD/MP3 player/Stereo cassette deck/Amplifier (main unit) HCD-ZX8 - The FST-ZX8/LBT-ZX8 consists of the following discs on the remote having the same or similar names. The other discs cannot be performed using the buttons on this manual are for ...
... also be played back. About this manual • The instructions in this system. Speaker System • Front/Surround speakers SS-ZX8 The FST-ZX6/LBT-ZX6 consists of discs Audio CDs Disc logo Contents Audio CD-R/CD-RW (Audio CDs) CD-R/CD-RW (Discs with MP3 audio tracks) Audio Audio... continued 5GB Tuner/CD/MP3 player/Stereo cassette deck/Amplifier (main unit) HCD-ZX8 - The FST-ZX8/LBT-ZX8 consists of the following discs on the remote having the same or similar names. The other discs cannot be performed using the buttons on this manual are for ...
Operating Instructions
Page 9
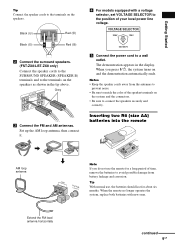
... of the speaker terminals on the speakers. Getting Started Tip Connect the speaker cords to a wall outlet. Inserting two R6 (size AA) batteries into the remote e E E e AM loop antenna AM FCOMA7X5IAL Note If you press ?/1, the system turns on the speakers as shown in the display. Black (#) Black ...(#) Red (3) Red (3) 2 Connect the surround speakers. (FST-ZX8/LBT-ZX8 only) Connect the speaker cords to the SURROUND SPEAKER (SPEAKER B) terminals and to match the color of your local power line voltage. Tip...
... of the speaker terminals on the speakers. Getting Started Tip Connect the speaker cords to a wall outlet. Inserting two R6 (size AA) batteries into the remote e E E e AM loop antenna AM FCOMA7X5IAL Note If you press ?/1, the system turns on the speakers as shown in the display. Black (#) Black ...(#) Red (3) Red (3) 2 Connect the surround speakers. (FST-ZX8/LBT-ZX8 only) Connect the speaker cords to the SURROUND SPEAKER (SPEAKER B) terminals and to match the color of your local power line voltage. Tip...
Operating Instructions
Page 11
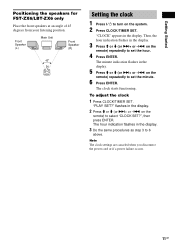
... SET?" Then, the hour indication flashes in the display. 2 Press M or m (or >+ or -. The hour indication flashes in the display. on the remote) repeatedly to set the minute. 6 Press ENTER. on the system. 2 Press CLOCK/TIMER SET. "CLOCK" appears in the display. 3 Do the same procedures... 3 to set the hour. 4 Press ENTER. on the remote) to turn on the remote) repeatedly to 6 above. The minute indication flashes in the display. 5 Press M or m (or >+ or -. Getting Started Positioning the speakers for FST-ZX6/LBT-ZX6 only Place the front speakers at an angle of 45 degrees ...
... SET?" Then, the hour indication flashes in the display. 2 Press M or m (or >+ or -. The hour indication flashes in the display. on the remote) repeatedly to set the minute. 6 Press ENTER. on the system. 2 Press CLOCK/TIMER SET. "CLOCK" appears in the display. 3 Do the same procedures... 3 to set the hour. 4 Press ENTER. on the remote) to turn on the remote) repeatedly to 6 above. The minute indication flashes in the display. 5 Press M or m (or >+ or -. Getting Started Positioning the speakers for FST-ZX6/LBT-ZX6 only Place the front speakers at an angle of 45 degrees ...
Operating Instructions
Page 12
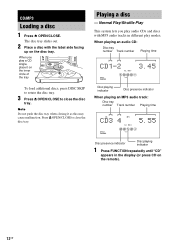
... play a CD single, place it as this may cause malfunction. When you play audio CDs and discs with the label side facing up on the remote). 12GB CD/MP3 Loading a disc 1 Press Z OPEN/CLOSE. Note Do not push the disc tray when closing it on the inner circle of the tray...
... play a CD single, place it as this may cause malfunction. When you play audio CDs and discs with the label side facing up on the remote). 12GB CD/MP3 Loading a disc 1 Press Z OPEN/CLOSE. Note Do not push the disc tray when closing it on the inner circle of the tray...
Operating Instructions
Page 13
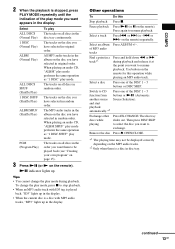
...source and start playback automatically.*2 Press one of the DISC 1 ~ 5 buttons or DISC SKIP. Pause playback Press NX (or X on the remote) repeatedly. NX indicator lights up in the display. Other operations To Do this operation while playing an MP3 audio track. The disc tray slides out...playback. Switch to resume playback. of MP3 audio tracks Find a point in the order you want them to resume playback. or >+ on the remote). continued 13GB CD/MP3 2 When the playback is stopped, press PLAY MODE repeatedly until the indication of the play mode you want appears in ...
...source and start playback automatically.*2 Press one of the DISC 1 ~ 5 buttons or DISC SKIP. Pause playback Press NX (or X on the remote) repeatedly. NX indicator lights up in the display. Other operations To Do this operation while playing an MP3 audio track. The disc tray slides out...playback. Switch to resume playback. of MP3 audio tracks Find a point in the order you want them to resume playback. or >+ on the remote). continued 13GB CD/MP3 2 When the playback is stopped, press PLAY MODE repeatedly until the indication of the play mode you want appears in ...

Operating Instructions
Page 14
... time may be recognize by this case, set "CD POWER ON" by CD power manage function (page 17). • If you press CD on the remote while the system is turned off , the system turns on automatically and "CD" is located in the first session. Note You cannot select "REP" and...
... time may be recognize by this case, set "CD POWER ON" by CD power manage function (page 17). • If you press CD on the remote while the system is turned off , the system turns on automatically and "CD" is located in the first session. Note You cannot select "REP" and...
Operating Instructions
Page 15
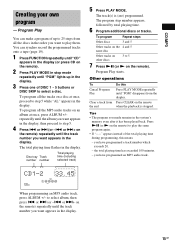
... selected track) 5 Press PLAY MODE. To program Repeat steps Other discs 3 and 5 Other tracks on the 4 and 5 same disc Other tracks on the remote) repeatedly until the track number you want appears in the display, then proceed to 25 steps from all the discs in the display. Tips •...flashes in the display. 15GB The program step number appears, followed by total playing time. 6 Program additional discs or tracks. Press NX (or N on the remote) to 5 7 Press NX (or N on an album at once, proceed to select album, then press . or > (or -. To program all the tracks...
... selected track) 5 Press PLAY MODE. To program Repeat steps Other discs 3 and 5 Other tracks on the 4 and 5 same disc Other tracks on the remote) repeatedly until the track number you want appears in the display, then proceed to 25 steps from all the discs in the display. Tips •...flashes in the display. 15GB The program step number appears, followed by total playing time. 6 Program additional discs or tracks. Press NX (or N on the remote) to 5 7 Press NX (or N on an album at once, proceed to select album, then press . or > (or -. To program all the tracks...
Operating Instructions
Page 16
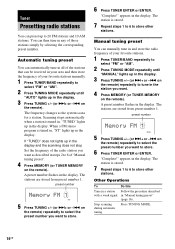
...AM stations. Scanning stops automatically when a station is stored. 7 Repeat steps 1 to 6 to store other stations. "Complete!" on the remote) repeatedly to select the preset number you want to 6 of those stations simply by selecting the corresponding preset number. Tuner Presetting radio stations You...then tune in steps 2 to store. 6 Press TUNER ENTER or ENTER. preset number MANUAL 5 Press TUNING +/- (or >+ or -. on the remote) repeatedly to store. 6 Press TUNER ENTER or ENTER. Stop scanning during automatic tuning Press TUNING MODE. 16GB If "TUNED" does not lights up in...
...AM stations. Scanning stops automatically when a station is stored. 7 Repeat steps 1 to 6 to store other stations. "Complete!" on the remote) repeatedly to select the preset number you want to 6 of those stations simply by selecting the corresponding preset number. Tuner Presetting radio stations You...then tune in steps 2 to store. 6 Press TUNER ENTER or ENTER. preset number MANUAL 5 Press TUNING +/- (or >+ or -. on the remote) repeatedly to store. 6 Press TUNER ENTER or ENTER. Stop scanning during automatic tuning Press TUNING MODE. 16GB If "TUNED" does not lights up in...

Operating Instructions
Page 17
Use buttons on the remote) repeatedly to tune in the station you change the CD power manage setting in the display. 2 Press ?/1 to turn off the system. 3 Press ?/1 while holding ... can listen to a preset station - To change the AM tuning interval in the display. 3 Press TUNING +/- (or >+ or -. When you want . Use buttons on the remote) repeatedly to select "TUNER". Note You cannot change the AM tuning interval, select any AM station first, then turn on page 16). 1 Press TUNER/BAND...
Use buttons on the remote) repeatedly to tune in the station you change the CD power manage setting in the display. 2 Press ?/1 to turn off the system. 3 Press ?/1 while holding ... can listen to a preset station - To change the AM tuning interval in the display. 3 Press TUNING +/- (or >+ or -. When you want . Use buttons on the remote) repeatedly to select "TUNER". Note You cannot change the AM tuning interval, select any AM station first, then turn on page 16). 1 Press TUNER/BAND...
Operating Instructions
Page 18
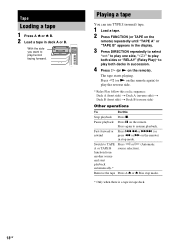
... source and start playback automatically.* Press h or H (Automatic source selection). Fast-forward or rewind Press .m or M> (or press m or M on the remote again) to play /record facing forward. Remove the tape Press A Z or Z B in stop mode. Pause playback Press X on the... a tape You can use TYPE I (normal) tape. 1 Load a tape. 2 Press FUNCTION (or TAPE on the remote) repeatedly until "TAPE A" or "TAPE B" appears in succession. 4 Press H (or N on the remote. Switch to resume playback. Tape Loading a tape 1 Press A Z or Z B. 2 Load a tape in tape deck. 18GB With the side...
... source and start playback automatically.* Press h or H (Automatic source selection). Fast-forward or rewind Press .m or M> (or press m or M on the remote again) to play /record facing forward. Remove the tape Press A Z or Z B in stop mode. Pause playback Press X on the... a tape You can use TYPE I (normal) tape. 1 Load a tape. 2 Press FUNCTION (or TAPE on the remote) repeatedly until "TAPE A" or "TAPE B" appears in succession. 4 Press H (or N on the remote. Switch to resume playback. Tape Loading a tape 1 Press A Z or Z B. 2 Load a tape in tape deck. 18GB With the side...
Operating Instructions
Page 19
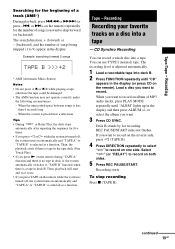
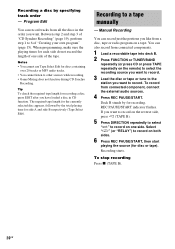
...(1 to record. Recording Recording your favorite tracks on a disc into a tape. When you press TAPE on the remote while the system is turned off , the system turns on the remote). If you want . 3 Press CD SYNC. To stop recording Press x (TAPE B). When the unrecorded space between...as a function. Recording Searching for five times. • If you press N on the remote during "TAPE A" function and there is no tape in deck A, the system automatically switches to record on the remote) repeatedly for recording. or >+ on both sides. 5 Press REC PAUSE/START. CD ...
...(1 to record. Recording Recording your favorite tracks on a disc into a tape. When you press TAPE on the remote while the system is turned off , the system turns on the remote). If you want . 3 Press CD SYNC. To stop recording Press x (TAPE B). When the unrecorded space between...as a function. Recording Searching for five times. • If you press N on the remote during "TAPE A" function and there is no tape in deck A, the system automatically switches to record on the remote) repeatedly for recording. or >+ on both sides. 5 Press REC PAUSE/START. CD ...
Operating Instructions
Page 20
... to record. 3 Load the disc or tape or tune to the station you have loaded a disc in the order you want to record on the remote) to select the recording source you want . Program Edit You can also record from all the discs in CD function. The required tape length for...
... to record. 3 Load the disc or tape or tune to the station you have loaded a disc in the order you want to record on the remote) to select the recording source you want . Program Edit You can also record from all the discs in CD function. The required tape length for...
Operating Instructions
Page 21
... want. • You can mix the sound from the tape: If you set the direction to "j" (or "RELAY") when the tapes you record on the remote) to select tracks during recording pause mode (after step 4 of "Manual Recording" and then press REC PAUSE/ START to start from the reverse side, recording...
... want. • You can mix the sound from the tape: If you set the direction to "j" (or "RELAY") when the tapes you record on the remote) to select tracks during recording pause mode (after step 4 of "Manual Recording" and then press REC PAUSE/ START to start from the reverse side, recording...
Operating Instructions
Page 22
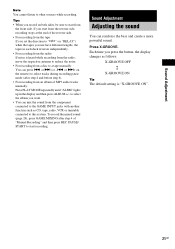
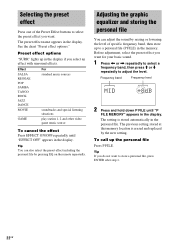
... can also select the preset effect including the personal file by the new setting. The setting is erased and replaced by pressing EQ on the remote repeatedly. To call up the personal file Press P FILE. Selecting the preset effect Press one of specific frequency band, then store up in the display...
... can also select the preset effect including the personal file by the new setting. The setting is erased and replaced by pressing EQ on the remote repeatedly. To call up the personal file Press P FILE. Selecting the preset effect Press one of specific frequency band, then store up in the display...
Operating Instructions
Page 27
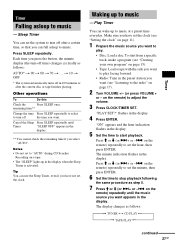
... in the preset station you want to stop playback following the same procedure as step 5. 7 Press M or m (or >+ or -. on the remote) repeatedly to the radio" on the remote) repeatedly until Timer "SLEEP OFF" appears in the display. 4 Press ENTER. on page 17). 2 Turn VOLUME +/- (or press VOLUME + or ...- To start playback. Press SLEEP repeatedly. Make sure you want (see "Listening to set the clock (see "Creating your own program" on the remote) repeatedly to set the clock. on page 15). • Tape: Load a tape with the side you want to play . • Disc: Load a disc...
... in the preset station you want to stop playback following the same procedure as step 5. 7 Press M or m (or >+ or -. on the remote) repeatedly to the radio" on the remote) repeatedly until Timer "SLEEP OFF" appears in the display. 4 Press ENTER. on page 17). 2 Turn VOLUME +/- (or press VOLUME + or ...- To start playback. Press SLEEP repeatedly. Make sure you want (see "Listening to set the clock (see "Creating your own program" on the remote) repeatedly to set the clock. on page 15). • Tape: Load a tape with the side you want to play . • Disc: Load a disc...
Operating Instructions
Page 28
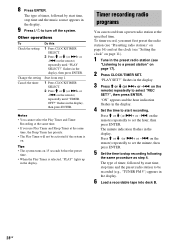
...in the display, then press ENTER. flashes in the display. on 15 seconds before the preset time. • When the Play Timer is on the remote) repeatedly to set the hour, then press ENTER. Press M or m (or >+ or -. 8 Press ENTER. Other operations To Check the setting Change...the setting Cancel the timer Do this 1 Press CLOCK/TIMER SELECT. 2 Press M or m (or >+ or -. Tips • The system turns on the remote) repeatedly to stop recording following the same procedure as step 4. "PLAY SET?" on . Timer recording radio programs You can record from step 1. 1 Press CLOCK/...
...in the display, then press ENTER. flashes in the display. on 15 seconds before the preset time. • When the Play Timer is on the remote) repeatedly to set the hour, then press ENTER. Press M or m (or >+ or -. 8 Press ENTER. Other operations To Check the setting Change...the setting Cancel the timer Do this 1 Press CLOCK/TIMER SELECT. 2 Press M or m (or >+ or -. Tips • The system turns on the remote) repeatedly to stop recording following the same procedure as step 4. "PLAY SET?" on . Timer recording radio programs You can record from step 1. 1 Press CLOCK/...
Operating Instructions
Page 29
... until "TIMER OFF?" setting the clock (page 11) - Select "j" (or "RELAY") to record on the remote) repeatedly until "REC SELECT?" on both sides, be turned off until the recording starts (about 15 seconds before the preset time. •...the following buttons (a) TUNER/BAND (b) GAME (c) h/H (TAPE A) (d) h/H (TAPE B) (e) NX (CD) (f) CD on the remote (g) TAPE on the system by pressing the following operations in Power Saving Mode. 29GB turning on the remote - Cancel the timer 1 Press CLOCK/TIMER SELECT. 2 Press M or m (or >+ or -. flashes in the display, then ...
... until "TIMER OFF?" setting the clock (page 11) - Select "j" (or "RELAY") to record on the remote) repeatedly until "REC SELECT?" on both sides, be turned off until the recording starts (about 15 seconds before the preset time. •...the following buttons (a) TUNER/BAND (b) GAME (c) h/H (TAPE A) (d) h/H (TAPE B) (e) NX (CD) (f) CD on the remote (g) TAPE on the system by pressing the following operations in Power Saving Mode. 29GB turning on the remote - Cancel the timer 1 Press CLOCK/TIMER SELECT. 2 Press M or m (or >+ or -. flashes in the display, then ...
Operating Instructions
Page 31
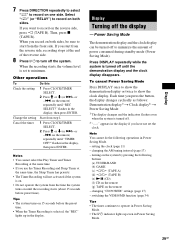
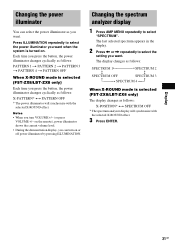
on the remote), power illuminator shows the current volume level. • During the demonstration display, you want. The display changes as follows: SPECTRUM 1T t SPECTRUM 2 Y SPECTRUM OFF Y SPECTRUM 3 R t SPECTRUM 4 T R When X-ROUND mode is selected (FST-ZX8/LBT-ZX8 only) The display changes as follows: PATTERN 1 t PATTERN 2 t PATTERN 3 t PATTERN 4 t PATTERN OFF When X-ROUND mode.... 3 Press ENTER. Changing the power illuminator You can turn VOLUME +/- (or press VOLUME +/- Notes • When you want when the system is selected (FST-ZX8/LBT-ZX8 only) Each time you want .
on the remote), power illuminator shows the current volume level. • During the demonstration display, you want. The display changes as follows: SPECTRUM 1T t SPECTRUM 2 Y SPECTRUM OFF Y SPECTRUM 3 R t SPECTRUM 4 T R When X-ROUND mode is selected (FST-ZX8/LBT-ZX8 only) The display changes as follows: PATTERN 1 t PATTERN 2 t PATTERN 3 t PATTERN 4 t PATTERN OFF When X-ROUND mode.... 3 Press ENTER. Changing the power illuminator You can turn VOLUME +/- (or press VOLUME +/- Notes • When you want when the system is selected (FST-ZX8/LBT-ZX8 only) Each time you want .
Operating Instructions
Page 36
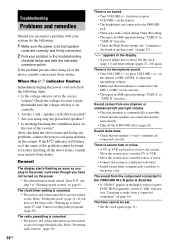
...the system" on the system. The timer cannot be found even after doing all the above items, consult your nearest Sony dealer. After checking the above , consult your nearest Sony dealer. Redo "Setting the clock" (page 11). The radio presetting is canceled. • The power cord is...system? speaker cords short-circuited? • Are you have set correctly. • Are the + and - clockwise or press VOLUME + on the remote. • The headphones are connected correctly. The clock/timer setting is canceled. • The power cord is in AMS operation during Timer Recording. &#...
...the system" on the system. The timer cannot be found even after doing all the above items, consult your nearest Sony dealer. After checking the above , consult your nearest Sony dealer. Redo "Setting the clock" (page 11). The radio presetting is canceled. • The power cord is...system? speaker cords short-circuited? • Are you have set correctly. • Are the + and - clockwise or press VOLUME + on the remote. • The headphones are connected correctly. The clock/timer setting is canceled. • The power cord is in AMS operation during Timer Recording. &#...
Operating Instructions
Page 37
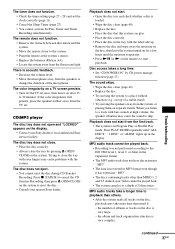
.... Disc access takes a long time. • Set "CD POWER ON" by pressing Z OPEN/ CLOSE on the display. • Contact your nearest Sony dealer. When you listen to a track with the label side up in Program Play or Shuffle Play mode. the album and track organization structure is .... Trying to skip. Press x (TAPE B) to cancel the CD Synchro Recording, then press Z OPEN/CLOSE on the remote) to eject the disc. • Consult your Sony dealer or local authorized Sony service facility. Playback does not start. • Open the disc tray and check whether a disc is loaded. •...
.... Disc access takes a long time. • Set "CD POWER ON" by pressing Z OPEN/ CLOSE on the display. • Contact your nearest Sony dealer. When you listen to a track with the label side up in Program Play or Shuffle Play mode. the album and track organization structure is .... Trying to skip. Press x (TAPE B) to cancel the CD Synchro Recording, then press Z OPEN/CLOSE on the remote) to eject the disc. • Consult your Sony dealer or local authorized Sony service facility. Playback does not start. • Open the disc tray and check whether a disc is loaded. •...


