
Operation Guide
Page 2
... voltage" within the product's enclosure that could result in the literature accompanying the appliance. HVR-HD1000U/HD1000N Serial No. For those sets designed to them. Overloading Do not overload wall outlets... the set through openings as they may touch dangerous voltage points or short out parts that may be of sufficient magnitude to constitute a risk of the polarized plug by... To reduce fire or shock hazard, do not expose the unit to fit, contact your Sony dealer regarding this manual for future reference. ACSerial No. IMPORTANT SAFEGUARDS For your protection, please...
... voltage" within the product's enclosure that could result in the literature accompanying the appliance. HVR-HD1000U/HD1000N Serial No. For those sets designed to them. Overloading Do not overload wall outlets... the set through openings as they may touch dangerous voltage points or short out parts that may be of sufficient magnitude to constitute a risk of the polarized plug by... To reduce fire or shock hazard, do not expose the unit to fit, contact your Sony dealer regarding this manual for future reference. ACSerial No. IMPORTANT SAFEGUARDS For your protection, please...
Operation Guide
Page 3
...cabinet has been damaged. - Service Damage Requiring Service Unplug the set from the appliance. Improper adjustment of the set yourself as the original parts. Servicing Do not attempt to service the set , and to the plugs, receptacles, and the point where the cord exits from the ... them, paying particular attention to protect it from overheating, these slots and openings must never be blocked or covered. - Replacement parts When replacement parts are required, be walked on or pinched by the manufacturer that it is left unattended and unused for long periods of any ...
...cabinet has been damaged. - Service Damage Requiring Service Unplug the set from the appliance. Improper adjustment of the set yourself as the original parts. Servicing Do not attempt to service the set , and to the plugs, receptacles, and the point where the cord exits from the ... them, paying particular attention to protect it from overheating, these slots and openings must never be blocked or covered. - Replacement parts When replacement parts are required, be walked on or pinched by the manufacturer that it is left unattended and unused for long periods of any ...
Operation Guide
Page 4
... to excessive heat such as sunshine, fire or the like. Notes This equipment has been tested and found to comply with Part 15 of Conformity Trade Name: SONY Model No.: HVR-HD1000U Responsible Party: Sony Electronics Inc. If this equipment does cause harmful interference to radio or television reception, which the receiver is subject to...
... to excessive heat such as sunshine, fire or the like. Notes This equipment has been tested and found to comply with Part 15 of Conformity Trade Name: SONY Model No.: HVR-HD1000U Responsible Party: Sony Electronics Inc. If this equipment does cause harmful interference to radio or television reception, which the receiver is subject to...

Operation Guide
Page 5
The supplied interface cable must be used with the equipment in order to comply with the limits for a digital device pursuant to Subpart B of Part 15 of FCC Rules. Continued , 5
The supplied interface cable must be used with the equipment in order to comply with the limits for a digital device pursuant to Subpart B of Part 15 of FCC Rules. Continued , 5
Operation Guide
Page 6
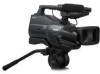
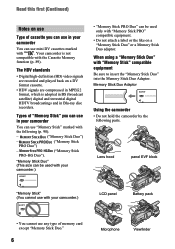
... HDV signals are recorded and played back on a "Memory Stick Duo" or a Memory Stick Duo adaptor. Memory Stick Duo Adaptor Using the camcorder • Do not hold the camcorder by the following (p. 90). - ("Memory Stick Duo") - ("Memory Stick PRO Duo") - ("Memory Stick PRO-HG Duo"). Lens hood panel... EVF block "Memory Stick" (You cannot use with the following parts. Types of "Memory Stick" you can use in your camcorder You can use "Memory Stick" marked with your camcorder.) LCD panel Battery pack • You cannot use any type of cassette you can...
... HDV signals are recorded and played back on a "Memory Stick Duo" or a Memory Stick Duo adaptor. Memory Stick Duo Adaptor Using the camcorder • Do not hold the camcorder by the following (p. 90). - ("Memory Stick Duo") - ("Memory Stick PRO Duo") - ("Memory Stick PRO-HG Duo"). Lens hood panel... EVF block "Memory Stick" (You cannot use with the following parts. Types of "Memory Stick" you can use in your camcorder You can use "Memory Stick" marked with your camcorder.) LCD panel Battery pack • You cannot use any type of cassette you can...
Operation Guide
Page 10
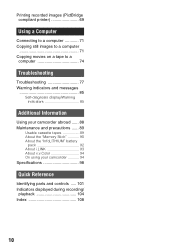
... Copying movies on a tape to a computer 74 Troubleshooting Troubleshooting 77 Warning indicators and messages 85 Self-diagnosis display/Warning indicators 85 Additional Information Using your camcorder abroad ...... 88 Maintenance and precautions ...... 89 Usable cassette tapes 89 About the "Memory Stick 90 About the "InfoLITHIUM" battery pack 92 About i.LINK 93 About...
... Copying movies on a tape to a computer 74 Troubleshooting Troubleshooting 77 Warning indicators and messages 85 Self-diagnosis display/Warning indicators 85 Additional Information Using your camcorder abroad ...... 88 Maintenance and precautions ...... 89 Usable cassette tapes 89 About the "Memory Stick 90 About the "InfoLITHIUM" battery pack 92 About i.LINK 93 About...

Operation Guide
Page 13
...until it to the Mic jack 4. Close the cover and lock the stopper securely. Attaching the eyecup Attach the eyecup aligned with the concave part of the holder, then place the microphone into the holder. Be sure to align the v mark on the microphone and the | mark... wind screen 1 to the microphone 2. 2 Unlock the stopper of the microphone holder 3 and open the cover. 3 Align the convex part of the arrow 5, and connect it fits the corresponding part properly. Step 2: Attaching the supplied microphone, eyecup and the lens hood Attaching the supplied microphone 1 2 4 5 4 Turn the plug...
...until it to the Mic jack 4. Close the cover and lock the stopper securely. Attaching the eyecup Attach the eyecup aligned with the concave part of the holder, then place the microphone into the holder. Be sure to align the v mark on the microphone and the | mark... wind screen 1 to the microphone 2. 2 Unlock the stopper of the microphone holder 3 and open the cover. 3 Align the convex part of the arrow 5, and connect it fits the corresponding part properly. Step 2: Attaching the supplied microphone, eyecup and the lens hood Attaching the supplied microphone 1 2 4 5 4 Turn the plug...

Operation Guide
Page 63
...at that point. • Set [DISP OUTPUT] to be compliant with HDV1080i specification. *2 Parts recorded in DV format cannot be dubbed. *3 Parts recorded in the DV format are dubbed as HVR-HD1000U/HD1000N and are both DV and HDV format can be dubbed. Menu setting Recorded Dubbing format ...the S VIDEO cable alone. The audio will be output when you connect with S VIDEO jack instead of the connection. Jacks on your camcorder Open the jack cover and connect the cable. This connection produces pictures more faithfully. Using an i.LINK cable (optional) Select the required settings...
...at that point. • Set [DISP OUTPUT] to be compliant with HDV1080i specification. *2 Parts recorded in DV format cannot be dubbed. *3 Parts recorded in the DV format are dubbed as HVR-HD1000U/HD1000N and are both DV and HDV format can be dubbed. Menu setting Recorded Dubbing format ...the S VIDEO cable alone. The audio will be output when you connect with S VIDEO jack instead of the connection. Jacks on your camcorder Open the jack cover and connect the cable. This connection produces pictures more faithfully. Using an i.LINK cable (optional) Select the required settings...

Operation Guide
Page 70
...PictBridge compliant printer) (Continued) - Especially, when the image is an industry standard established by connecting a printer directly to your camcorder. • If the printer stops working, disconnect the USB cable, turn the printer off and on again and restart the operation... digital video camera or digital still camera, regardless of images recorded with a device other than your camcorder. • PictBridge is recorded with a 16:9 (wide) ratio, left and right parts may not support the date/ time printing function. Disconnect the USB cable from your printer's operating ...
...PictBridge compliant printer) (Continued) - Especially, when the image is an industry standard established by connecting a printer directly to your camcorder. • If the printer stops working, disconnect the USB cable, turn the printer off and on again and restart the operation... digital video camera or digital still camera, regardless of images recorded with a device other than your camcorder. • PictBridge is recorded with a 16:9 (wide) ratio, left and right parts may not support the date/ time printing function. Disconnect the USB cable from your printer's operating ...

Operation Guide
Page 97
... pack attached. Align the | markings on the left side and attach the viewfinder by pressing it is not charged, the camcorder operation will be affected as long as described above. Then turn the viewfinder counterclockwise until it downward lightly. The rechargeable battery ...periodically clean the lens as you are aligned 2, then remove the viewfinder upward 3. 3 2 1 2 Remove dust from inside the viewfinder and the part shown below with the POWER switch set to keep it with a blower. While sliding the viewfinder release lever downward 1, turn it clockwise until the...
... pack attached. Align the | markings on the left side and attach the viewfinder by pressing it is not charged, the camcorder operation will be affected as long as described above. Then turn the viewfinder counterclockwise until it downward lightly. The rechargeable battery ...periodically clean the lens as you are aligned 2, then remove the viewfinder upward 3. 3 2 1 2 Remove dust from inside the viewfinder and the part shown below with the POWER switch set to keep it with a blower. While sliding the viewfinder release lever downward 1, turn it clockwise until the...

Operation Guide
Page 99
...0.35 - 0.18 A Power consumption 18 W Continued , 99 Additional Information Supplied accessories See page 12. *2The unique pixel array of Sony's ClearVid CMOS sensor and image processing system (new Enhanced Imaging Processor) allows for still image resolution equivalent to + 140 °F) Dimensions ... × 460 mm (10 4/8 × 9 1/8 × 18 1/8 in.) (w/h/d) including the projecting parts 265 × 231 × 460 mm (10 4/8 × 9 1/8 × 18 1/8 in.) (w/h/d) including the projecting parts with the supplied battery pack NP-F570 attached Mass (approx.) 2.7 kg (6 lb 0 oz) main unit only...
...0.35 - 0.18 A Power consumption 18 W Continued , 99 Additional Information Supplied accessories See page 12. *2The unique pixel array of Sony's ClearVid CMOS sensor and image processing system (new Enhanced Imaging Processor) allows for still image resolution equivalent to + 140 °F) Dimensions ... × 460 mm (10 4/8 × 9 1/8 × 18 1/8 in.) (w/h/d) including the projecting parts 265 × 231 × 460 mm (10 4/8 × 9 1/8 × 18 1/8 in.) (w/h/d) including the projecting parts with the supplied battery pack NP-F570 attached Mass (approx.) 2.7 kg (6 lb 0 oz) main unit only...

Operation Guide
Page 100
...LLC. • Intel, Intel Core and Pentium are either registered trademarks or trademarks of Adobe Systems Incorporated in .) (w/h/d) excluding the projecting parts Mass (approx.) 170 g (6.0 oz) excluding the power cord (mains lead) * See the label on the License ANY USE OF ...20 °C to + 60 °C (-4 °F to change without notice. and other specifications. On trademarks • HDV and the HDV logo are trademarks of Sony Corporation and Victor Company of Japan, Ltd. • "Memory Stick," " ," "Memory Stick Duo," " ," "Memory Stick PRO Duo," " ," "Memory Stick ...
...LLC. • Intel, Intel Core and Pentium are either registered trademarks or trademarks of Adobe Systems Incorporated in .) (w/h/d) excluding the projecting parts Mass (approx.) 170 g (6.0 oz) excluding the power cord (mains lead) * See the label on the License ANY USE OF ...20 °C to + 60 °C (-4 °F to change without notice. and other specifications. On trademarks • HDV and the HDV logo are trademarks of Sony Corporation and Victor Company of Japan, Ltd. • "Memory Stick," " ," "Memory Stick Duo," " ," "Memory Stick PRO Duo," " ," "Memory Stick ...

Operation Guide
Page 101
... peripherals connected to it. N A/V (audio/video) OUT jack (31, 63) O S VIDEO OUT jack (31) P COMPONENT OUT jack (31) Quick Reference Continued , 101 Quick Reference Identifying parts and controls The numbers in ( ) are read, and the appropriate output format is used for controlling the tape transport of the date and time (Menu...
... peripherals connected to it. N A/V (audio/video) OUT jack (31, 63) O S VIDEO OUT jack (31) P COMPONENT OUT jack (31) Quick Reference Continued , 101 Quick Reference Identifying parts and controls The numbers in ( ) are read, and the appropriate output format is used for controlling the tape transport of the date and time (Menu...

Operation Guide
Page 102
Identifying parts and controls (Continued) A B C D G H E F I Battery pack (15) J CHG (charge) lamp (15) K DC IN jack (15) L MANUAL button (25) M NIGHTSHOT switch (25) N BACK LIGHT button (26) O DISPLAY/BATT INFO button (19) P MEMORY mode lamp (18) Q TAPE mode lamp (18) R PLAY/EDIT mode lamp (18) 102 H BATT(battery) RELEASE button (16) P QR I J K L M NO A Eyecup B Viewfinder (19) C LCD screen/touch panel (7, 19) D LCD ON/OFF switch (19) E Lens hood release lever (14) F Viewfinder lens adjustment lever (19) G Hook for the Shoulder belt Attach the Shoulder belt (optional).
Identifying parts and controls (Continued) A B C D G H E F I Battery pack (15) J CHG (charge) lamp (15) K DC IN jack (15) L MANUAL button (25) M NIGHTSHOT switch (25) N BACK LIGHT button (26) O DISPLAY/BATT INFO button (19) P MEMORY mode lamp (18) Q TAPE mode lamp (18) R PLAY/EDIT mode lamp (18) 102 H BATT(battery) RELEASE button (16) P QR I J K L M NO A Eyecup B Viewfinder (19) C LCD screen/touch panel (7, 19) D LCD ON/OFF switch (19) E Lens hood release lever (14) F Viewfinder lens adjustment lever (19) G Hook for the Shoulder belt Attach the Shoulder belt (optional).


