Operation Guide
Page 7
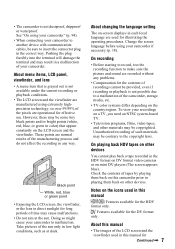
.... • Television programs, films, video tapes, and other devices. About this manual Features available for Continued , 7 • The camcorder is not available under the current recording or playback conditions. • The LCD screen and the viewfinder are manufactured using extremely highprecision technology,...% of the pixels are used for effective use. However, there may result in low light conditions, such as at the sun. Change the screen language before using your camcorder. Pushing the plug forcibly into the terminal will damage the terminal and may be copyrighted...
.... • Television programs, films, video tapes, and other devices. About this manual Features available for Continued , 7 • The camcorder is not available under the current recording or playback conditions. • The LCD screen and the viewfinder are manufactured using extremely highprecision technology,...% of the pixels are used for effective use. However, there may result in low light conditions, such as at the sun. Change the screen language before using your camcorder. Pushing the plug forcibly into the terminal will damage the terminal and may be copyrighted...
Operation Guide
Page 8
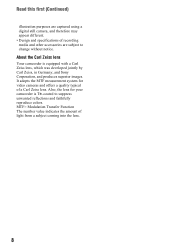
...= Modulation Transfer Function The number value indicates the amount of light from a subject coming into the lens. 8 It adopts the MTF measurement system for your camcorder is equipped with a Carl Zeiss lens, which was developed jointly by Carl Zeiss, in Germany, and Sony Corporation, and produces superior images. About the Carl Zeiss lens...
...= Modulation Transfer Function The number value indicates the amount of light from a subject coming into the lens. 8 It adopts the MTF measurement system for your camcorder is equipped with a Carl Zeiss lens, which was developed jointly by Carl Zeiss, in Germany, and Sony Corporation, and produces superior images. About the Carl Zeiss lens...

Operation Guide
Page 15
...lights up and charging starts. The CHG (charge) lamp turns off when the battery is facing to the v mark on the DC plug is fully charged. The battery pack will not lose its charge in this case. b Notes • Disconnect the AC Adaptor from the DC IN jack holding both the camcorder... the wall outlet (wall socket) DC plug 4 AC Adaptor Power cord (Mains lead) DC IN jack POWER switch CHG (charge) lamp You can operate your camcorder connected to a power source such as a wall outlet (wall socket) as shown in the illustration. z Tips • You can charge the "InfoLITHIUM" battery pack ...
...lights up and charging starts. The CHG (charge) lamp turns off when the battery is facing to the v mark on the DC plug is fully charged. The battery pack will not lose its charge in this case. b Notes • Disconnect the AC Adaptor from the DC IN jack holding both the camcorder... the wall outlet (wall socket) DC plug 4 AC Adaptor Power cord (Mains lead) DC IN jack POWER switch CHG (charge) lamp You can operate your camcorder connected to a power source such as a wall outlet (wall socket) as shown in the illustration. z Tips • You can charge the "InfoLITHIUM" battery pack ...

Operation Guide
Page 21
b Notes • When the access lamp is reading/writing data. Do not shake or knock your camcorder is lit or flashing, your camcorder, turn the power off, eject the "Memory Stick Duo," or remove the battery pack. Otherwise, image data may be damaged. • When inserting or ejecting ... force the "Memory Stick Duo" into the "Memory Stick Duo" slot in the right direction until it clicks. Access lamp To eject a "Memory Stick Duo" Lightly push the "Memory Stick Duo" in once. Getting Started 1 Open the jack cover. 2 Insert the "Memory Stick Duo" into the slot in the wrong direction...
b Notes • When the access lamp is reading/writing data. Do not shake or knock your camcorder is lit or flashing, your camcorder, turn the power off, eject the "Memory Stick Duo," or remove the battery pack. Otherwise, image data may be damaged. • When inserting or ejecting ... force the "Memory Stick Duo" into the "Memory Stick Duo" slot in the right direction until it clicks. Access lamp To eject a "Memory Stick Duo" Lightly push the "Memory Stick Duo" in once. Getting Started 1 Open the jack cover. 2 Insert the "Memory Stick Duo" into the slot in the wrong direction...
Operation Guide
Page 26
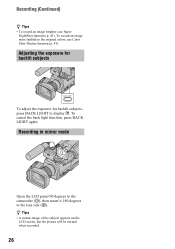
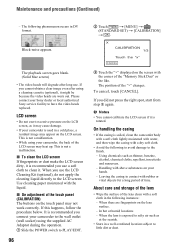
To cancel the back light function, press BACK LIGHT again. Recording in mirror mode Open the LCD panel 90 degrees to the camcorder (1), then rotate it 180 degrees to the original colors, use Super NightShot function (p. 43). To record an image more faithful to the lens side (2). z Tips &#... record an image brighter, use Color Slow Shutter function (p. 43). Adjusting the exposure for backlit subjects To adjust the exposure for backlit subjects, press BACK LIGHT to display ..
To cancel the back light function, press BACK LIGHT again. Recording in mirror mode Open the LCD panel 90 degrees to the camcorder (1), then rotate it 180 degrees to the original colors, use Super NightShot function (p. 43). To record an image more faithful to the lens side (2). z Tips &#... record an image brighter, use Color Slow Shutter function (p. 43). Adjusting the exposure for backlit subjects To adjust the exposure for backlit subjects, press BACK LIGHT to display ..

Operation Guide
Page 39
... too dark. * Adjusted to focus on subjects farther away only. ** Adjusted not to prevent people's faces from appearing dark in strong light or reflected light, such as at a beach in twilight scenes. TWILIGHT* ( ) Select to bring out the subject such as people or flowers while creating...of situations such as sunsets and sunrises. Continued , 39 This setting also prevents your camcorder to the recording conditions The default settings are selected. CAMERA SET menu Settings to adjust your camcorder from focusing on glass or metal mesh in very bright, white conditions, such as...
... too dark. * Adjusted to focus on subjects farther away only. ** Adjusted not to prevent people's faces from appearing dark in strong light or reflected light, such as at a beach in twilight scenes. TWILIGHT* ( ) Select to bring out the subject such as people or flowers while creating...of situations such as sunsets and sunrises. Continued , 39 This setting also prevents your camcorder to the recording conditions The default settings are selected. CAMERA SET menu Settings to adjust your camcorder from focusing on glass or metal mesh in very bright, white conditions, such as...

Operation Guide
Page 42
... (Continued) z Tips • Touch if the subject is white or the backlight is bright, or touch if the subject is black or the light is dim. • You can adjust the automatic exposure level to brighter or darker when [EXPOSURE] is set to [AUTO]. • You can...a subject not located in .) for wide angle and about 80 cm (about 2 5/8 feet) for recording. b Notes • The minimum possible distance between camcorder and subject while maintaining sharp focus is anything other than the default setting. appears when [CAMERA COLOR] is about 1 cm (about 13/32 in the...
... (Continued) z Tips • Touch if the subject is white or the backlight is bright, or touch if the subject is black or the light is dim. • You can adjust the automatic exposure level to brighter or darker when [EXPOSURE] is set to [AUTO]. • You can...a subject not located in .) for wide angle and about 80 cm (about 2 5/8 feet) for recording. b Notes • The minimum possible distance between camcorder and subject while maintaining sharp focus is anything other than the default setting. appears when [CAMERA COLOR] is about 1 cm (about 13/32 in the...

Operation Guide
Page 43
...appear on the screen. You can record an image brighter in color even in .). When you set to focus automatically. The motion of your camcorder changes depending on the brightness. b Notes • Adjust the focus manually ([FOCUS], p. 42) when it is hard to focus automatically. ...• The shutter speed of the T (Telephoto) side automatically and allows for recording subjects at this case. NS LIGHT (NightShot Light) When using [NS LIGHT] is hard to ON. To cancel [COLOR SLOW S], touch [OFF]. This may be recorded at a maximum of 16 times...
...appear on the screen. You can record an image brighter in color even in .). When you set to focus automatically. The motion of your camcorder changes depending on the brightness. b Notes • Adjust the focus manually ([FOCUS], p. 42) when it is hard to focus automatically. ...• The shutter speed of the T (Telephoto) side automatically and allows for recording subjects at this case. NS LIGHT (NightShot Light) When using [NS LIGHT] is hard to ON. To cancel [COLOR SLOW S], touch [OFF]. This may be recorded at a maximum of 16 times...

Operation Guide
Page 56
...that has the component input jack and is capable of the viewfinder. COMPONENT Select [COMPONENT] when connecting your camcorder to a TV with the component input jack. 480i Select when connecting your camcorder to outside power sources, [BRIGHT] is automatically selected for the following outputs. - On a 4:3 standard ... a TV with the component input jack. STANDARD SET menu (Continued) x VF B.LIGHT You can set an output video signal type from the HDV/DV 56 Interface (i.LINK). B 1080i/480i Select when connecting your camcorder to the DV format and output it from HDV format signals.
...that has the component input jack and is capable of the viewfinder. COMPONENT Select [COMPONENT] when connecting your camcorder to a TV with the component input jack. 480i Select when connecting your camcorder to outside power sources, [BRIGHT] is automatically selected for the following outputs. - On a 4:3 standard ... a TV with the component input jack. STANDARD SET menu (Continued) x VF B.LIGHT You can set an output video signal type from the HDV/DV 56 Interface (i.LINK). B 1080i/480i Select when connecting your camcorder to the DV format and output it from HDV format signals.

Operation Guide
Page 66
... recording and restart it, the picture may not be recorded smoothly. • When a 4:3 video signal is paused on a VCR while recording to your camcorder. 7 Touch [REC START] at the scene you want to record. Recording still images 1 Perform steps 1 to 4 in the DV format. •... connected device appears on the LCD screen of your VCR. Dubbing to VCR or DVD/HDD recorders (Continued) 6 Start playing the cassette on your camcorder. 3 Press PHOTO lightly at the point you want to start recording. 8 Stop recording. Touch (Stop) or [REC PAUSE]. 9 Touch t . b Notes • You...
... recording and restart it, the picture may not be recorded smoothly. • When a 4:3 video signal is paused on a VCR while recording to your camcorder. 7 Touch [REC START] at the scene you want to record. Recording still images 1 Perform steps 1 to 4 in the DV format. •... connected device appears on the LCD screen of your VCR. Dubbing to VCR or DVD/HDD recorders (Continued) 6 Start playing the cassette on your camcorder. 3 Press PHOTO lightly at the point you want to start recording. 8 Stop recording. Touch (Stop) or [REC PAUSE]. 9 Touch t . b Notes • You...

Operation Guide
Page 67
... (Play) to play back the tape, then press PHOTO lightly at the scene you want to delete with the write-protect... Notes • The date and time the picture is recorded on the tape and stored on the tape are displayed. On your camcorder. 1 Slide the POWER switch to PLAY/ EDIT. 2 Search and record the scene you want to delete t t [YES]. Still...Editing 67 Deleting recorded pictures from a movie you have a recorded tape and a "Memory Stick Duo" inserted into your camcorder, the date and time the picture is protected (p. 68). Check the image and press it fully. Make sure you...
... (Play) to play back the tape, then press PHOTO lightly at the scene you want to delete with the write-protect... Notes • The date and time the picture is recorded on the tape and stored on the tape are displayed. On your camcorder. 1 Slide the POWER switch to PLAY/ EDIT. 2 Search and record the scene you want to delete t t [YES]. Still...Editing 67 Deleting recorded pictures from a movie you have a recorded tape and a "Memory Stick Duo" inserted into your camcorder, the date and time the picture is protected (p. 68). Check the image and press it fully. Make sure you...

Operation Guide
Page 77
...not a malfunction. • Fully charge the battery again. The battery pack may get warmer while you use the following table to the camcorder correctly (p. 15). Troubleshooting Troubleshooting If you run into any problems using a sharppointed object (If you press the RESET button, all settings ...items). If the problem persists, disconnect the power source and contact your Sony dealer. Batteries/Power sources The power abruptly turns off. • Charge the battery pack (p. 15). The CHG (charge) lamp does not light while the battery pack is being charged. • Attach the battery...
...not a malfunction. • Fully charge the battery again. The battery pack may get warmer while you use the following table to the camcorder correctly (p. 15). Troubleshooting Troubleshooting If you run into any problems using a sharppointed object (If you press the RESET button, all settings ...items). If the problem persists, disconnect the power source and contact your Sony dealer. Batteries/Power sources The power abruptly turns off. • Charge the battery pack (p. 15). The CHG (charge) lamp does not light while the battery pack is being charged. • Attach the battery...

Operation Guide
Page 78
...appear. The buttons on the touch panel do not work correctly or do not appear on the touch panel. • Touch the LCD screen lightly. • Press DISPLAY/BATT INFO on tape; This is not clear. • Move the viewfinder lens adjustment lever until the picture appears clearly...the compartment. • Make sure the power source (battery pack or AC Adaptor) is connected correctly (p. 15). • Moisture condensation has occurred inside the camcorder (p. 95). The cassette is not displayed. • Set [ REMAINING] to [ON] to check the warning messages (p. 86). you can only rewind ...
...appear. The buttons on the touch panel do not work correctly or do not appear on the touch panel. • Touch the LCD screen lightly. • Press DISPLAY/BATT INFO on tape; This is not clear. • Move the viewfinder lens adjustment lever until the picture appears clearly...the compartment. • Make sure the power source (battery pack or AC Adaptor) is connected correctly (p. 15). • Moisture condensation has occurred inside the camcorder (p. 95). The cassette is not displayed. • Set [ REMAINING] to [ON] to check the warning messages (p. 86). you can only rewind ...

Operation Guide
Page 83
... or a distorted picture may not be used repeatedly for recording. Still pictures cannot be dubbed from a tape to the recorded tape on another camcorder is not heard. • Adjust [ AUDIO MIX] from the [ST1] (original sound) side until the sound is set to a recorded... tape on this function is set BACK LIGHT function [FIREWORKS], [SPOT METER], [MANUAL] of [EXPOSURE] [SCENE SELECT] NightShot, [TELE MACRO], [CINEMA EFECT], [OLD MOVIE], [COLOR SLOW S] [SPOT METER] ...
... or a distorted picture may not be used repeatedly for recording. Still pictures cannot be dubbed from a tape to the recorded tape on another camcorder is not heard. • Adjust [ AUDIO MIX] from the [ST1] (original sound) side until the sound is set to a recorded... tape on this function is set BACK LIGHT function [FIREWORKS], [SPOT METER], [MANUAL] of [EXPOSURE] [SCENE SELECT] NightShot, [TELE MACRO], [CINEMA EFECT], [OLD MOVIE], [COLOR SLOW S] [SPOT METER] ...
Operation Guide
Page 96
...Slide the POWER switch to the LCD screen. b Notes • You cannot calibrate the LCD screen if it is soiled, clean the camcorder body with a soft cloth lightly moistened with water, and then wipe the casing with a soft cloth in the following phenomenon occurs in a well-ventilated location subject to... with above substances on the touch panel may heat up. The position of the touch panel (CALIBRATION) The buttons on your Sony dealer or local authorized Sony service facility to clean it might be because the video heads are fingerprints on the lens surface. - If you use a ...
...Slide the POWER switch to the LCD screen. b Notes • You cannot calibrate the LCD screen if it is soiled, clean the camcorder body with a soft cloth lightly moistened with water, and then wipe the casing with a soft cloth in the following phenomenon occurs in a well-ventilated location subject to... with above substances on the touch panel may heat up. The position of the touch panel (CALIBRATION) The buttons on your Sony dealer or local authorized Sony service facility to clean it might be because the video heads are fingerprints on the lens surface. - If you use a ...

Operation Guide
Page 97
...| markings on the left side are not recording the date. Then turn the viewfinder counterclockwise until it with a blower. Use your camcorder is connected to the wall outlet (wall socket) via the AC Adaptor or while the battery pack is inserted. Additional Information 3 ... the pre-installed rechargeable battery. Align the | markings on the left side and attach the viewfinder by pressing it downward lightly. x Procedures Connect your camcorder at all without the AC Adaptor connected or the battery pack attached. Removing dust from inside the viewfinder 1 Remove the viewfinder...
...| markings on the left side are not recording the date. Then turn the viewfinder counterclockwise until it with a blower. Use your camcorder is connected to the wall outlet (wall socket) via the AC Adaptor or while the battery pack is inserted. Additional Information 3 ... the pre-installed rechargeable battery. Align the | markings on the left side and attach the viewfinder by pressing it downward lightly. x Procedures Connect your camcorder at all without the AC Adaptor connected or the battery pack attached. Removing dust from inside the viewfinder 1 Remove the viewfinder...


