Operating Instructions (CMTEP707)
Page 2
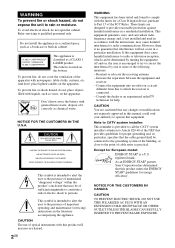
... shock, do not cover the ventilation of cable entry as a bookcase or built-in this manual could void your authority to the point of the apparatus with newspapers, table-cloths, curtains, etc...try to the presence of the following measures: - As an ENERGY STAR partner, Sony Corporation has determined that the cable ground shall be of sufficient magnitude to persons. Do not...not expressly approved in cabinet. Note to CATV system installer: This reminder is located on the apparatus. Refer servicing to the grounding system of the building, as chemical waste. This label...
... shock, do not cover the ventilation of cable entry as a bookcase or built-in this manual could void your authority to the point of the apparatus with newspapers, table-cloths, curtains, etc...try to the presence of the following measures: - As an ENERGY STAR partner, Sony Corporation has determined that the cable ground shall be of sufficient magnitude to persons. Do not...not expressly approved in cabinet. Note to CATV system installer: This reminder is located on the apparatus. Refer servicing to the grounding system of the building, as chemical waste. This label...
Operating Instructions (CMTEP707)
Page 3
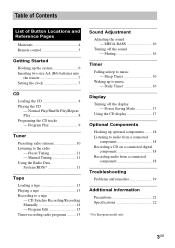
Manual Tuning 11 Using the Radio Data System (RDS 11 Tape Loading a tape 13 Playing a tape 13 Recording to music - Muting 16 Timer Falling asleep to a tape - Sleep Timer 16 Waking up to ... 3GB Program Edit 15 Timer-recording radio programs ......... 15 Sound Adjustment Adjusting the sound - Power Saving Mode 17 Using the CD display 17 Optional Components Hooking up the system 6 Inserting two size AA (R6) batteries into the remote 7 Setting the clock 7 CD Loading the CD 8 Playing the CD - Normal Play/Shuffle Play...
Manual Tuning 11 Using the Radio Data System (RDS 11 Tape Loading a tape 13 Playing a tape 13 Recording to music - Muting 16 Timer Falling asleep to a tape - Sleep Timer 16 Waking up to ... 3GB Program Edit 15 Timer-recording radio programs ......... 15 Sound Adjustment Adjusting the sound - Power Saving Mode 17 Using the CD display 17 Optional Components Hooking up the system 6 Inserting two size AA (R6) batteries into the remote 7 Setting the clock 7 CD Loading the CD 8 Playing the CD - Normal Play/Shuffle Play...
Operating Instructions (CMTEP707)
Page 10
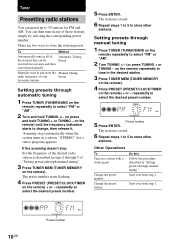
There are two ways to select the desired preset number. 5 Press ENTER. Scanning stops automatically when the system tunes in any of those stations simply by selecting the corresponding preset number. The preset number starts flashing. 4 Press PRESET (PRESET/CLOCK/TIMER on the ... can preset up to select the desired preset number. - You can then tune in a station. on the remote) repeatedly to tune in "Setting presets through manual tuning". 3 Press TUNER MEM (TUNER MEMORY on the remote) repeatedly to select "FM" or "AM". 2 Turn and hold TUNING +/- (or press and hold TUNING + or...
There are two ways to select the desired preset number. 5 Press ENTER. Scanning stops automatically when the system tunes in any of those stations simply by selecting the corresponding preset number. The preset number starts flashing. 4 Press PRESET (PRESET/CLOCK/TIMER on the ... can preset up to select the desired preset number. - You can then tune in a station. on the remote) repeatedly to tune in "Setting presets through manual tuning". 3 Press TUNER MEM (TUNER MEMORY on the remote) repeatedly to select "FM" or "AM". 2 Turn and hold TUNING +/- (or press and hold TUNING + or...
Operating Instructions (CMTEP707)
Page 11
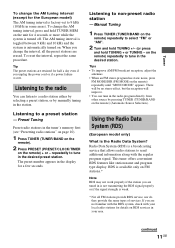
...not transmitting the RDS signal properly or if the signal strength is weak. * Not all the preset stations are not familiar with the RDS system, check with the regular program signal. Preset Tuning Preset radio stations in the desired station. repeatedly to tune in the tuner's memory first...What is the Radio Data System? RDS is available only on the remote) repeatedly to a radio station either by selecting a preset station, or by pressing TUNER (TUNER/BAND on the remote) + or - Listening to the radio You can tune in the desired preset station. Manual Tuning 1 Press TUNER (...
...not transmitting the RDS signal properly or if the signal strength is weak. * Not all the preset stations are not familiar with the RDS system, check with the regular program signal. Preset Tuning Preset radio stations in the desired station. repeatedly to tune in the tuner's memory first...What is the Radio Data System? RDS is available only on the remote) repeatedly to a radio station either by selecting a preset station, or by pressing TUNER (TUNER/BAND on the remote) + or - Listening to the radio You can tune in the desired preset station. Manual Tuning 1 Press TUNER (...
Operating Instructions (CMTEP707)
Page 14
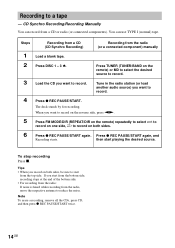
..., move the respective antenna to record on both sides. 6 Press z REC PAUSE/START again. then start from a CD or radio (or connected components). If you start from the bottom side, recording stops at the end of the bottom side. • For recording from the radio: If noise... is heard while recording from the radio (or a connected component) manually 1 Load a blank tape. 2 Press DISC 1 - 3 Z. You can record from the top side. The deck stands by for recording. Note To erase a ...
..., move the respective antenna to record on both sides. 6 Press z REC PAUSE/START again. then start from a CD or radio (or connected components). If you start from the bottom side, recording stops at the end of the bottom side. • For recording from the radio: If noise... is heard while recording from the radio (or a connected component) manually 1 Load a blank tape. 2 Press DISC 1 - 3 Z. You can record from the top side. The deck stands by for recording. Note To erase a ...
Operating Instructions (CMTEP707)
Page 18
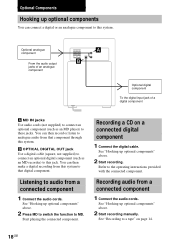
... record or listen to analogue audio from this system. Start playing the connected component. See "Hooking up optional components" above. 2 Start recording manually. See "Recording to audio from a connected component 1 Connect the audio cords. Listening to a tape" on a connected digital component 1 Connect the digital cable. See "Hooking up optional components" above . 2 Press MD to switch the function...
... record or listen to analogue audio from this system. Start playing the connected component. See "Hooking up optional components" above. 2 Start recording manually. See "Recording to audio from a connected component 1 Connect the audio cords. Listening to a tape" on a connected digital component 1 Connect the digital cable. See "Hooking up optional components" above . 2 Press MD to switch the function...

