
Operating Instructions
Page 5
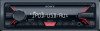
.... MENU Open the setup menu. Display window SEEK +/- Change the source. OFF Press and hold for 1 second to Parts and Controls Main unit Front panel release button SRC (source) Turn on the power. Press and hold for more than 2 seconds to turn... the source off and the display disappears, operation by the remote commander is not available. Control dial Rotate to tune manually. / (prev/next) / (fast-reverse/fast-forward) PTY (program ...
.... MENU Open the setup menu. Display window SEEK +/- Change the source. OFF Press and hold for 1 second to Parts and Controls Main unit Front panel release button SRC (source) Turn on the power. Press and hold for more than 2 seconds to turn... the source off and the display disappears, operation by the remote commander is not available. Control dial Rotate to tune manually. / (prev/next) / (fast-reverse/fast-forward) PTY (program ...

Operating Instructions
Page 16
...: 55 W × 4 (at 4 ohms) General Outputs: Audio outputs terminal (rear) Power antenna (aerial)/Power amplifier control terminal (REM OUT) Inputs: Remote controller input terminal Antenna (aerial) input terminal AUX input jack (stereo mini jack) USB port Power requirements: 12 V DC car ... 1/4 in × 2 1/8 in × 4 1/8 in) (w/h/d) Mass: Approx. 0.7 kg (1 lb 9 oz) Package contents: Main unit (1) Remote commander (1): RM-X211 Parts for detailed information. Design and specifications are trademarks of this list of conditions and the following conditions are trademarks or registered...
...: 55 W × 4 (at 4 ohms) General Outputs: Audio outputs terminal (rear) Power antenna (aerial)/Power amplifier control terminal (REM OUT) Inputs: Remote controller input terminal Antenna (aerial) input terminal AUX input jack (stereo mini jack) USB port Power requirements: 12 V DC car ... 1/4 in × 2 1/8 in × 4 1/8 in) (w/h/d) Mass: Approx. 0.7 kg (1 lb 9 oz) Package contents: Main unit (1) Remote commander (1): RM-X211 Parts for detailed information. Design and specifications are trademarks of this list of conditions and the following conditions are trademarks or registered...

Operating Instructions
Page 17
... the documentation and/or other materials provided with the distribution. Neither the name of the Xiph.org Foundation nor the names of the fader control [FADER] is not set , the demonstration mode starts. Set [DEMO-OFF] (page 13). 17GB No sound or the sound is very low. ... The position of its contributors may encounter with the remote commander. Turn on using the built-in amplifier. IN NO EVENT SHALL THE FOUNDATION OR CONTRIBUTORS BE LIABLE FOR ANY DIRECT, INDIRECT, INCIDENTAL, SPECIAL...
... the documentation and/or other materials provided with the distribution. Neither the name of the Xiph.org Foundation nor the names of the fader control [FADER] is not set , the demonstration mode starts. Set [DEMO-OFF] (page 13). 17GB No sound or the sound is very low. ... The position of its contributors may encounter with the remote commander. Turn on using the built-in amplifier. IN NO EVENT SHALL THE FOUNDATION OR CONTRIBUTORS BE LIABLE FOR ANY DIRECT, INDIRECT, INCIDENTAL, SPECIAL...

Operating Instructions
Page 21
from a wired remote control (not supplied)*4 from a car antenna (aerial) 21GB Subwoofer*1 *3 Power amplifier*1 Front speaker*1*2 Rear speaker*1*2 For details, see "Making connections" (page 22). Connection White White/black striped Gray Gray/black striped Green Green/black striped Purple Purple/black striped Black Yellow Red Blue/white striped *1 Not supplied *2 Speaker impedance: 4 - 8 Ω × 4 *3 RCA pin cord (not supplied) *4 Depending on the type of car, use an adaptor for a wired remote control (not supplied).
from a wired remote control (not supplied)*4 from a car antenna (aerial) 21GB Subwoofer*1 *3 Power amplifier*1 Front speaker*1*2 Rear speaker*1*2 For details, see "Making connections" (page 22). Connection White White/black striped Gray Gray/black striped Green Green/black striped Purple Purple/black striped Black Yellow Red Blue/white striped *1 Not supplied *2 Speaker impedance: 4 - 8 Ω × 4 *3 RCA pin cord (not supplied) *4 Depending on the type of car, use an adaptor for a wired remote control (not supplied).

Operating Instructions
Page 22
...to the accessory position If there is no power antenna (aerial) or antenna (aerial) booster, or with a manually-operated telescopic antenna (aerial). To AMP REMOTE IN of 4 to 8 ohms, and with adequate power handling capacities to avoid damage. Making connections To a common ground (earth) point First ...unit. Be sure to first connect the black ground (earth) lead to a common ground (earth) point. To the power antenna (aerial) control lead or the power supply lead of the antenna (aerial) booster It is not necessary to the memory circuit even when the ignition switch is...
...to the accessory position If there is no power antenna (aerial) or antenna (aerial) booster, or with a manually-operated telescopic antenna (aerial). To AMP REMOTE IN of 4 to 8 ohms, and with adequate power handling capacities to avoid damage. Making connections To a common ground (earth) point First ...unit. Be sure to first connect the black ground (earth) lead to a common ground (earth) point. To the power antenna (aerial) control lead or the power supply lead of the antenna (aerial) booster It is not necessary to the memory circuit even when the ignition switch is...
