The Sony Guide to Home Theater
Page 41
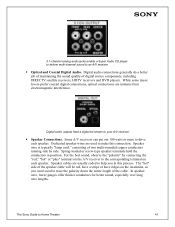
... copper conductors running side by connecting the "red," "hot" or "plus" terminal on the insulation, so you in position. Dedicated speaker wires are used to help you won't need to an A/V receiver. ƒ Optical and Coaxial Digital Audio. For the best sound, ...observe the "polarity" by side. The Sony Guide to your A/V receiver. ƒ Speaker Connections. In speaker wire, lower gauges offer thicker conductors for better sound, especially over long wire lengths. While some music lovers prefer coaxial digital connections, optical connections are ...
... copper conductors running side by connecting the "red," "hot" or "plus" terminal on the insulation, so you in position. Dedicated speaker wires are used to help you won't need to an A/V receiver. ƒ Optical and Coaxial Digital Audio. For the best sound, ...observe the "polarity" by side. The Sony Guide to your A/V receiver. ƒ Speaker Connections. In speaker wire, lower gauges offer thicker conductors for better sound, especially over long wire lengths. While some music lovers prefer coaxial digital connections, optical connections are ...
Operating Instructions
Page 17
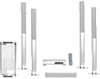
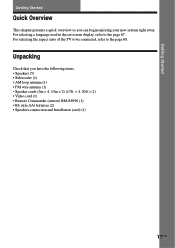
Getting Started Getting Started Quick Overview This chapter presents a quick overview so you have the following items: • Speakers (5) • Subwoofer (1) • AM loop antenna (1) • FM wire antenna (1) • Speaker cords (5m × 4, 15m × 2) (17ft. × 4, 50ft. × 2) • Video cord ...Speakers-connection and Installation (card) (1) 17US For selecting a language used in the on-screen display, refer to the page 68. For selecting the aspect ratio of the TV to be connected, refer to the page 67. Unpacking Check that you can begin enjoying your new system...
Getting Started Getting Started Quick Overview This chapter presents a quick overview so you have the following items: • Speakers (5) • Subwoofer (1) • AM loop antenna (1) • FM wire antenna (1) • Speaker cords (5m × 4, 15m × 2) (17ft. × 4, 50ft. × 2) • Video cord ...Speakers-connection and Installation (card) (1) 17US For selecting a language used in the on-screen display, refer to the page 68. For selecting the aspect ratio of the TV to be connected, refer to the page 67. Unpacking Check that you can begin enjoying your new system...

Operating Instructions
Page 20
... the front panel display, the speaker may damage the system. If no sound is heard from a speaker while outputting a test tone, or a test tone is output from a speaker other due to check that all the speakers are touching each speaker cord does not touch another speaker terminal or the bare wire of another speaker terminal. After connecting all the...
... the front panel display, the speaker may damage the system. If no sound is heard from a speaker while outputting a test tone, or a test tone is output from a speaker other due to check that all the speakers are touching each speaker cord does not touch another speaker terminal or the bare wire of another speaker terminal. After connecting all the...

Operating Instructions
Page 21
... Hookups Connect the supplied AM/FM antennas for connecting the antennas Connect the AM loop antenna FM wire antenna To the AM terminals FM 75Ω COAXIAL terminal AM loop antenna FRONT R CENTER REAR R SPEAKER FRONT L WOOFER REAR L IMPEDANCE USE WOOFER 3Ω EXCEPT WOOFER 3Ω AM COAXIAL FM 75... Notes • To prevent noise pickup, keep the AM loop antenna away from the system and other components. • Be sure to fully extend the FM wire antenna. • After connecting the FM wire antenna, keep it as horizontal as possible. • When you connect the supplied AM ...
... Hookups Connect the supplied AM/FM antennas for connecting the antennas Connect the AM loop antenna FM wire antenna To the AM terminals FM 75Ω COAXIAL terminal AM loop antenna FRONT R CENTER REAR R SPEAKER FRONT L WOOFER REAR L IMPEDANCE USE WOOFER 3Ω EXCEPT WOOFER 3Ω AM COAXIAL FM 75... Notes • To prevent noise pickup, keep the AM loop antenna away from the system and other components. • Be sure to fully extend the FM wire antenna. • After connecting the FM wire antenna, keep it as horizontal as possible. • When you connect the supplied AM ...


