Primary User Manual
Page 3
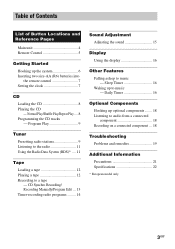
... Button Locations and Reference Pages Main unit 4 Remote Control 5 Getting Started Hooking up to music - Normal Play/Shuffle Play/Repeat Play .... 8 Programming the CD tracks -- Daily Timer 16 Optional Components Hooking up optional components ........ 18 Listening to music - Program Play ...9 Tuner Presetting radio stations 9 Listening to the radio 11 Using the Radio Data System (RDS)* .... 11 Tape Loading a tape 12 Playing a tape...
... Button Locations and Reference Pages Main unit 4 Remote Control 5 Getting Started Hooking up to music - Normal Play/Shuffle Play/Repeat Play .... 8 Programming the CD tracks -- Daily Timer 16 Optional Components Hooking up optional components ........ 18 Listening to music - Program Play ...9 Tuner Presetting radio stations 9 Listening to the radio 11 Using the Radio Data System (RDS)* .... 11 Tape Loading a tape 12 Playing a tape...
Primary User Manual
Page 4
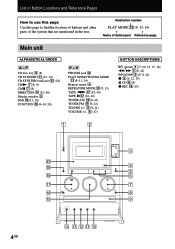
V PHONES jack qf PLAY MODE/TUNING MODE qd (8-11, 14) Remote sensor 4 REPEAT/FM MODE qs (8, 11) TAPE nN qj (12-14) TAPE X qj (12-14) TUNER AM qg (9-11) TUNER FM qg (9-11) TUNING +/- 3 (9-11) ... (8-14, 18) P - ql qk nN qj X qh z qg ML lm 3 4 x 5 6 N 7 X Z 8 9 qf qd qs qa 0 4GB Illustration number r PLAY MODE qg (9, 13, 14) R R Name of the system that are mentioned in the text. List of Button Locations and Reference Pages How to use this page Use this page to find the location...
V PHONES jack qf PLAY MODE/TUNING MODE qd (8-11, 14) Remote sensor 4 REPEAT/FM MODE qs (8, 11) TAPE nN qj (12-14) TAPE X qj (12-14) TUNER AM qg (9-11) TUNER FM qg (9-11) TUNING +/- 3 (9-11) ... (8-14, 18) P - ql qk nN qj X qh z qg ML lm 3 4 x 5 6 N 7 X Z 8 9 qf qd qs qa 0 4GB Illustration number r PLAY MODE qg (9, 13, 14) R R Name of the system that are mentioned in the text. List of Button Locations and Reference Pages How to use this page Use this page to find the location...
Primary User Manual
Page 5
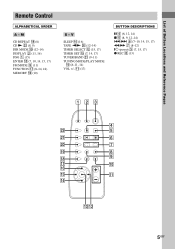
... (15, 17) TIMER SET qg (7, 14, 17) TUNER/BAND wa (9-11) TUNING MODE/PLAY MODE q; (8-11, 14) VOL +/- List of Button Locations and Reference Pages Remote Control ALPHABETICAL ORDER A -
... (15, 17) TIMER SET qg (7, 14, 17) TUNER/BAND wa (9-11) TUNING MODE/PLAY MODE q; (8-11, 14) VOL +/- List of Button Locations and Reference Pages Remote Control ALPHABETICAL ORDER A -
Primary User Manual
Page 7
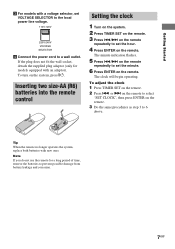
...AA (R6) batteries into the remote control e EE e Setting the clock 1 Turn on the system. 2 Press TIMER SET on the remote. 3 Press ./> on the remote repeatedly to set the minute. 6 Press ENTER on the remote. The minute indication flashes. 5 Press ./> on the remote repeatedly to set VOLTAGE SELECTOR to...prevent possible damage from battery leakage and corrosion. 7GB To turn on the remote. 2 Press . To adjust the clock 1 Press TIMER SET on the system, press @/1. Note If you do not use the remote for models equipped with new ones. The clock will begin operating. Getting Started...
...AA (R6) batteries into the remote control e EE e Setting the clock 1 Turn on the system. 2 Press TIMER SET on the remote. 3 Press ./> on the remote repeatedly to set the minute. 6 Press ENTER on the remote. The minute indication flashes. 5 Press ./> on the remote repeatedly to set VOLTAGE SELECTOR to...prevent possible damage from battery leakage and corrosion. 7GB To turn on the remote. 2 Press . To adjust the clock 1 Press TIMER SET on the system, press @/1. Note If you do not use the remote for models equipped with new ones. The clock will begin operating. Getting Started...
Primary User Manual
Page 8
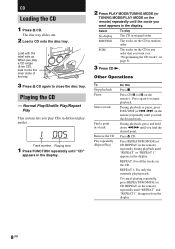
... Play/Shuffle Play/Repeat Play This system lets you play CDs in different play modes. 1 005 Track number Playing time 1 Press FUNCTION repeatedly until you play The CD in random order. When you find the desired point. During playback or pause, press l/L (or ./> on the remote) repeatedly during playback until "REPEAT" and...
... Play/Shuffle Play/Repeat Play This system lets you play CDs in different play modes. 1 005 Track number Playing time 1 Press FUNCTION repeatedly until you play The CD in random order. When you find the desired point. During playback or pause, press l/L (or ./> on the remote) repeatedly during playback until "REPEAT" and...
Primary User Manual
Page 9
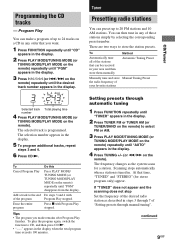
...preset number. If "TUNED" does not appear and the scanning does not stop Set the frequency of the desired radio station as the system scans for stereo program only) appear. Programming the CD tracks -- PGM 3 243 Selected track Total playing time number 4 Press PLAY MODE...STEREO" (for a station. Program Play You can preset up to store the station presets. There are two ways to 24 tracks on the remote). The selection number appears in the display when the total program time exceeds 100 minutes. Scanning stops automatically when a station is programmed. Do steps...
...preset number. If "TUNED" does not appear and the scanning does not stop Set the frequency of the desired radio station as the system scans for stereo program only) appear. Programming the CD tracks -- PGM 3 243 Selected track Total playing time number 4 Press PLAY MODE...STEREO" (for a station. Program Play You can preset up to store the station presets. There are two ways to 24 tracks on the remote). The selection number appears in the display when the total program time exceeds 100 minutes. Scanning stops automatically when a station is programmed. Do steps...
Primary User Manual
Page 10
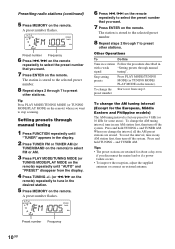
... you want. 7 Press ENTER on the remote) when you want to preset other stations. A preset number flashes. Setting presets through manual signal tuning". To reset the interval, tune in any AM station first, then turn off the system. Tips • The preset stations are erased.... Presetting radio stations (continued) 5 Press MEMORY on the remote. To change the AM tuning interval (Except for some areas). and TUNER AM.
... you want. 7 Press ENTER on the remote) when you want to preset other stations. A preset number flashes. Setting presets through manual signal tuning". To reset the interval, tune in any AM station first, then turn off the system. Tips • The preset stations are erased.... Presetting radio stations (continued) 5 Press MEMORY on the remote. To change the AM tuning interval (Except for some areas). and TUNER AM.
Primary User Manual
Page 11
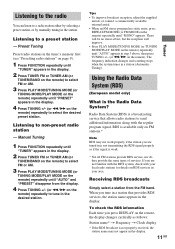
... (or FM MODE on RDS services in the desired station. Radio Data System (RDS) is a broadcasting service that provides RDS services, the station name appears in the display. 4 Press TUNING +/- (or m/M on the remote, the display changes cyclically as follows: Station name* t Frequency t Clock..."AUTO" and "PRESET" disappear from the FM band. The frequency indication changes and scanning stops when the system tunes in step 3 above, then press TUNING +/- (or m/M on the remote) repeatedly until "PRESET" appears in the display. If you tune in a station that allows radio stations ...
... (or FM MODE on RDS services in the desired station. Radio Data System (RDS) is a broadcasting service that provides RDS services, the station name appears in the display. 4 Press TUNING +/- (or m/M on the remote, the display changes cyclically as follows: Station name* t Frequency t Clock..."AUTO" and "PRESET" disappear from the FM band. The frequency indication changes and scanning stops when the system tunes in step 3 above, then press TUNING +/- (or m/M on the remote) repeatedly until "PRESET" appears in the display. If you tune in a station that allows radio stations ...
Primary User Manual
Page 12
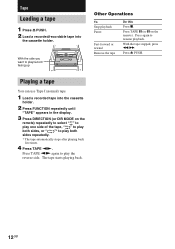
... sides repeatedly. * The tape automatically stops after playing back five times. 4 Press TAPE nN. The tape starts playing back. 12GB Press TAPE X (or X on the remote) repeatedly to select " " to play one side of the tape, " " to play the reverse side. Press TAPE nN again to resume playback. With the tape... Z PUSH. 2 Load a recorded/recordable tape into the cassette holder. 2 Press FUNCTION repeatedly until "TAPE" appears in the display. 3 Press DIRECTION (or DIR MODE on the remote).
... sides repeatedly. * The tape automatically stops after playing back five times. 4 Press TAPE nN. The tape starts playing back. 12GB Press TAPE X (or X on the remote) repeatedly to select " " to play one side of the tape, " " to play the reverse side. Press TAPE nN again to resume playback. With the tape... Z PUSH. 2 Load a recorded/recordable tape into the cassette holder. 2 Press FUNCTION repeatedly until "TAPE" appears in the display. 3 Press DIRECTION (or DIR MODE on the remote).
Primary User Manual
Page 13
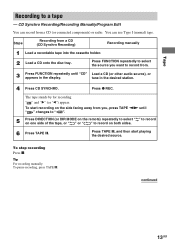
... recording on the side facing away from you want to record from. 3 Press FUNCTION repeatedly until " " changes to " ". 5 Press DIRECTION (or DIR MODE on the remote) repeatedly to select " " to record on one side of the tape, or " " or " " to record on both sides. 6 Press TAPE X. Press FUNCTION repeatedly...Recording manually 1 Load a recordable tape into the cassette holder. 2 Load a CD onto the disc tray. continued 13GB Steps Recording from a CD (or connected components) or radio. The tape stands by for recording. " " and "B" (or "b") appear. To stop recording Press x.
... recording on the side facing away from you want to record from. 3 Press FUNCTION repeatedly until " " changes to " ". 5 Press DIRECTION (or DIR MODE on the remote) repeatedly to select " " to record on one side of the tape, or " " or " " to record on both sides. 6 Press TAPE X. Press FUNCTION repeatedly...Recording manually 1 Load a recordable tape into the cassette holder. 2 Load a CD onto the disc tray. continued 13GB Steps Recording from a CD (or connected components) or radio. The tape stands by for recording. " " and "B" (or "b") appear. To stop recording Press x.
Primary User Manual
Page 14
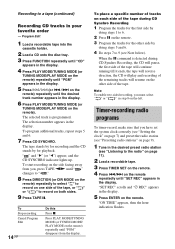
...DIRECTION (or DIR MODE on the remote) repeatedly to select " " to record on both sides. 9 Press TAPE X. The selected track is detected during CD Synchro Recording 1 Program the tracks for playback. Note To enable two-sided recording, you have set the system clock correctly (see "Setting the clock..." on page 7) and preset the radio station (see "Presetting radio stations" on page 9). 1 Tune in step 8 on the remote) repeatedly until "SET REC" appears in your favorite order -- ...
...DIRECTION (or DIR MODE on the remote) repeatedly to select " " to record on both sides. 9 Press TAPE X. The selected track is detected during CD Synchro Recording 1 Program the tracks for playback. Note To enable two-sided recording, you have set the system clock correctly (see "Setting the clock..." on page 7) and preset the radio station (see "Presetting radio stations" on page 9). 1 Tune in step 8 on the remote) repeatedly until "SET REC" appears in your favorite order -- ...
Primary User Manual
Page 15
... timer off the timer Do this Press TIMER SELECT on the remote. The minute indication begins flashing next. Notes • The system will turn . Press TIMER SELECT on the remote. Press ./> on the remote repeatedly to set the hour, then press ENTER on the remote repeatedly until "c REC" disappears from the display. "OFF TIME" appears...
... timer off the timer Do this Press TIMER SELECT on the remote. The minute indication begins flashing next. Notes • The system will turn . Press TIMER SELECT on the remote. Press ./> on the remote repeatedly to set the hour, then press ENTER on the remote repeatedly until "c REC" disappears from the display. "OFF TIME" appears...
Primary User Manual
Page 16
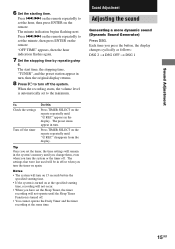
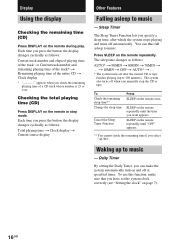
... t Current source display Other Features Falling asleep to 100 minutes). Waking up to music - To use this function, make the system automatically turn on the remote in stop the CD or tape. Sleep Timer The Sleep Timer Function lets you can thus fall asleep to music - The sleep... Checking the remaining time (CD) Press DISPLAY on the remote repeatedly until the time you have set the system clock correctly (see "Setting the clock" on page 7). 16GB t 10MIN t OFF t AUTO* t ... * The system turns off after which the system stops playing and turns off when you press the button,...
... t Current source display Other Features Falling asleep to 100 minutes). Waking up to music - To use this function, make the system automatically turn on the remote in stop the CD or tape. Sleep Timer The Sleep Timer Function lets you can thus fall asleep to music - The sleep... Checking the remaining time (CD) Press DISPLAY on the remote repeatedly until the time you have set the system clock correctly (see "Setting the clock" on page 7). 16GB t 10MIN t OFF t AUTO* t ... * The system turns off after which the system stops playing and turns off when you press the button,...
Primary User Manual
Page 17
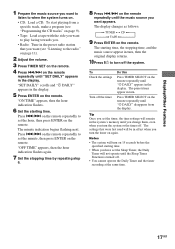
... minute, then press ENTER on the remote repeatedly until the music source you want appears. Tip Once you set the Sleep Timer, the Daily Timer will be in the system's memory until you change them, even when you turn the timer on the remote. Notes • The system will remain in effect when you... turn the system or the timer off . • You cannot operate the Daily Timer and the...
... minute, then press ENTER on the remote repeatedly until the music source you want appears. Tip Once you set the Sleep Timer, the Daily Timer will be in the system's memory until you change them, even when you turn the timer on the remote. Notes • The system will remain in effect when you... turn the system or the timer off . • You cannot operate the Daily Timer and the...
Primary User Manual
Page 19
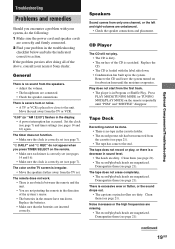
... persists after doing all of the above, consult your problem in sound level. • The heads are correctly and firmly connected. 2 Find your nearest Sony dealer. "0:00" (or "AM 12:00") flashes in Program or Shuffle Play. Speakers Sound comes from the speakers. • Adjust the volume. ... Components/Troubleshooting Troubleshooting Problems and remedies Should you press TIMER SELECT on the TV screen is loaded with your system, do not appear when you encounter a problem with the label side down . Play does not start from the TV or VCR. The remote does not work. • There ...
... persists after doing all of the above, consult your problem in sound level. • The heads are correctly and firmly connected. 2 Find your nearest Sony dealer. "0:00" (or "AM 12:00") flashes in Program or Shuffle Play. Speakers Sound comes from the speakers. • Adjust the volume. ... Components/Troubleshooting Troubleshooting Problems and remedies Should you press TIMER SELECT on the TV screen is loaded with your system, do not appear when you encounter a problem with the label side down . Play does not start from the TV or VCR. The remote does not work. • There ...
Primary User Manual
Page 20
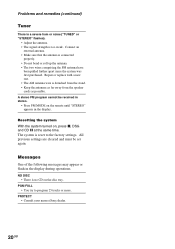
A stereo FM program cannot be set again. PROTECT • Consult your nearest Sony dealer. 20GB Resetting the system With the system turned on the disc tray. The system is too weak. PGM FULL • You try to the factory settings. Problems and remedies (continued) Tuner There is a severe hum ...away from the speaker cords as possible. All previous settings are cleared and must be received in stereo. • Press FM MODE on the remote until "STEREO" appears in the display during operations. Repair or replace with a new one. • The AM antenna wire is connected properly....
A stereo FM program cannot be set again. PROTECT • Consult your nearest Sony dealer. 20GB Resetting the system With the system turned on the disc tray. The system is too weak. PGM FULL • You try to the factory settings. Problems and remedies (continued) Tuner There is a severe hum ...away from the speaker cords as possible. All previous settings are cleared and must be received in stereo. • Press FM MODE on the remote until "STEREO" appears in the display during operations. Repair or replace with a new one. • The AM antenna wire is connected properly....
Primary User Manual
Page 23
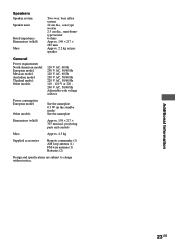
projecting parts and controls Mass Approx. 4.5 kg Supplied accessories Remote commander (1) AM loop antenna (1) FM wire antenna (1) Batteries (2) Design and specifications are subject to change without notice. 23GB Additional Information Speakers Speaker system Speaker units Rated impedance Dimensions (w/h/d) Mass Two-way, bass reflex system 10 cm dia., cone type woofer 2.5 cm dia., semi-dometype...
projecting parts and controls Mass Approx. 4.5 kg Supplied accessories Remote commander (1) AM loop antenna (1) FM wire antenna (1) Batteries (2) Design and specifications are subject to change without notice. 23GB Additional Information Speakers Speaker system Speaker units Rated impedance Dimensions (w/h/d) Mass Two-way, bass reflex system 10 cm dia., cone type woofer 2.5 cm dia., semi-dometype...


