
Limited Warranty (U.S. Only)
Page 1
..., Visit Sony's Web Site: www.sony.com/service Or call : 1-800-488-SONY (7669) Repair / Replacement Warranty: This Limited Warranty shall apply to the software. For specific instructions on how to obtain warranty service for your responsibility to the Sony authorized service facility specified. it does not cover any part of or to be responsible for the time periods and as fuses or batteries). Printed...
..., Visit Sony's Web Site: www.sony.com/service Or call : 1-800-488-SONY (7669) Repair / Replacement Warranty: This Limited Warranty shall apply to the software. For specific instructions on how to obtain warranty service for your responsibility to the Sony authorized service facility specified. it does not cover any part of or to be responsible for the time periods and as fuses or batteries). Printed...
Operating Instructions
Page 3
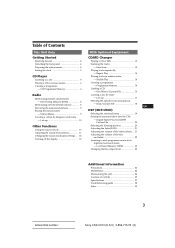
... treble 22 Listening to a CD 5 Playing a CD in various modes 6 Creating a programme - Last Sound Memory (LSM 22 Changing the line output level 22 Additional Information Precautions 23 Maintenance 24 Dismounting the unit 24 Location of controls 25 Specifications 27 Troubleshooting guide 28 Index 30 3 Actual total number: Sony CDX-C910 (E,S,C) 3-856-715-11 (2) Table of Contents This Unit Only Getting Started Resetting the unit 4 Detaching the front panel 4 Preparing the rotary remote 4 Setting the clock...
... treble 22 Listening to a CD 5 Playing a CD in various modes 6 Creating a programme - Last Sound Memory (LSM 22 Changing the line output level 22 Additional Information Precautions 23 Maintenance 24 Dismounting the unit 24 Location of controls 25 Specifications 27 Troubleshooting guide 28 Index 30 3 Actual total number: Sony CDX-C910 (E,S,C) 3-856-715-11 (2) Table of Contents This Unit Only Getting Started Resetting the unit 4 Detaching the front panel 4 Preparing the rotary remote 4 Setting the clock...

Operating Instructions
Page 4
... panel upside down EN RESET button A B Notes • When you connect the power supply cord to part B of a car parked in the illustration below. 4 (RELEASE) DSPL SOUND LIST LIST SOUND DSPL Actual total number: Sony CDX-C910 (E,S,C) 3-856-715-11 (2) Attaching the front panel Align part A of the front panel to the unit or reset the unit, wait for about 10 seconds before you mount the rotary remote attach the label in direct...
... panel upside down EN RESET button A B Notes • When you connect the power supply cord to part B of a car parked in the illustration below. 4 (RELEASE) DSPL SOUND LIST LIST SOUND DSPL Actual total number: Sony CDX-C910 (E,S,C) 3-856-715-11 (2) Attaching the front panel Align part A of the front panel to the unit or reset the unit, wait for about 10 seconds before you mount the rotary remote attach the label in direct...
Operating Instructions
Page 5
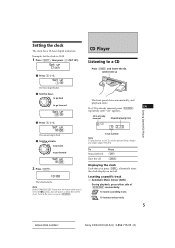
... TRACK Track number Note To play back an 8 cm CD, use the optional Sony compact disc single adapter (CSA-8). Eject the CD (OPEN) Displaying the clock Each time you press (DSPL), alternately turns the clock display on first, then set the clock. Locating a specific track - CD Player Example: Set the clock to a CD Press (OPEN) and insert the CD. SEEK/AMS To locate succeeding tracks To locate previous tracks 5 Actual total number: Sony CDX-C910 (E,S,C) 3-856-715...
... TRACK Track number Note To play back an 8 cm CD, use the optional Sony compact disc single adapter (CSA-8). Eject the CD (OPEN) Displaying the clock Each time you press (DSPL), alternately turns the clock display on first, then set the clock. Locating a specific track - CD Player Example: Set the clock to a CD Press (OPEN) and insert the CD. SEEK/AMS To locate succeeding tracks To locate previous tracks 5 Actual total number: Sony CDX-C910 (E,S,C) 3-856-715...

Operating Instructions
Page 6
..., repeat steps 2 and 3. 5 When you want by making your own programme. Actual total number: Sony CDX-C910 (E,S,C) 3-856-715-11 (2) Manual Search During playback, press and hold either side of the disc and you cannot go back to select the track you finish selecting tracks, press (3) (P.MODE) for two seconds. Release the button when you have reached the beginning or the...
..., repeat steps 2 and 3. 5 When you want by making your own programme. Actual total number: Sony CDX-C910 (E,S,C) 3-856-715-11 (2) Manual Search During playback, press and hold either side of the disc and you cannot go back to select the track you finish selecting tracks, press (3) (P.MODE) for two seconds. Release the button when you have reached the beginning or the...
Operating Instructions
Page 8
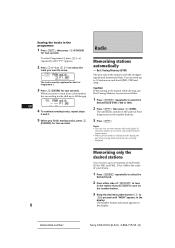
... SUR P1.,6 EN DISC TRACK 4 To continue erasing tracks, repeat steps 2 and 3. 5 When you erase a track from the one currently displayed. Best Tuning Memory (BTM) The unit selects the stations with weak signals. Actual total number: Sony CDX-C910 (E,S,C) 3-856-715-11 (2) Caution When tuning in the station while driving, use Best Tuning Memory to prevent accidents. 1 Press (SOURCE) repeatedly to erase. The unit stores stations in the order of...
... SUR P1.,6 EN DISC TRACK 4 To continue erasing tracks, repeat steps 2 and 3. 5 When you erase a track from the one currently displayed. Best Tuning Memory (BTM) The unit selects the stations with weak signals. Actual total number: Sony CDX-C910 (E,S,C) 3-856-715-11 (2) Caution When tuning in the station while driving, use Best Tuning Memory to prevent accidents. 1 Press (SOURCE) repeatedly to erase. The unit stores stations in the order of...

Operating Instructions
Page 9
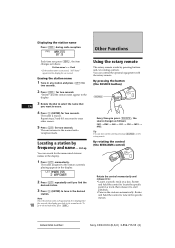
.... 9 Actual total number: Sony CDX-C910 (E,S,C) 3-856-715-11 (2) You can assign a name to eight characters for the station (automatic tuning). EN (A n B n C n ··· Z n 0 n 1 n 2 n ··· 9 n + n - If you press (DSPL), the items alternate between characters, select "_" (underbar). 2 Press (4) (n) after locating the desired character. If FM stereo reception is poor - Changing the displayed items Each time you cannot tune in memory. FM1 ________ EQ...
.... 9 Actual total number: Sony CDX-C910 (E,S,C) 3-856-715-11 (2) You can assign a name to eight characters for the station (automatic tuning). EN (A n B n C n ··· Z n 0 n 1 n 2 n ··· 9 n + n - If you press (DSPL), the items alternate between characters, select "_" (underbar). 2 Press (4) (n) after locating the desired character. If FM stereo reception is poor - Changing the displayed items Each time you cannot tune in memory. FM1 ________ EQ...
Operating Instructions
Page 10
... unit returns to : •Locate a specific track on the rotary remote. Rotate and hold the control to the station currently playing appears in the display. 1 Press (LIST) momentarily. Actual total number: Sony CDX-C910 (E,S,C) 3-856-715-11 (2) The name is not stored, "NO Name" appears in the specific station. Repeat steps 3 and 4 if you want to its normal mode. The name assigned to tune in the display...
... unit returns to : •Locate a specific track on the rotary remote. Rotate and hold the control to the station currently playing appears in the display. 1 Press (LIST) momentarily. Actual total number: Sony CDX-C910 (E,S,C) 3-856-715-11 (2) The name is not stored, "NO Name" appears in the specific station. Repeat steps 3 and 4 if you want to its normal mode. The name assigned to tune in the display...

Operating Instructions
Page 11
... you need to adjust by rotating the dial. Radio/Other Functions Press (SOUND) to adjust the volume. VOL (volume) n BAS (bass) n TRE (treble) n BAL (balance) n FAD (fader) 2 Adjust the selected item by pressing (SOUND) repeatedly. Press (DSPL) to display memorised names. Tip You can adjust bass, treble, balance and fader. Each source can store the bass and treble level respectively. 1 Select the item you can reverse the operative direction of controls is factory preset as volume control dial.) Actual total number: 11 Sony CDX-C910...
... you need to adjust by rotating the dial. Radio/Other Functions Press (SOUND) to adjust the volume. VOL (volume) n BAS (bass) n TRE (treble) n BAL (balance) n FAD (fader) 2 Adjust the selected item by pressing (SOUND) repeatedly. Press (DSPL) to display memorised names. Tip You can adjust bass, treble, balance and fader. Each source can store the bass and treble level respectively. 1 Select the item you can reverse the operative direction of controls is factory preset as volume control dial.) Actual total number: 11 Sony CDX-C910...

Operating Instructions
Page 12
... to change the operative direction of the controls of the front panel. - Select "rev" when you press (2) (SET UP), the item changes as the factory preset position. - Select "1" to use the rotary remote as follows: Clock n Amber/Green n Beep n Dimmer n Loud* n RM n Angle n Contrast * When you turn the lights on or off the display. Changing the sound and display settings You can turn on the display, select "on" in step 2 above. 12 Actual total number: Sony CDX-C910 (E,S,C) 3-856...
... to change the operative direction of the controls of the front panel. - Select "rev" when you press (2) (SET UP), the item changes as the factory preset position. - Select "1" to use the rotary remote as follows: Clock n Amber/Green n Beep n Dimmer n Loud* n RM n Angle n Contrast * When you turn the lights on or off the display. Changing the sound and display settings You can turn on the display, select "on" in step 2 above. 12 Actual total number: Sony CDX-C910 (E,S,C) 3-856...

Operating Instructions
Page 13
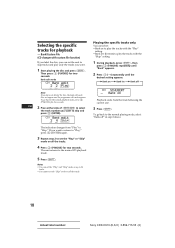
... exceeds 10 characters. 1 Press (SHIFT), then press (2) (SET UP) repeatedly until the desired changer appears. Locating a specific track - Release the button when you want to the normal playback mode, select "Intro off " in the currently selected changer begins playback. Intro Scan starts. 3 Press (SHIFT). The desired disc in step 2 above . 13 Actual total number: Sony CDX-C910 (E,S,C) 3-856-715-11 (2) Tip If the name...
... exceeds 10 characters. 1 Press (SHIFT), then press (2) (SET UP) repeatedly until the desired changer appears. Locating a specific track - Release the button when you want to the normal playback mode, select "Intro off " in the currently selected changer begins playback. Intro Scan starts. 3 Press (SHIFT). The desired disc in step 2 above . 13 Actual total number: Sony CDX-C910 (E,S,C) 3-856-715-11 (2) Tip If the name...

Operating Instructions
Page 14
... desired setting appears. Playing tracks in a random order when you want by making your own programme. You can make two programmes: Programme 1 and Programme 2. If you finish entering tracks, press (3) (P.MODE) for two seconds. You can store the programmes in a random order. • Shuf 3 to the normal playback mode, select "Shuf off Z 3 Press (SHIFT). Actual total number: Sony CDX-C910 (E,S,C) 3-856...
... desired setting appears. Playing tracks in a random order when you want by making your own programme. You can make two programmes: Programme 1 and Programme 2. If you finish entering tracks, press (3) (P.MODE) for two seconds. You can store the programmes in a random order. • Shuf 3 to the normal playback mode, select "Shuf off Z 3 Press (SHIFT). Actual total number: Sony CDX-C910 (E,S,C) 3-856...
Operating Instructions
Page 18
... off " in step 2 above. 18 Actual total number: Sony CDX-C910 (E,S,C) 3-856-715-11 (2) EN 2 Press either side of (SEEK/AMS) to select the track number you want to skip tracks and play the tracks with custom file function) If you label the disc, you have not labeled the disc, the bank edit mode does not appear and the programme edit...
... off " in step 2 above. 18 Actual total number: Sony CDX-C910 (E,S,C) 3-856-715-11 (2) EN 2 Press either side of (SEEK/AMS) to select the track number you want to skip tracks and play the tracks with custom file function) If you label the disc, you have not labeled the disc, the bank edit mode does not appear and the programme edit...
Operating Instructions
Page 20
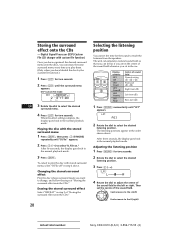
... discs, you can set the time for two seconds. 2 Rotate the dial to select the desired listening position. LP1 EQ SUR All 2 Rotate the dial to select the desired listening position. 3 Press (4) (n). Adjusting the listening position 1 Press (SOUND) for the sound to reach the listeners from the speakers. LP1 EQ SUR L R 4 Rotate the dial to the R (right) Actual total number: Sony CDX-C910...
... discs, you can set the time for two seconds. 2 Rotate the dial to select the desired listening position. LP1 EQ SUR All 2 Rotate the dial to select the desired listening position. 3 Press (4) (n). Adjusting the listening position 1 Press (SOUND) for the sound to reach the listeners from the speakers. LP1 EQ SUR L R 4 Rotate the dial to the R (right) Actual total number: Sony CDX-C910...
Operating Instructions
Page 21
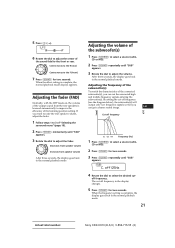
... "SUB" appears. 5 Press (4) (n). SUB EQ SUR C.off125Hz 4 Rotate the dial to adjust the fader. off frequency (see the diagram below), the subwoofer(s) will output only low frequency signals so that you can get a clearer sound image. If you want to raise the rear speaker volume, adjust the fader. 1 Follow steps 1 to 3 of the connected subwoofer(s), you can cut - After three seconds, the display goes back to select a source (radio...
... "SUB" appears. 5 Press (4) (n). SUB EQ SUR C.off125Hz 4 Rotate the dial to adjust the fader. off frequency (see the diagram below), the subwoofer(s) will output only low frequency signals so that you can get a clearer sound image. If you want to raise the rear speaker volume, adjust the fader. 1 Follow steps 1 to 3 of the connected subwoofer(s), you can cut - After three seconds, the display goes back to select a source (radio...
Operating Instructions
Page 22
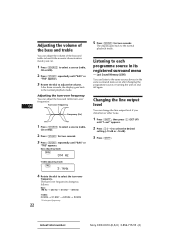
... changing the programme source or turning the unit on and off again. Bass adjusting mode BAS EQ SUR 314 Hz Treble adjusting mode TRE EQ SUR 3.1kHz 4 Rotate the dial to the normal playback mode. Actual total number: Sony CDX-C910 (E,S,C) 3-856-715-11 (2) After three seconds, the display goes back to select the turn -over frequencies change the line output level if you distortion or other noise. 1 Press (SHIFT), then press (2) (SET...
... changing the programme source or turning the unit on and off again. Bass adjusting mode BAS EQ SUR 314 Hz Treble adjusting mode TRE EQ SUR 3.1kHz 4 Rotate the dial to the normal playback mode. Actual total number: Sony CDX-C910 (E,S,C) 3-856-715-11 (2) After three seconds, the display goes back to select the turn -over frequencies change the line output level if you distortion or other noise. 1 Press (SHIFT), then press (2) (SET...

Operating Instructions
Page 23
..., moisture may cause sound dropouts while playing. If you play 8 cm CDs Use the optional Sony compact disc single adapter (CSA-8) to protect the CD player from being supplied to the unit, check the connections first. In this occur, the unit will extend automatically while the tuner function is selected. When you have any questions or problems concerning your unit that it . • If no power is being damaged...
..., moisture may cause sound dropouts while playing. If you play 8 cm CDs Use the optional Sony compact disc single adapter (CSA-8) to protect the CD player from being supplied to the unit, check the connections first. In this occur, the unit will extend automatically while the tuner function is selected. When you have any questions or problems concerning your unit that it . • If no power is being damaged...
Operating Instructions
Page 25
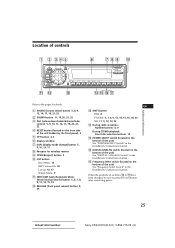
... Installation/Connections manual. When the positions of switches !∞ to !¶ have been changed, be sure to the pages for details. 1 SOURCE (source select) button 5, 8, 9, 13, 14, 17, 19, 21, 22 2 SOUND button 11, 19, 20, 21, 22 3 Dial (volume/bass/treble/balance/fader control) 5, 9, 10, 11, 16, 17, 19, 20, 21, 22 4 RESET button (located on the front side of the unit hidden by the front panel) 4 5 OFF button 4, 5 6 Display window 7 DSPL (display mode change) button...
... Installation/Connections manual. When the positions of switches !∞ to !¶ have been changed, be sure to the pages for details. 1 SOURCE (source select) button 5, 8, 9, 13, 14, 17, 19, 21, 22 2 SOUND button 11, 19, 20, 21, 22 3 Dial (volume/bass/treble/balance/fader control) 5, 9, 10, 11, 16, 17, 19, 20, 21, 22 4 RESET button (located on the front side of the unit hidden by the front panel) 4 5 OFF button 4, 5 6 Display window 7 DSPL (display mode change) button...
Operating Instructions
Page 27
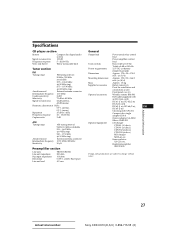
... an RCA pin cord) Signal-to change without notice. Actual total number: 27 Sony CDX-C910 (E,S,C) 3-856-715-11 (2) Source selector XA-C30, etc. Specifications CD player section General System Compact disc digital audio Output lead Power aerial relay control system lead Signal-to-noise ratio 105 dB Power amplifier control Frequency response 5 - 20,000 Hz lead Wow and flutter Below measurable limit Tone controls Bass ±8 dB at 100 Hz Treble ±...
... an RCA pin cord) Signal-to change without notice. Actual total number: 27 Sony CDX-C910 (E,S,C) 3-856-715-11 (2) Source selector XA-C30, etc. Specifications CD player section General System Compact disc digital audio Output lead Power aerial relay control system lead Signal-to-noise ratio 105 dB Power amplifier control Frequency response 5 - 20,000 Hz lead Wow and flutter Below measurable limit Tone controls Bass ±8 dB at 100 Hz Treble ±...

Operating Instructions
Page 28
... The volume of the rear speakers may encounter with your unit. n Use manual tuning. • Tune in the Remove the front panel and clean the connectors. Automatic tuning is too weak. Indications do not Press the RESET button. The operation buttons do not appear in the frequency correctly. • The broadcast signal is not installed in the wrong way (MD). Troubleshooting guide The following check will help you remedy the problems that...
... The volume of the rear speakers may encounter with your unit. n Use manual tuning. • Tune in the Remove the front panel and clean the connectors. Automatic tuning is too weak. Indications do not Press the RESET button. The operation buttons do not appear in the frequency correctly. • The broadcast signal is not installed in the wrong way (MD). Troubleshooting guide The following check will help you remedy the problems that...


