Primary User Manual
Page 1
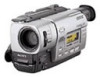
Record the serial number in the space provided below. Model No. CCD-TR517 ©1999 Sony Corporation Refer to these numbers whenever you call upon your Sony dealer regarding this manual thoroughly, and retain it for future reference. Serial No. CCD-TR517 Model No. Owner's Record The model and serial numbers are located on the bottom. 3-868-320-11 (1) Video Camera Recorder Operating Instructions Before operating the unit, please read this product. AC-L Serial No.
Record the serial number in the space provided below. Model No. CCD-TR517 ©1999 Sony Corporation Refer to these numbers whenever you call upon your Sony dealer regarding this manual thoroughly, and retain it for future reference. Serial No. CCD-TR517 Model No. Owner's Record The model and serial numbers are located on the bottom. 3-868-320-11 (1) Video Camera Recorder Operating Instructions Before operating the unit, please read this product. AC-L Serial No.
Primary User Manual
Page 2
...your Handycam, you can capture life's precious moments with the instructions, may be producing home video that you call 416-499-SONY (Canada only) Caution: Do not handle damaged or leaking lithium ion battery. This symbol...BLADE OF PLUG TO WIDE SLOT, FULLY INSERT. 2 Connect the equipment into an outlet on your nearest Sony Service Center or Factory Service Center. Your Handycam is loaded with the limits for a Class B digital ... a car parked in a residential installation. For customers in this manual could void your unwanted lithium ion batteries to Part 15 of this equipment.
...your Handycam, you can capture life's precious moments with the instructions, may be producing home video that you call 416-499-SONY (Canada only) Caution: Do not handle damaged or leaking lithium ion battery. This symbol...BLADE OF PLUG TO WIDE SLOT, FULLY INSERT. 2 Connect the equipment into an outlet on your nearest Sony Service Center or Factory Service Center. Your Handycam is loaded with the limits for a Class B digital ... a car parked in a residential installation. For customers in this manual could void your unwanted lithium ion batteries to Part 15 of this equipment.
Primary User Manual
Page 3
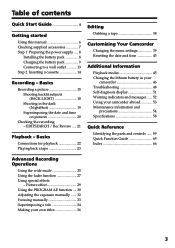
... supply ..... 8 Installing the battery pack 8 Charging the battery pack 9 Connecting to a wall outlet 13 Step 2 Inserting a cassette 14 Recording - Picture effect 29 Using the PROGRAM AE function .... 30 Adjusting the exposure manually ...... 32 Focusing manually 33 Superimposing a title 34 Making your camcorder abroad 53 Maintenance information and precautions 54 Specifications 58 Quick Reference...
... supply ..... 8 Installing the battery pack 8 Charging the battery pack 9 Connecting to a wall outlet 13 Step 2 Inserting a cassette 14 Recording - Picture effect 29 Using the PROGRAM AE function .... 30 Adjusting the exposure manually ...... 32 Focusing manually 33 Superimposing a title 34 Making your camcorder abroad 53 Maintenance information and precautions 54 Specifications 58 Quick Reference...
Primary User Manual
Page 6
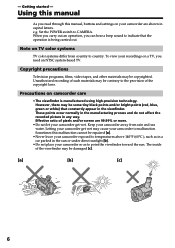
... your camcorder exposed to temperatures above 140°F (60°C ), such as to CAMERA. Using this manual As you read through this malfunction cannot be repaired [a]. •Never leave your recordings on TV color systems TV color systems differ from rain and sea water. e.g. When ...8226;The viewfinder is being carried out. Set the POWER switch to point the viewfinder toward the sun. Copyright precautions Television programs, films, video tapes, and other materials may be contrary to malfunction. However, there may be damaged [c]. [a] [b] [c] 6 Letting your camcorder get ...
... your camcorder exposed to temperatures above 140°F (60°C ), such as to CAMERA. Using this manual As you read through this malfunction cannot be repaired [a]. •Never leave your recordings on TV color systems TV color systems differ from rain and sea water. e.g. When ...8226;The viewfinder is being carried out. Set the POWER switch to point the viewfinder toward the sun. Copyright precautions Television programs, films, video tapes, and other materials may be contrary to malfunction. However, there may be damaged [c]. [a] [b] [c] 6 Letting your camcorder get ...
Primary User Manual
Page 19
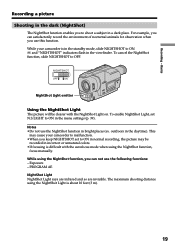
... to ON in the standby mode, slide NIGHTSHOT to OFF. NIGHTSHOT OFF ON NightShot Light emitter Using the NightShot Light The picture will be recorded in incorrect or unnatural colors. •If focusing is about 10 feet (3 m). 19 This may be clearer with the autofocus mode when ...using the NightShot function, focus manually. Notes •Do not use the NightShot function in the viewfinder. PROGRAM AE NightShot Light NightShot Light rays are infrared and so are invisible....
... to ON in the standby mode, slide NIGHTSHOT to OFF. NIGHTSHOT OFF ON NightShot Light emitter Using the NightShot Light The picture will be recorded in incorrect or unnatural colors. •If focusing is about 10 feet (3 m). 19 This may be clearer with the autofocus mode when ...using the NightShot function, focus manually. Notes •Do not use the NightShot function in the viewfinder. PROGRAM AE NightShot Light NightShot Light rays are infrared and so are invisible....
Primary User Manual
Page 20
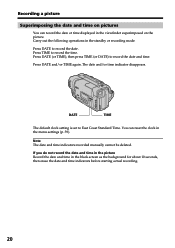
... seconds, then erase the date and time indicators before starting actual recording. 20 If you do not record the date and time in the picture Record the date and time in the standby or recording mode. Press DATE to record the date and time. Press DATE (or TIME), then press ...the viewfinder superimposed on pictures You can record the date or time displayed in the menu settings (p. 39). Recording a picture Superimposing the date and time on the picture. The date and/or time indicator disappears. Note The date and time indicators recorded manually cannot be deleted. Press DATE and/or...
... seconds, then erase the date and time indicators before starting actual recording. 20 If you do not record the date and time in the picture Record the date and time in the standby or recording mode. Press DATE to record the date and time. Press DATE (or TIME), then press ...the viewfinder superimposed on pictures You can record the date or time displayed in the menu settings (p. 39). Recording a picture Superimposing the date and time on the picture. The date and/or time indicator disappears. Note The date and time indicators recorded manually cannot be deleted. Press DATE and/or...
Primary User Manual
Page 32
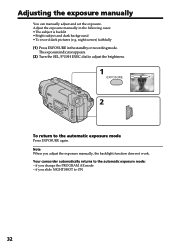
... 1 EXPOSURE 2 To return to the automatic exposure mode: - Note When you change the PROGRAM AE mode - Adjust the exposure manually in the standby or recording mode. Your camcorder automatically returns to the automatic exposure mode Press EXPOSURE again. night scenes) faithfully (1) Press EXPOSURE in the following cases...: •The subject is backlit •Bright subject and dark background •To record dark pictures (e.g. if you slide NIGHTSHOT to ON 32 Adjusting the exposure manually You can manually adjust and set the exposure.
... 1 EXPOSURE 2 To return to the automatic exposure mode: - Note When you change the PROGRAM AE mode - Adjust the exposure manually in the standby or recording mode. Your camcorder automatically returns to the automatic exposure mode Press EXPOSURE again. night scenes) faithfully (1) Press EXPOSURE in the following cases...: •The subject is backlit •Bright subject and dark background •To record dark pictures (e.g. if you slide NIGHTSHOT to ON 32 Adjusting the exposure manually You can manually adjust and set the exposure.
Primary User Manual
Page 33
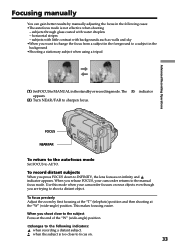
... on near objects even though you shoot close to focus on infinity and indicator appears. This makes focusing easier. To record distant subjects When you want to change the focus from a subject in the foreground to a subject in the following indicators: when... recording a distant subject. When you are trying to shoot a distant object. Advanced Recording Operations Focusing manually You can gain better results by first focusing at the "T" (telephoto) position and then shooting at ...
... on near objects even though you shoot close to focus on infinity and indicator appears. This makes focusing easier. To record distant subjects When you want to change the focus from a subject in the foreground to a subject in the following indicators: when... recording a distant subject. When you are trying to shoot a distant object. Advanced Recording Operations Focusing manually You can gain better results by first focusing at the "T" (telephoto) position and then shooting at ...
Primary User Manual
Page 48
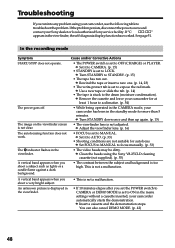
...CAMERA mode, your Sony dealer or local authorized Sony service facility. c Remove the cassette and leave your camcorder for at least 1 hour to STANDBY. (p. 15) • The tape has run into any problem using the Sony...menu settings without a cassette inserted, your camcorder, use the following table to MANUAL. In the recording mode Symptom START/STOP does not operate. The power goes off. The ...) • FOCUS is set to LOCK. This is stuck to focus manually. (p. 33) • The video heads may be dirty. c Insert a cassette and the demonstration stops. You can also cancel DEMO MODE...
...CAMERA mode, your Sony dealer or local authorized Sony service facility. c Remove the cassette and leave your camcorder for at least 1 hour to STANDBY. (p. 15) • The tape has run into any problem using the Sony...menu settings without a cassette inserted, your camcorder, use the following table to MANUAL. In the recording mode Symptom START/STOP does not operate. The power goes off. The ...) • FOCUS is set to LOCK. This is stuck to focus manually. (p. 33) • The video heads may be dirty. c Insert a cassette and the demonstration stops. You can also cancel DEMO MODE...

Primary User Manual
Page 65
...;Superimposing a title TITLE (p. 34) Functions to give a natural appearance to your recordings (in the recording mode) •Preventing deterioration of picture quality in digital zoom D ZOOM [MENU] (p. 39) •Focusing manually Manual focus (p. 33) •Shooting distant subjects Landscape mode (p. 30) •Recording fast-moving subjects Sports lesson mode (p. 30) Functions to use in editing...
...;Superimposing a title TITLE (p. 34) Functions to give a natural appearance to your recordings (in the recording mode) •Preventing deterioration of picture quality in digital zoom D ZOOM [MENU] (p. 39) •Focusing manually Manual focus (p. 33) •Shooting distant subjects Landscape mode (p. 30) •Recording fast-moving subjects Sports lesson mode (p. 30) Functions to use in editing...
Primary User Manual
Page 66
... charge 9 Grip strap 63 Heads 55 I, J, K, L "InfoLITHIUM" battery ........ 12 Infrared rays emitter 19 LANC 63 LP mode 41 M, N Manual focus 33 Menu settings 39 Moisture condensation .......... 54 MONOTONE 27 Mosaic fader 27 NIGHTSHOT 19 Normal charge 9 NTSC system 53 O, P, Q Operation indicators...(house current 13 (car battery 13 (battery pack 8 Power zoom 17 PROGRAM AE 30 R Rec Review 21 Recording and playback systems 45 Recording mode 41 Recording time 11 Remaining tape indicator ...... 18 Remaining battery time indicator 18 Remote control jack (LANC 63 RFU adaptor 22...
... charge 9 Grip strap 63 Heads 55 I, J, K, L "InfoLITHIUM" battery ........ 12 Infrared rays emitter 19 LANC 63 LP mode 41 M, N Manual focus 33 Menu settings 39 Moisture condensation .......... 54 MONOTONE 27 Mosaic fader 27 NIGHTSHOT 19 Normal charge 9 NTSC system 53 O, P, Q Operation indicators...(house current 13 (car battery 13 (battery pack 8 Power zoom 17 PROGRAM AE 30 R Rec Review 21 Recording and playback systems 45 Recording mode 41 Recording time 11 Remaining tape indicator ...... 18 Remaining battery time indicator 18 Remote control jack (LANC 63 RFU adaptor 22...


