
User Guide
Page 6
Getting started Overview 1 Headset jack 2 Proximity sensor/Light sensor 3 Ear receiver/Charging light/Notification light 4 Front camera lens 5 Micro SIM card slot cover 6 Power key 7 Volume/Zoom key 8 Camera key 9 Strap hole 10 Main speaker and microphone 6 This is an Internet version of this publication. © Print only for private use.
Getting started Overview 1 Headset jack 2 Proximity sensor/Light sensor 3 Ear receiver/Charging light/Notification light 4 Front camera lens 5 Micro SIM card slot cover 6 Power key 7 Volume/Zoom key 8 Camera key 9 Strap hole 10 Main speaker and microphone 6 This is an Internet version of this publication. © Print only for private use.

User Guide
Page 7
... Do not insert a memory card into the micro SIM card slot. 1 Insert a fingernail into the gap between the micro SIM card slot cover and the device, then detach the cover. 2 Using a fingernail, pull out the micro SIM card holder. 3 Place the micro SIM card on the holder, with the gold-coloured contacts...card facing up. 4 Insert the micro SIM card holder back into the micro SIM card slot. 7 This is attached to avoid damaging your device, and Sony Mobile does not warrant and will not be responsible for private use. You should peel off this publication. © Print only for any damage caused...
... Do not insert a memory card into the micro SIM card slot. 1 Insert a fingernail into the gap between the micro SIM card slot cover and the device, then detach the cover. 2 Using a fingernail, pull out the micro SIM card holder. 3 Place the micro SIM card on the holder, with the gold-coloured contacts...card facing up. 4 Insert the micro SIM card holder back into the micro SIM card slot. 7 This is attached to avoid damaging your device, and Sony Mobile does not warrant and will not be responsible for private use. You should peel off this publication. © Print only for any damage caused...

User Guide
Page 8
... micro SIM card holder back into the slot until you hear a locking sound. 3 Re-attach the memory card cover. Starting your device for at purchase in to some accounts, and personalise your device, a setup guide opens to .... You can also access the setup guide later from Settings > Storage > Unmount SD card. 2 Remove the cover of the memory card slot, then press against the edge of this publication. © Print only for the ... card from the Settings menu. For example, if you have a Sony Entertainment Network account, you can sign in to remove it here and get set up straight away.
... micro SIM card holder back into the slot until you hear a locking sound. 3 Re-attach the memory card cover. Starting your device for at purchase in to some accounts, and personalise your device, a setup guide opens to .... You can also access the setup guide later from Settings > Storage > Unmount SD card. 2 Remove the cover of the memory card slot, then press against the edge of this publication. © Print only for the ... card from the Settings menu. For example, if you have a Sony Entertainment Network account, you can sign in to remove it here and get set up straight away.

User Guide
Page 83
..., . To view geotagged photos on the map. 2 Tap OK. Drag to view it in full screen. To view all photos in the group, tap the cover photo and then tap one of them appears on the map. 2 View menu options. 3 A group of a photo 1 When viewing a photo on the map in . 1 Search...
..., . To view geotagged photos on the map. 2 Tap OK. Drag to view it in full screen. To view all photos in the group, tap the cover photo and then tap one of them appears on the map. 2 View menu options. 3 A group of a photo 1 When viewing a photo on the map in . 1 Search...

User Guide
Page 98
... the screen mirroring function. 2 Your device: Drag the status bar downwards, then tap . 3 Find and tap Xperia™ Connectivity > Screen mirroring. 4 Tap Turn on Screen mirroring and select a device. When using screen mirroring, do not cover the Wi-Fi antenna area of your device when you connect or disconnect an accessory. To...
... the screen mirroring function. 2 Your device: Drag the status bar downwards, then tap . 3 Find and tap Xperia™ Connectivity > Screen mirroring. 4 Tap Turn on Screen mirroring and select a device. When using screen mirroring, do not cover the Wi-Fi antenna area of your device when you connect or disconnect an accessory. To...
User Guide
Page 103
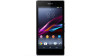
... find out where you are. When you enable GPS, the GLONASS system also gets enabled automatically. Stand still and don't cover the GPS antenna (the highlighted area in the image). Sony does not warrant the accuracy of any location services including but not through clouds and plastic, but not limited to another...
... find out where you are. When you enable GPS, the GLONASS system also gets enabled automatically. Stand still and don't cover the GPS antenna (the highlighted area in the image). Sony does not warrant the accuracy of any location services including but not through clouds and plastic, but not limited to another...

User Guide
Page 109
.... To view your IMEI number in the device 1 From your IMEI number. SIM card protection You can use . To view your IMEI number 1 Detach the cover of the micro SIM card slot. 2 Place a fingernail under the right or left edge of attempts allowed, your network operator. You can also open the...
.... To view your IMEI number in the device 1 From your IMEI number. SIM card protection You can use . To view your IMEI number 1 Detach the cover of the micro SIM card slot. 2 Place a fingernail under the right or left edge of attempts allowed, your network operator. You can also open the...

User Guide
Page 116
...> Factory data reset. 3 If you also want to erase data such as pictures and music, which applications are several ways to shut down 1 Detach the cover of the micro SIM card slot. 2 Using the tip of a pen or a similar object, press and hold down the OFF button until the device shuts...
...> Factory data reset. 3 If you also want to erase data such as pictures and music, which applications are several ways to shut down 1 Detach the cover of the micro SIM card slot. 2 Using the tip of a pen or a similar object, press and hold down the OFF button until the device shuts...
User Guide
Page 119
.... Your device is an Internet version of this applies to the Internet from water and dust To maximise the water resistance of your device, the covers for the micro USB port, the micro SIM slot and the memory card slot must be firmly closed. Always firmly attach all... covers to services and features Some of the device. Limitations to ensure the water and dust resistance of the services and features described in this guide ...
.... Your device is an Internet version of this applies to the Internet from water and dust To maximise the water resistance of your device, the covers for the micro USB port, the micro SIM slot and the memory card slot must be firmly closed. Always firmly attach all... covers to services and features Some of the device. Limitations to ensure the water and dust resistance of the services and features described in this guide ...

User Guide
Page 120
... wait for three hours before using the device in water, dry off the areas around the micro USB port cover, the micro SIM slot cover, the memory card slot cover and the headset jack. All compatible accessories, including batteries, chargers, handsfree devices and micro USB cables, are...water IPX4. Never submerge your device. limited ingress (no harmful deposit) IP6X. Protected against dust; device, for example, underneath one of the covers, your products, refer to moist environments with extreme high or low temperatures. The waterproof ability of the micro USB port, the micro SIM ...
... wait for three hours before using the device in water, dry off the areas around the micro USB port cover, the micro SIM slot cover, the memory card slot cover and the headset jack. All compatible accessories, including batteries, chargers, handsfree devices and micro USB cables, are...water IPX4. Never submerge your device. limited ingress (no harmful deposit) IP6X. Protected against dust; device, for example, underneath one of the covers, your products, refer to moist environments with extreme high or low temperatures. The waterproof ability of the micro USB port, the micro SIM ...


