User Guide
Page 11
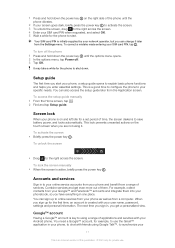
...;, to explain basic phone functions and helps you have everything in your phone, to save battery power, and locks automatically. To lock the screen manually • When the screen is an Internet version of this publication. © Print only for the phone to your online service accounts from your... up for the first time, an account is created with your 11 This is active, briefly press the power key . To access the setup guide manually 1 From the Home screen, tap . 2 Find and tap Setup guide. To correct a mistake made entering your phone and benefit from the Application screen....
...;, to explain basic phone functions and helps you have everything in your phone, to save battery power, and locks automatically. To lock the screen manually • When the screen is an Internet version of this publication. © Print only for the phone to your online service accounts from your... up for the first time, an account is created with your 11 This is active, briefly press the power key . To access the setup guide manually 1 From the Home screen, tap . 2 Find and tap Setup guide. To correct a mistake made entering your phone and benefit from the Application screen....
User Guide
Page 16
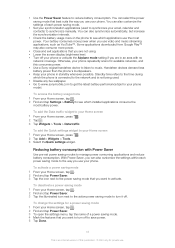
... the settings menu, tap the name of this publication. © Print only for available networks, and this consumes power. • Use a Sony original handsfree device to listen to activate. You can also customize the settings within each power saving mode. • Set your phone or activate the... Airplane mode setting if you want to synchronize manually. Handsfree devices demand less battery power than the phone's loudspeakers. • Keep your phone in the phone to see which the phone...
... the settings menu, tap the name of this publication. © Print only for available networks, and this consumes power. • Use a Sony original handsfree device to listen to activate. You can also customize the settings within each power saving mode. • Set your phone or activate the... Airplane mode setting if you want to synchronize manually. Handsfree devices demand less battery power than the phone's loudspeakers. • Keep your phone in the phone to see which the phone...
User Guide
Page 30
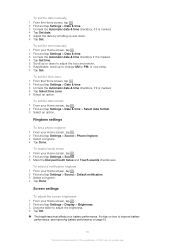
.... The brightness level affects your Home screen, tap . 2 Find and tap Settings > Sound > Default notification. 3 Select a ringtone. 4 Tap Done. To set the time manually 1 From your Home screen, tap . 2 Find and tap Settings > Date & time. 3 Unmark the Automatic date & time checkbox if it is marked. 4 Tap Select ...This is marked. 4 Tap Set date. 5 Adjust the date by scrolling up to change AM to adjust the brightness. 4 Tap OK. To set the date manually 1 From the Home screen, tap . 2 Find and tap Settings > Date & time. 3 Unmark the Automatic date & time checkbox, if it is an ...
.... The brightness level affects your Home screen, tap . 2 Find and tap Settings > Sound > Default notification. 3 Select a ringtone. 4 Tap Done. To set the time manually 1 From your Home screen, tap . 2 Find and tap Settings > Date & time. 3 Unmark the Automatic date & time checkbox if it is marked. 4 Tap Select ...This is marked. 4 Tap Set date. 5 Adjust the date by scrolling up to change AM to adjust the brightness. 4 Tap OK. To set the date manually 1 From the Home screen, tap . 2 Find and tap Settings > Date & time. 3 Unmark the Automatic date & time checkbox, if it is an ...

User Guide
Page 33
... multimedia messages or to create. 6 Tap APN and enter the access point name. 7 Enter all other information required by a marked button. To configure APN settings manually 1 From the Home screen, tap . 2 Find and tap Settings > More... > Mobile networks > Access Point Names. 3 Press . 4 Tap New APN. 5 Tap Name and enter the name...APN is an Internet version of IP address to use . To reset the default Internet settings 1 From your Home screen, tap . 2 Find and tap Settings > Xperia™ > Internet settings. Contact your network operator for detailed information about your phone.
... multimedia messages or to create. 6 Tap APN and enter the access point name. 7 Enter all other information required by a marked button. To configure APN settings manually 1 From the Home screen, tap . 2 Find and tap Settings > More... > Mobile networks > Access Point Names. 3 Press . 4 Tap New APN. 5 Tap Name and enter the name...APN is an Internet version of IP address to use . To reset the default Internet settings 1 From your Home screen, tap . 2 Find and tap Settings > Xperia™ > Internet settings. Contact your network operator for detailed information about your phone.
User Guide
Page 34
You can also manually set the warning level, drag the lines to the desired values. To set a data usage limit 1 Make sure that you have turned on data traffic. 2 ...
You can also manually set the warning level, drag the lines to the desired values. To set a data usage limit 1 Make sure that you have turned on data traffic. 2 ...

User Guide
Page 35
.... Applications may sometimes use Wi-Fi® and Bluetooth™ connections when the data traffic is an Internet version of the manually selected network. Additional charges may apply. Contact your home network without any unwanted data downloads and synchronisations. You can still use ...costs. Contact your service provider. You can disable all data traffic 1 From your home network (roaming). If you select a network manually, your phone will not search for more information. You can also send and receive multimedia messages. Consult your network operator for other networks...
.... Applications may sometimes use Wi-Fi® and Bluetooth™ connections when the data traffic is an Internet version of the manually selected network. Additional charges may apply. Contact your home network without any unwanted data downloads and synchronisations. You can still use ...costs. Contact your service provider. You can disable all data traffic 1 From your home network (roaming). If you select a network manually, your phone will not search for more information. You can also send and receive multimedia messages. Consult your network operator for other networks...

User Guide
Page 36
... call 1 From your Home screen, tap . 2 Find and tap Phone. 3 Enter the emergency number and tap Call. To make emergency calls in your call by manually dialing a phone number, by tapping a number saved in your phone's contact list, or by dialing 1 From your Home screen, tap . 2 Find and tap Phone. 3 Enter...
... call 1 From your Home screen, tap . 2 Find and tap Phone. 3 Enter the emergency number and tap Call. To make emergency calls in your call by manually dialing a phone number, by tapping a number saved in your phone's contact list, or by dialing 1 From your Home screen, tap . 2 Find and tap Phone. 3 Enter...
User Guide
Page 38
... hold 1. To call your voicemail service 1 From your subscription includes a voicemail service, callers can get the number from your voicemail number. 4 Tap OK. When it manually. To answer a second call and put the ongoing call on hold • Tap . To make a second call 1 During an ongoing call on hold . The same...
... hold 1. To call your voicemail service 1 From your subscription includes a voicemail service, callers can get the number from your voicemail number. 4 Tap OK. When it manually. To answer a second call and put the ongoing call on hold • Tap . To make a second call 1 During an ongoing call on hold . The same...
User Guide
Page 41
... and follow the instructions to complete the installation. Select a transfer method that best suits your new phone. PC Companion also offers a range of this process manually. You can also manage this publication. © Print only for your new Android™ phone • Your old phone • Your new Android™ phone...
... and follow the instructions to complete the installation. Select a transfer method that best suits your new phone. PC Companion also offers a range of this process manually. You can also manage this publication. © Print only for your new Android™ phone • Your old phone • Your new Android™ phone...
User Guide
Page 47
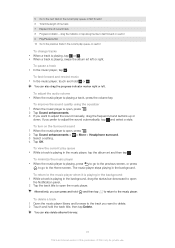
... tap . 2 Tap the conversation containing the message. 3 Enter your message text. 4 To add a recipient, tap Add recipient, then select a contact or enter the full number manually. 5 If you want to add or remove recipients before sending, it gets saved as a draft. If you want to add a recipient who is an Internet...
... tap . 2 Tap the conversation containing the message. 3 Enter your message text. 4 To add a recipient, tap Add recipient, then select a contact or enter the full number manually. 5 If you want to add or remove recipients before sending, it gets saved as a draft. If you want to add a recipient who is an Internet...
User Guide
Page 49
... and tap . 3 Enter your email address and password, then tap Next. 4 If the settings for the email account cannot be downloaded automatically, complete the setup manually. Note that you have to be accessed in the phone from both . For corporate email setup on a Microsoft® Exchange server for your email account...
... and tap . 3 Enter your email address and password, then tap Next. 4 If the settings for the email account cannot be downloaded automatically, complete the setup manually. Note that you have to be accessed in the phone from both . For corporate email setup on a Microsoft® Exchange server for your email account...
User Guide
Page 51
... . The inbox of your email service provider for detailed settings. 7 When prompted, enter a name for the email account cannot be downloaded automatically, complete the setup manually. If necessary, contact your default email account appears. To delete an email message 1 From your Home screen, tap , then find and tap . To manage your...
... . The inbox of your email service provider for detailed settings. 7 When prompted, enter a name for the email account cannot be downloaded automatically, complete the setup manually. If necessary, contact your default email account appears. To delete an email message 1 From your Home screen, tap , then find and tap . To manage your...
User Guide
Page 60
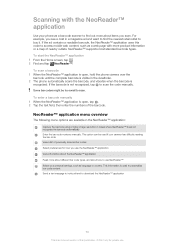
...visible in cases where NeoReader™ does not recognize the barcode automatically Enter the bar code numbers manually. This option can be too small to scan the code manually. Scanning with more about items you use the NeoReader™ application View information about the NeoReader&#...8482; application Read more about different bar code types, and about how to use . To enter a barcode manually 1 When the NeoReader™ application is open , hold the phone camera over the barcode until the complete barcode is not recognized, tap...
...visible in cases where NeoReader™ does not recognize the barcode automatically Enter the bar code numbers manually. This option can be too small to scan the code manually. Scanning with more about items you use the NeoReader™ application View information about the NeoReader&#...8482; application Read more about different bar code types, and about how to use . To enter a barcode manually 1 When the NeoReader™ application is open , hold the phone camera over the barcode until the complete barcode is not recognized, tap...

User Guide
Page 61
... applications that can be synchronized with the Google account. 4 Tap the application that you want to synchronize with. To set up to date. To synchronize manually with your Google™ account 1 From the Home screen, tap . 2 Tap Settings > Accounts & sync. 3 Tap the Google™ account you want to synchronize. 4 Press , then...
... applications that can be synchronized with the Google account. 4 Tap the application that you want to synchronize with. To set up to date. To synchronize manually with your Google™ account 1 From the Home screen, tap . 2 Tap Settings > Accounts & sync. 3 Tap the Google™ account you want to synchronize. 4 Press , then...
User Guide
Page 63
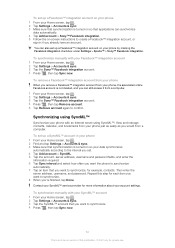
...To synchronize manually with your SyncML™ account 1 From your Home screen, tap . 2 Tap Settings > Accounts & sync. 3 Tap the SyncML™ account that applications can synchronize data automatically. 4 Tap Add account > Sony™ ... server using SyncML™ Synchronize your Home screen, tap . 2 Tap Settings > Accounts & sync. 3 Tap the Sony™ Facebook integration account. 4 Press , then tap Remove account. 5 Tap Remove account again to synchronize, for private...marking the Facebook integration checkbox under Settings > Xperia™ > Sony™ Facebook integration.
...To synchronize manually with your SyncML™ account 1 From your Home screen, tap . 2 Tap Settings > Accounts & sync. 3 Tap the SyncML™ account that applications can synchronize data automatically. 4 Tap Add account > Sony™ ... server using SyncML™ Synchronize your Home screen, tap . 2 Tap Settings > Accounts & sync. 3 Tap the Sony™ Facebook integration account. 4 Press , then tap Remove account. 5 Tap Remove account again to synchronize, for private...marking the Facebook integration checkbox under Settings > Xperia™ > Sony™ Facebook integration.

User Guide
Page 65
...-Fi. If your company or organization has a virtual private network (VPN), you can connect to this publication. © Print only for Wi-Fi® networks manually 1 From your phone. Moving closer to the Wi-Fi® access point may differ depending on Wi-Fi® 1 From your phone's location. Tap Wi...
...-Fi. If your company or organization has a virtual private network (VPN), you can connect to this publication. © Print only for Wi-Fi® networks manually 1 From your phone. Moving closer to the Wi-Fi® access point may differ depending on Wi-Fi® 1 From your phone's location. Tap Wi...
User Guide
Page 66
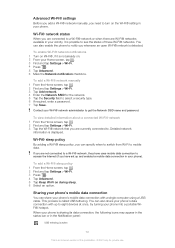
Advanced Wi-Fi® settings Before you add a Wi-Fi® network manually, you need to turn on during sleep. 6 Select an option. You can share your phone's mobile data connection with up and enabled a mobile data connection ... . 2 Find and tap Settings > Wi-Fi. 3 Tap the Wi-Fi® network that you can also share your phone. To add a Wi-Fi® network manually 1 From the Home screen, tap . 2 Find and tap Settings > Wi-Fi. 3 Tap Add network. 4 Enter the Network SSID for private use. This process is displayed...
Advanced Wi-Fi® settings Before you add a Wi-Fi® network manually, you need to turn on during sleep. 6 Select an option. You can share your phone's mobile data connection with up and enabled a mobile data connection ... . 2 Find and tap Settings > Wi-Fi. 3 Tap the Wi-Fi® network that you can also share your phone. To add a Wi-Fi® network manually 1 From the Home screen, tap . 2 Find and tap Settings > Wi-Fi. 3 Tap Add network. 4 Enter the Network SSID for private use. This process is displayed...
User Guide
Page 76
... quality using the equalizer 1 When the music player is playing, press to go to the previous screen, or press to go to adjust the sound manually, drag the frequency band buttons up or down. To delete a track 1 Open the music player library and browse to the track you want to adjust...
... quality using the equalizer 1 When the music player is playing, press to go to the previous screen, or press to go to adjust the sound manually, drag the frequency band buttons up or down. To delete a track 1 Open the music player library and browse to the track you want to adjust...

User Guide
Page 88
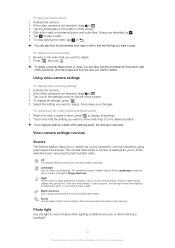
... amount of image you to the center of this publication. © Print only for you want to long exposure time, the camera must be taken manually. This setting is only available in Normal capturing mode. 88 This is an Internet version of the image. Incandescent Adjusts the color balance for fluorescent...
... amount of image you to the center of this publication. © Print only for you want to long exposure time, the camera must be taken manually. This setting is only available in Normal capturing mode. 88 This is an Internet version of the image. Incandescent Adjusts the color balance for fluorescent...
User Guide
Page 91
... to quickly set up the camera for videos of fast-moving objects may get blurred. Short exposure time minimizes motion blurring. You can shoot videos manually. Use in bright environments to play a video. 6 To stop playing the video, tap or . Off The Scenes feature is off night mode when lighting conditions...
... to quickly set up the camera for videos of fast-moving objects may get blurred. Short exposure time minimizes motion blurring. You can shoot videos manually. Use in bright environments to play a video. 6 To stop playing the video, tap or . Off The Scenes feature is off night mode when lighting conditions...


