

Owners Manual
Page 2
... NOTE : This equipment has been tested and found that could result. Operation of this manual to familiarize yourself with our projectors. This projector produces intense light from the many service requests were not caused by problems that many features included in the way indicated. ... QUALIFIED SERVICE PERSONNEL. This owner's manual will receive maximum satisfaction from the projection lens. Do not try out your new projector. If the projector will be used in the manual. This equipment generates, uses and can often correct operating problems yourself. READ AND KEEP ...
... NOTE : This equipment has been tested and found that could result. Operation of this manual to familiarize yourself with our projectors. This projector produces intense light from the many service requests were not caused by problems that many features included in the way indicated. ... QUALIFIED SERVICE PERSONNEL. This owner's manual will receive maximum satisfaction from the projection lens. Do not try out your new projector. If the projector will be used in the manual. This equipment generates, uses and can often correct operating problems yourself. READ AND KEEP ...

Owners Manual
Page 3
... openings should never be covered with care. c. For added protection to normal operation. If you to lightning and power line surges. When the projector exhibits a distinct change in fire or electric shock. Do not defeat the safety purpose of your electrician. Heat build-up can reduce the service... life of this projector from the type of the instructions given here and retain them for service. Do not use attachments not recommended by the manufacturer as a...
... openings should never be covered with care. c. For added protection to normal operation. If you to lightning and power line surges. When the projector exhibits a distinct change in fire or electric shock. Do not defeat the safety purpose of your electrician. Heat build-up can reduce the service... life of this projector from the type of the instructions given here and retain them for service. Do not use attachments not recommended by the manufacturer as a...

Owners Manual
Page 4
... SYSTEM AUTOMATIC MULTISCANNING SYSTEM 22 22 COMPATIBLE COMPUTER SPECIFICATIONS 23 NAME OF EACH PART OF THE PROJECTOR 6 PC ADJUSTMENT 24 SETTING-UP THE PROJECTOR 7 PICTURE IMAGE ADJUSTMENT 26 POSITIONING THE PROJECTOR 7 ADJUST PICTURE IMAGE MANUALLY 26 ADJUSTABLE FEET 7 NORMAL FUNCTION 26 CONNECTING THE AC POWER...MENU 17 MENU BAR 18 APPENDIX 32 BASIC OPERATION 19 OPERATING WIRELESS MOUSE 32 MAINTENANCE 33 TURNING ON / OFF THE PROJECTOR 19 TEMPERATURE WARNING INDICATOR 33 ADJUSTING THE IMAGE 20 AIR FILTER CARE AND CLEANING CLEANING THE PROJECTION LENS 33 33 ...
... SYSTEM AUTOMATIC MULTISCANNING SYSTEM 22 22 COMPATIBLE COMPUTER SPECIFICATIONS 23 NAME OF EACH PART OF THE PROJECTOR 6 PC ADJUSTMENT 24 SETTING-UP THE PROJECTOR 7 PICTURE IMAGE ADJUSTMENT 26 POSITIONING THE PROJECTOR 7 ADJUST PICTURE IMAGE MANUALLY 26 ADJUSTABLE FEET 7 NORMAL FUNCTION 26 CONNECTING THE AC POWER...MENU 17 MENU BAR 18 APPENDIX 32 BASIC OPERATION 19 OPERATING WIRELESS MOUSE 32 MAINTENANCE 33 TURNING ON / OFF THE PROJECTOR 19 TEMPERATURE WARNING INDICATOR 33 ADJUSTING THE IMAGE 20 AIR FILTER CARE AND CLEANING CLEANING THE PROJECTION LENS 33 33 ...
Owners Manual
Page 5
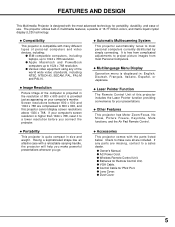
... a lower resolution before you go. x Image Resolution Picture Image of the computer is projected in ; x Automatic Multiscanning System This projector automatically tunes to a sales dealer. x Laser Pointer Function The Remote Control Unit of the world wide video standards, including NTSC, ...ease of 16.77 million colors, and matrix liquid crystal display (LCD) technology. Check to project picture images from complicated adjustments to make powerful presentations wherever you connect the projector. x Compatibility This projector is higher than 1024 x 768, reset it is displayed in ...
... a lower resolution before you go. x Image Resolution Picture Image of the computer is projected in ; x Automatic Multiscanning System This projector automatically tunes to a sales dealer. x Laser Pointer Function The Remote Control Unit of the world wide video standards, including NTSC, ...ease of 16.77 million colors, and matrix liquid crystal display (LCD) technology. Check to project picture images from complicated adjustments to make powerful presentations wherever you connect the projector. x Compatibility This projector is higher than 1024 x 768, reset it is displayed in ...

Owners Manual
Page 6
... Intake Vents should be blocked. q Do not put a flammable object near this area especially screws and metallic parts. PREPARATION NAME OF EACH PART OF THE PROJECTOR FRONT OF THE CABINET PROJECTION LENS LENS COVER INFRARED REMOTE RECEIVER BACK OF THE CABINET EXHAUST VENT HOT AIR EXHAUSTED ! When using or installing the...
... Intake Vents should be blocked. q Do not put a flammable object near this area especially screws and metallic parts. PREPARATION NAME OF EACH PART OF THE PROJECTOR FRONT OF THE CABINET PROJECTION LENS LENS COVER INFRARED REMOTE RECEIVER BACK OF THE CABINET EXHAUST VENT HOT AIR EXHAUSTED ! When using or installing the...

Owners Manual
Page 7
...the FEET LOCK LATCHES. Projection angle can be adjusted to 10 degrees. 1 Lift the front of the projector and pull the FEET LOCK LATCHES on both sides of the projector. 2 Release the FEET LOCK LATCHES to lock the ADJUSTABLE FEET and rotate the ADJUSTABLE FEET to fine ....3"(2903mm) 171.4"(4354mm) 2.9"(73mm) 4.3"(109mm) 5.7"(145mm) 8.6"(218mm) ROOM LIGHT The brightness in order to provide the best image. SETTING-UP THE PROJECTOR POSITIONING THE PROJECTOR q This projector is recommended to limit ambient lighting in the room has a great influence on the picture quality. q The...
...the FEET LOCK LATCHES. Projection angle can be adjusted to 10 degrees. 1 Lift the front of the projector and pull the FEET LOCK LATCHES on both sides of the projector. 2 Release the FEET LOCK LATCHES to lock the ADJUSTABLE FEET and rotate the ADJUSTABLE FEET to fine ....3"(2903mm) 171.4"(4354mm) 2.9"(73mm) 4.3"(109mm) 5.7"(145mm) 8.6"(218mm) ROOM LIGHT The brightness in order to provide the best image. SETTING-UP THE PROJECTOR POSITIONING THE PROJECTOR q This projector is recommended to limit ambient lighting in the room has a great influence on the picture quality. q The...

Owners Manual
Page 8
...to the outlet with single-phase power systems having a grounded neutral conductor. The socket-outlet must be near this projector is not in use . Connect the projector with the cooling fans for connection.) CAUTION For safety, unplug the AC Power Cord when the appliance is connected... to the projector. Projector side (Female) AC outlet side (Male) VENTILATION This projector is equipped with the peripheral equipment before turning the projector on. (Refer to pages 10 ~ 13 for protection from any object. q ...
...to the outlet with single-phase power systems having a grounded neutral conductor. The socket-outlet must be near this projector is not in use . Connect the projector with the cooling fans for connection.) CAUTION For safety, unplug the AC Power Cord when the appliance is connected... to the projector. Projector side (Female) AC outlet side (Male) VENTILATION This projector is equipped with the peripheral equipment before turning the projector on. (Refer to pages 10 ~ 13 for protection from any object. q ...
Owners Manual
Page 9
... an unsuitable transport case. q For carrying or transportation cases, contact a Sanyo authorized dealer. 9 q Do not transport the projector by using a courier or transport service in use a case recommended by Sanyo. PREPARATION CAUTION IN CARRYING OR TRANSPORTING THE PROJECTOR q Do not drop or bump the projector, otherwise damages or malfunctions may cause damage to the lens...
... an unsuitable transport case. q For carrying or transportation cases, contact a Sanyo authorized dealer. 9 q Do not transport the projector by using a courier or transport service in use a case recommended by Sanyo. PREPARATION CAUTION IN CARRYING OR TRANSPORTING THE PROJECTOR q Do not drop or bump the projector, otherwise damages or malfunctions may cause damage to the lens...

Owners Manual
Page 10
...terminal. (Refer to P11, 12, 13.) CONTROL PORT CONNECTOR When controlling the computer with the Remote Control of this projector, connect the mouse port of thus projector with the monitor cable (not supplied). sync. 6 Ground (Red) 14 Vert. And connect to the monitor to ...10 Ground (Vert.sync.) 3 Blue Input 11 Sense 0 4 Sense 2 12 Sense 1 5 Ground (Horiz.sync.) 13 Horiz. CONNECTING THE PROJECTOR TERMINALS OF THE PROJECTOR S-VIDEO INPUT JACK Connect the S-VIDEO output from the video equipment to this terminal. (Refer to P11.) AUDIO INPUT JACKS Connect the audio outputs...
...terminal. (Refer to P11, 12, 13.) CONTROL PORT CONNECTOR When controlling the computer with the Remote Control of this projector, connect the mouse port of thus projector with the monitor cable (not supplied). sync. 6 Ground (Red) 14 Vert. And connect to the monitor to ...10 Ground (Vert.sync.) 3 Blue Input 11 Sense 0 4 Sense 2 12 Sense 1 5 Ground (Horiz.sync.) 13 Horiz. CONNECTING THE PROJECTOR TERMINALS OF THE PROJECTOR S-VIDEO INPUT JACK Connect the S-VIDEO output from the video equipment to this terminal. (Refer to P11.) AUDIO INPUT JACKS Connect the audio outputs...

Owners Manual
Page 11
..., the power cords of both jacks are not supplied with this projector. When the both the projector and the external equipment should be disconnected from AC outlet. Turn the projector and peripheral equipment on before the computer is switched on. CONNECTING THE PROJECTOR CONNECTING TO THE VIDEO EQUIPMENT Video Source (example) Video Cassette Recorder...
..., the power cords of both jacks are not supplied with this projector. When the both the projector and the external equipment should be disconnected from AC outlet. Turn the projector and peripheral equipment on before the computer is switched on. CONNECTING THE PROJECTOR CONNECTING TO THE VIDEO EQUIPMENT Video Source (example) Video Cassette Recorder...

Owners Manual
Page 12
...switches following the chart on . IBM-compatible computers or Macintosh computers (VGA / SVGA / XGA) Desktop type Laptop type Monitor Audio Speaker (stereo) Audio Amplifier To the Monitor To each terminal of both the projector and the external equipment should be disconnected from AC outlet. CONNECTING THE... PROJECTOR CONNECTING TO THE COMPUTER To connect to the computer, refer to the figure below. Turn the projector and peripheral equipment on before the ...
...switches following the chart on . IBM-compatible computers or Macintosh computers (VGA / SVGA / XGA) Desktop type Laptop type Monitor Audio Speaker (stereo) Audio Amplifier To the Monitor To each terminal of both the projector and the external equipment should be disconnected from AC outlet. CONNECTING THE... PROJECTOR CONNECTING TO THE COMPUTER To connect to the computer, refer to the figure below. Turn the projector and peripheral equipment on before the ...

Owners Manual
Page 13
... OFF OFF 16" MODE (832 x 624) OFF ON OFF ON OFF OFF 19" MODE (1024 x 768) OFF ON ON OFF OFF OFF 13 CONNECTING THE PROJECTOR S-VIDEO R-AUDIO-L(MONO) AUDIO VIDEO IN COMPUTER IN OUT MONITOR OUT CONTROL PORT COMPUTER IN MONITOR OUT CONTROL PORT AUDIO IN AUDIO OUT Use one... of these Control Cables corresponding with the terminal of your turn on the projector and computer. ON ing on the RESOLUTION MODE that you want to use before your computer. x MAC ADAPTER (Not supplied) Set the switches as shown...
... OFF OFF 16" MODE (832 x 624) OFF ON OFF ON OFF OFF 19" MODE (1024 x 768) OFF ON ON OFF OFF OFF 13 CONNECTING THE PROJECTOR S-VIDEO R-AUDIO-L(MONO) AUDIO VIDEO IN COMPUTER IN OUT MONITOR OUT CONTROL PORT COMPUTER IN MONITOR OUT CONTROL PORT AUDIO IN AUDIO OUT Use one... of these Control Cables corresponding with the terminal of your turn on the projector and computer. ON ing on the RESOLUTION MODE that you want to use before your computer. x MAC ADAPTER (Not supplied) Set the switches as shown...

Owners Manual
Page 14
... Pointer Function This remote control emits a laser beam as the Laser Pointer from the Laser Light Window. When using the Remote Control Unit, turn the projector on or off . The three marks bellow are put on yourself or other than 1 minute or the button is emitted while pressing this button within...
... Pointer Function This remote control emits a laser beam as the Laser Pointer from the Laser Light Window. When using the Remote Control Unit, turn the projector on or off . The three marks bellow are put on yourself or other than 1 minute or the button is emitted while pressing this button within...

Owners Manual
Page 15
... slide it. 2 Slide the batteries into DIGITAL ZOOM mode and resize the image. (P28, 29) Operating Range Point the remote control toward the projector (the Remote Receiver) whenever pressing the buttons. Two AA size batteries For correct polarity (+ and -), be sure the battery terminals are in the ...function. (P27) LASER KEYSTONE NO SHOW FREEZE AUTO IMAGE NORMAL VOLUME BUTTON Used to adjust volume. (P21) D.ZOOM BUTTON Used to turn the projector into the compartment. 3 Replace the compartment lid. Maximum operating range for the remote control is about 16.4' (5m) and 60° front...
... slide it. 2 Slide the batteries into DIGITAL ZOOM mode and resize the image. (P28, 29) Operating Range Point the remote control toward the projector (the Remote Receiver) whenever pressing the buttons. Two AA size batteries For correct polarity (+ and -), be sure the battery terminals are in the ...function. (P27) LASER KEYSTONE NO SHOW FREEZE AUTO IMAGE NORMAL VOLUME BUTTON Used to adjust volume. (P21) D.ZOOM BUTTON Used to turn the projector into the compartment. 3 Replace the compartment lid. Maximum operating range for the remote control is about 16.4' (5m) and 60° front...

Owners Manual
Page 16
... is also used to pan the image in green when the projector is ready to be turned on . READY INDICATOR This indicator is lit in DIGITAL ZOOM mode. (P28) NORMAL BUTTON Used to reset to normal picture .... (P27) 16 BEFORE OPERATION TOP CONTROLS AND INDICATORS POWER ON-OFF BUTTON Used to turn the projector on or off. (P19) LAMP INDICATOR This indicator is dim when the projector is turned on . And bright when the projector is in DIGITAL ZOOM mode. (P28) POINT BUTTONS Used to execute the item selected. WARNING...
... is also used to pan the image in green when the projector is ready to be turned on . READY INDICATOR This indicator is lit in DIGITAL ZOOM mode. (P28) NORMAL BUTTON Used to reset to normal picture .... (P27) 16 BEFORE OPERATION TOP CONTROLS AND INDICATORS POWER ON-OFF BUTTON Used to turn the projector on or off. (P19) LAMP INDICATOR This indicator is dim when the projector is turned on . And bright when the projector is in DIGITAL ZOOM mode. (P28) POINT BUTTONS Used to execute the item selected. WARNING...

Owners Manual
Page 17
... SELECT BUTTON Used to select the item. BEFORE OPERATION OPERATING ON-SCREEN MENU HOW TO OPERATE ON-SCREEN MENU You can control and adjust this projector through ON-SCREEN MENU 4 Move the POINTER downward by pressing POINT DOWN button. (The shape of the POINTER becomes an arrow.) 5 Move the POINTER to...
... SELECT BUTTON Used to select the item. BEFORE OPERATION OPERATING ON-SCREEN MENU HOW TO OPERATE ON-SCREEN MENU You can control and adjust this projector through ON-SCREEN MENU 4 Move the POINTER downward by pressing POINT DOWN button. (The shape of the POINTER becomes an arrow.) 5 Move the POINTER to...
Owners Manual
Page 19
... The Preparation Display appears on again. After cooling down starts. Press the power ON-OFF button to operate. The message disappears after the projector is automatically turned off . TO MAINTAIN THE LIFE OF THE LAMP, ONCE YOU TURN IT ON, WAIT AT LEAST 5 MINUTES BEFORE TURNING...the Remote Control Unit or on . The signal from the AC outlet. 2. The Cooling Fans operate for connecting that equipment. 2 Connect the projector's AC power cord into a wall outlet. If the TEMPERATURE WARNING indicator continues to flash, call your authorized dealer or service station. NOTE: The...
... The Preparation Display appears on again. After cooling down starts. Press the power ON-OFF button to operate. The message disappears after the projector is automatically turned off . TO MAINTAIN THE LIFE OF THE LAMP, ONCE YOU TURN IT ON, WAIT AT LEAST 5 MINUTES BEFORE TURNING...the Remote Control Unit or on . The signal from the AC outlet. 2. The Cooling Fans operate for connecting that equipment. 2 Connect the projector's AC power cord into a wall outlet. If the TEMPERATURE WARNING indicator continues to flash, call your authorized dealer or service station. NOTE: The...
Owners Manual
Page 22
... input from the computer. COMPUTER MODE SELECTING COMPUTER MODE DIRECT OPERATION Select COMPUTER mode by the projector. MODE button COMPUTER VIDEO Providing the information of computer based on VGA, SVGA or XGA (refer to select SYSTEM and press the SELECT button. Press the POINT LEFT/RIGHT...Computer Mode, the Current Mode display appears. When selecting Computer, this dialog box can be required when connecting some computers.) Note : The projector may be selected. The systems on the Remote Control Unit. Another dialog box COMPUTER SYSTEM Menu will appear. 2 Press the POINT DOWN ...
... input from the computer. COMPUTER MODE SELECTING COMPUTER MODE DIRECT OPERATION Select COMPUTER mode by the projector. MODE button COMPUTER VIDEO Providing the information of computer based on VGA, SVGA or XGA (refer to select SYSTEM and press the SELECT button. Press the POINT LEFT/RIGHT...Computer Mode, the Current Mode display appears. When selecting Computer, this dialog box can be required when connecting some computers.) Note : The projector may be selected. The systems on the Remote Control Unit. Another dialog box COMPUTER SYSTEM Menu will appear. 2 Press the POINT DOWN ...

Owners Manual
Page 23
...75.70 43.48 58.20 58.30 75.08 23 COMPUTER MODE COMPATIBLE COMPUTER SPECIFICATIONS Basically this projector can accept the signal from all computers with the V, H-Frequency mentioned below and less than 135 MHz....50 34.97 75.00 66.60 XGA 2 XGA 3 1024 x 768 1024 x 768 68.677 60.023 MAC 13 RGB RGB SVGA 1 SVGA 2 SVGA 3 SVGA 4 640 x 480 640 x 480 (Interlace) 768 x 576 (Interlace) 800 x 600 800 x 600 800 x 600 800 x... 1024 x 768 (Interlace) 1024 x 768 56.476 60.31 48.50 44.00 63.48 36.00 62.04 SVGA 5 SVGA 6 SVGA 7 SVGA 8 800 x 600 800 x 600 800 x 600 800 x 600 48.08 37.90 34.50 38.00 72....
...75.70 43.48 58.20 58.30 75.08 23 COMPUTER MODE COMPATIBLE COMPUTER SPECIFICATIONS Basically this projector can accept the signal from all computers with the V, H-Frequency mentioned below and less than 135 MHz....50 34.97 75.00 66.60 XGA 2 XGA 3 1024 x 768 1024 x 768 68.677 60.023 MAC 13 RGB RGB SVGA 1 SVGA 2 SVGA 3 SVGA 4 640 x 480 640 x 480 (Interlace) 768 x 576 (Interlace) 800 x 600 800 x 600 800 x 600 800 x... 1024 x 768 (Interlace) 1024 x 768 56.476 60.31 48.50 44.00 63.48 36.00 62.04 SVGA 5 SVGA 6 SVGA 7 SVGA 8 800 x 600 800 x 600 800 x 600 800 x 600 48.08 37.90 34.50 38.00 72....

Owners Manual
Page 24
...a flickering picture, a non-synchronized picture, a non-centered picture or a skewed picture. Manual set Full screen function on/off. 24 This projector has PC ADJUSTMENT function, to enable you want to change the value, press either the POINT RIGHT button or the POINT LEFT button. Another ... with "Stored." 3 When the Mode is selected, Parameter adjustment dialog box appears. Close the PC ADJUSTMENT Menu. If this happens, the projector cannot reproduce a proper image and the image is memorized in the selected Mode. 5 To activate the Mode manually adjusted in this dialog box...
...a flickering picture, a non-synchronized picture, a non-centered picture or a skewed picture. Manual set Full screen function on/off. 24 This projector has PC ADJUSTMENT function, to enable you want to change the value, press either the POINT RIGHT button or the POINT LEFT button. Another ... with "Stored." 3 When the Mode is selected, Parameter adjustment dialog box appears. Close the PC ADJUSTMENT Menu. If this happens, the projector cannot reproduce a proper image and the image is memorized in the selected Mode. 5 To activate the Mode manually adjusted in this dialog box...


