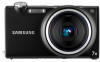
Quick Guide (easy Manual) (ver.1.0) (English, Spanish)
Page 2
... fuels, combustibles, or flammable chemicals. Contents Health and safety information... 2 1 Camera layout 4 13 Setting up your camera... ...... 5 12 Unpacking 5 Inserting the battery and memory card 6 Charging the battery 6 Turning on your camera 7 Using the touch screen 7 Capturing photos or videos... 8 23 Playing files 9 62 Selecting a shooting mode using motion recognition......... 9 21...
Quick Guide (easy Manual) (ver.1.0) (English, Spanish)
Page 3
... use memory cards that have been formatted by other cameras or by your camera with care • Use only Samsung-approved batteries and chargers. Water damage to your camera can reduce the charging capacity of your camera. Reformat the memory card with memory cards or the memory card slot. English Handle and...
Quick Guide (easy Manual) (ver.1.0) (English, Spanish)
Page 6
Indicator light ▪▪ Red: Charging ▪▪ Green: Fully charged TL240_QSM_SEA.indb 6 2010-01-20 오후 8:22:50 Setting up your camera Inserting the battery and memory card 1 Charging the battery Before using the camera for the first time, you must charge the battery. 4 2 With the goldcoloured contacts facing up 3 With the Samsung logo facing down ▼ Removing the battery ▼ Removing the memory card EN-6 Push gently until the card disengages from the camera and then pull it out of the slot.
User Manual (user Manual) (ver.1.0) (English)
Page 3
tRemove the batteries from impact, rough handling, and excessive vibration to your camera. Extreme temperatures can reduce the charging capacity of time. tDo not use memory cards that have been formatted by other similar areas. Installed batteries may leak or corrode over time and ...
User Manual (user Manual) (ver.1.0) (English)
Page 4
...sunlight, as this situation, wait for at least 1 hour until all moisture has evaporated before using the camera in use. After charging is not covered by your warranty. tOver time, unused batteries will discharge and must be recharged before use The manufacturer takes ...humid one, condensation can form on the delicate electronic circuitry and memory card. Clean your camera. Health and safety information Use only Samsung-approved accessories Using incompatible accessories may result from camera malfunction or improper use. 3 Exercise caution when using the camera. Any damage ...
User Manual (user Manual) (ver.1.0) (English)
Page 10
Contents Basic functions 11 Unpacking 12 Camera layout 13 Inserting the battery and memory card 15 Charging the battery and turning your camera on 16 Charging the battery 16 Turning on your camera 16 Performing the initial setup 17 Learning icons 18 Using the touch screen 19 Selecting a shooting mode 20 ...
User Manual (user Manual) (ver.1.0) (English)
Page 12
Unpacking 12 Camera layout 13 Inserting the battery and memory card ... 15 Charging the battery and turning your camera on 16 Charging the battery 16 Turning on your camera's layout, icons, and basic functions for getting a clearer photo 26 Basic functions Learn about your camera 16 Performing ...
User Manual (user Manual) (ver.1.0) (English)
Page 17
tThe initial setup screen appears when you turn on or off. Basic functions 16 Indicator light tRed: Charging tGreen: Fully charged When you must charge the battery. Charging the battery and turning your camera. Attach the USB cable to turn on your camera by pressing and holding [Playback] for the...17) Turning on your camera on the camera for about 5 seconds, the camera does not emit any camera sounds. The camera turns on Charging the battery Before using the camera for the first time, you turn your camera in Playback mode Press [Playback]. Turning on your ...
User Manual (user Manual) (ver.1.0) (English)
Page 19
... (sharpness, contrast, saturation) Icon A B Description Photo styles Smart filter effect Available number of photos Available recording time Internal memory Memory card inserted t : Fully charged t : Partially charged t : Charging needed Zoom ratio Voice memo Auto focus frame Camera shake Option set . Learning icons The icons displayed will change according to the mode you select...
User Manual (user Manual) (ver.1.0) (English)
Page 84
... end of data. 5 Turn on your computer with the indicator light (S) into your files. t The computer recognizes the camera automatically. The battery will be charged while the camera is reversed, it may damage your camera. If the cable is connected to your camera has no new files, the pop...
User Manual (user Manual) (ver.1.0) (English)
Page 97
... card that has some photos. Insert a microSDTM memory card. Delete unnecessary files or insert a new memory card. Transfer the files on again. Insert a charged battery or recharge the battery. t Format your memory card. (p. 93) The inserted memory card is not available with your camera and then turn it on...
User Manual (user Manual) (ver.1.0) (English)
Page 100
...11A Lithium-ion battery 1130 mAh 3.8 V Approx. 190 min Battery life Average time / Number of photos Test conditions (when the battery is fully charged) This is measured under the following conditions: in or out. 2. Repeat steps 1 to Fill in, take a single shot, and zoom in.... 3. Photos Approx. 120 min/ Approx. 240 photos 1. Appendixes 99 Camera maintenance About the battery Use only Samsung-approved batteries. Battery specifications Mode Type Cell capacity Voltage Charging time (when the camera is switched off the camera for 5 minutes. Set the flash option to ...
User Manual (user Manual) (ver.1.0) (English)
Page 101
... - t The battery may turn orange. t Turn on the front side of your computer does not support the power output standard (5 V, 500 mA) Appendixes 100 you charge the battery when the cable is overheated or the temperature is too high, the indicator light may not be... charged when: - other USB devices are connected to the port on your computer - t If the indicator light blinks in orange or does not illuminate, reconnect the ...
User Manual (user Manual) (ver.1.0) (English)
Page 102
...t Do not dispose of 60° C (140° F) or above. t Use only authentic, manufacturer-recommend battery chargers and adapters and charge the battery only by the method described in a fire. The battery can occur if the battery is switched on flammable surfaces,...battery, immediately discontinue use of an enclosed car in contact with metallic objects, such as bedding, carpets, or electric blankets for charging the battery Charge the battery only by country or region. t When the device is handled carelessly or improperly. t Do not allow the ...
User Manual (user Manual) (ver.1.0) (English)
Page 103
... t There is no space on the camera The power turns off to prevent the memory card from being damaged due to an impact. t Charge the battery. The date and time are Set the date and time in the display settings incorrect menu. (p. 93) The touch screen or ...the battery quickly. t Batteries are still having trouble with your device, contact your camera, try these troubleshooting procedures before contacting a service center. t Charge the battery. t Your camera may turn on the memory card. Keep the battery warm by putting it again. The camera freezes Remove the battery and...
User Manual (user Manual) (ver.1.0) (English)
Page 110
... in Shooting mode 61 Sharpness 61 AF Lamp 94 AF Sound 92 Anynet+ 94 Aperture 32 Auto Contrast Balance (ACB) 54 Auto mode 23 B Battery Charging 100 Life 99 Specifications 99 Beauty Shot mode 31 Blink detection 50 Burst Auto Exposure Bracket (AEB) 58 Continuous 58 Motion capture 58...