
User Manual (ENGLISH)
Page 1
WB_UVFG8_t619_080906_F3 SGH-t619 PORTABLE Quad-Band TELEPHONE User Guide Please read this manual before operating your phone, and keep it for future reference.
WB_UVFG8_t619_080906_F3 SGH-t619 PORTABLE Quad-Band TELEPHONE User Guide Please read this manual before operating your phone, and keep it for future reference.

User Manual (ENGLISH)
Page 2
... Intellectual Property includes, but not limited to, accessories, parts, or software relating there to (the "Phone System"), is otherwise the property of Samsung or its suppliers. Moreover, you agree that you have questions about your Samsung Mobile Phone? Intellectual Property All Intellectual Property, as defined below, owned by the Intellectual Property. You may not...
... Intellectual Property includes, but not limited to, accessories, parts, or software relating there to (the "Phone System"), is otherwise the property of Samsung or its suppliers. Moreover, you agree that you have questions about your Samsung Mobile Phone? Intellectual Property All Intellectual Property, as defined below, owned by the Intellectual Property. You may not...

User Manual (ENGLISH)
Page 5
Table of Contents Table of Contents Section 1: Getting Started 5 Activating Your Phone 6 Switching the Phone On or Off 10 Setting Up Your Voice Mail 11 Section 2: Understanding Your Phone 13 Features of Your Phone 14 View of Your Phone 14 Keys 15 Display Layout 17 Get More Help 20 Section 3: Call Functions 21 Making a Call 22... Using ABC Mode 47 Using T9 Mode 49 Using Number Mode 51 Using Symbol Mode 51 Section 6: Understanding Your Phonebook .... 53 Storing a Number in the Phone's Memory 54 Storing a Number in the SIM Card 55 Table of Contents 1
Table of Contents Table of Contents Section 1: Getting Started 5 Activating Your Phone 6 Switching the Phone On or Off 10 Setting Up Your Voice Mail 11 Section 2: Understanding Your Phone 13 Features of Your Phone 14 View of Your Phone 14 Keys 15 Display Layout 17 Get More Help 20 Section 3: Call Functions 21 Making a Call 22... Using ABC Mode 47 Using T9 Mode 49 Using Number Mode 51 Using Symbol Mode 51 Section 6: Understanding Your Phonebook .... 53 Storing a Number in the Phone's Memory 54 Storing a Number in the SIM Card 55 Table of Contents 1

User Manual (ENGLISH)
Page 6
... a Number from the SIM Card 63 Copying all SIM Phonebook Entries 64 Deleting all of the Phonebook Entries 64 My Namecard 65 Finding My Own Phone Number 66 FDN List 67 Management 67 Section 7: Messages 71 Voice Notes 72 Text Messages 74 Picture Messages 76 Inbox 80 Sentbox 87 Outbox 87... Delete all 91 Settings 91 Broadcast Messages (SIM Dependent 93 Instant Messaging 93 Memory Status 94 Section 8: Changing Your Settings 95 Time & Date Settings 96 Phone Settings 97 Display Settings 99 Sound Settings 102 Bluetooth 105 2
... a Number from the SIM Card 63 Copying all SIM Phonebook Entries 64 Deleting all of the Phonebook Entries 64 My Namecard 65 Finding My Own Phone Number 66 FDN List 67 Management 67 Section 7: Messages 71 Voice Notes 72 Text Messages 74 Picture Messages 76 Inbox 80 Sentbox 87 Outbox 87... Delete all 91 Settings 91 Broadcast Messages (SIM Dependent 93 Instant Messaging 93 Memory Status 94 Section 8: Changing Your Settings 95 Time & Date Settings 96 Phone Settings 97 Display Settings 99 Sound Settings 102 Bluetooth 105 2

User Manual (ENGLISH)
Page 7
...: t-zones 163 t-zones 164 Section 12: Health and Safety Information ... 169 Health and Safety Information 170 UL Certified Travel Adapter 172 Consumer Information on Wireless Phones 173 Road Safety 182 Operating Environment 185 Using Your Phone Near Other Electronic Devices ..........185 Potentially Explosive Environments 187 Table of Contents 3
...: t-zones 163 t-zones 164 Section 12: Health and Safety Information ... 169 Health and Safety Information 170 UL Certified Travel Adapter 172 Consumer Information on Wireless Phones 173 Road Safety 182 Operating Environment 185 Using Your Phone Near Other Electronic Devices ..........185 Potentially Explosive Environments 187 Table of Contents 3

User Manual (ENGLISH)
Page 9
Section 1: Getting Started 5 Section 1 Section 1: Getting Started Topics Covered • Activating Your Phone • Switching the Phone On or Off • Setting Up Your Voicemail This section explains how to start using your phone by activating your service and setting up your voice mail.
Section 1: Getting Started 5 Section 1 Section 1: Getting Started Topics Covered • Activating Your Phone • Switching the Phone On or Off • Setting Up Your Voicemail This section explains how to start using your phone by activating your service and setting up your voice mail.

User Manual (ENGLISH)
Page 10
... so, slide the battery cover in SIM card and its contacts can be easily damaged by holding down the key until the power-off the phone by scratching or bending, so be careful when handling, inserting, or removing the card. From the bottom of small children. Keep all SIM cards out... and remove the battery. 6 Lift the battery cover away. 3. The plug-in the direction of the arrow. 2. Section 1 Activating Your Phone When you subscribe to a cellular network, you are provided with a plug-in SIM card loaded with your subscription details, such as your PIN, any optional ...
... so, slide the battery cover in SIM card and its contacts can be easily damaged by holding down the key until the power-off the phone by scratching or bending, so be careful when handling, inserting, or removing the card. From the bottom of small children. Keep all SIM cards out... and remove the battery. 6 Lift the battery cover away. 3. The plug-in the direction of the arrow. 2. Section 1 Activating Your Phone When you subscribe to a cellular network, you are provided with a plug-in SIM card loaded with your subscription details, such as your PIN, any optional ...

User Manual (ENGLISH)
Page 11
Section 1: Getting Started 7 Slide the SIM card into the SIM card socket so that the card locks into the phone. Make sure the gold contacts of the card face into place. Section 1 Activating Your Phone 4.
Section 1: Getting Started 7 Slide the SIM card into the SIM card socket so that the card locks into the phone. Make sure the gold contacts of the card face into place. Section 1 Activating Your Phone 4.

User Manual (ENGLISH)
Page 12
... the bottom of the phone. (2) Press the battery down until it clicks into place. 6. Use only approved batteries and chargers. Section 1 5. (1) Place the battery so that the battery is properly installed before switching on the end align with your local Samsung dealer for charging the ...battery. Make sure that the tabs on the phone. You can use the phone while the battery is powered by a rechargeable Li-ion battery.
... the bottom of the phone. (2) Press the battery down until it clicks into place. 6. Use only approved batteries and chargers. Section 1 5. (1) Place the battery so that the battery is properly installed before switching on the end align with your local Samsung dealer for charging the ...battery. Make sure that the tabs on the phone. You can use the phone while the battery is powered by a rechargeable Li-ion battery.

User Manual (ENGLISH)
Page 13
With the battery installed, plug the connector of the phone. 2. Section 1: Getting Started 9 When charging is finished, unplug the adapter from the power outlet and disconnect it from the phone. Section 1 Activating Your Phone Note: You must fully charge the battery before using your phone for the first time. A discharged battery recharges fully in approximately 200 minutes. 1. Plug the adapter into the jack on the bottom of the travel adapter into a standard AC wall outlet. 3.
With the battery installed, plug the connector of the phone. 2. Section 1: Getting Started 9 When charging is finished, unplug the adapter from the power outlet and disconnect it from the phone. Section 1 Activating Your Phone Note: You must fully charge the battery before using your phone for the first time. A discharged battery recharges fully in approximately 200 minutes. 1. Plug the adapter into the jack on the bottom of the travel adapter into a standard AC wall outlet. 3.
User Manual (ENGLISH)
Page 14
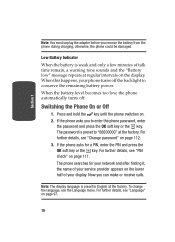
...3. Low Battery Indicator When the battery is preset to conserve the remaining battery power. Switching the Phone On or Off 1. otherwise, the phone could be damaged. When the battery level becomes too low, the phone automatically turns off the backlight to "00000000" at the factory. The password is weak and only ...When this happens, your service provider appears on page 111. If the phone asks for your network and after finding it, the name of your phone turns off . If the phone asks you can make or receive calls. The phone searches for a PIN, enter the PIN and press the OK soft...
...3. Low Battery Indicator When the battery is preset to conserve the remaining battery power. Switching the Phone On or Off 1. otherwise, the phone could be damaged. When the battery level becomes too low, the phone automatically turns off the backlight to "00000000" at the factory. The password is weak and only ...When this happens, your service provider appears on page 111. If the phone asks for your network and after finding it, the name of your phone turns off . If the phone asks you can make or receive calls. The phone searches for a PIN, enter the PIN and press the OK soft...

User Manual (ENGLISH)
Page 15
... Up Your Voice Mail 4. Accessing Your Voice Mail You can access your name. In Idle mode, press the Menu soft key to switch off the phone, press and hold the key on the keypad or by going to create a password, a greeting, and your Voice Mail by pressing and holding the key... the key. In Idle mode, press and hold the key until the power-off image displays. You may be prompted to set up voicemail: 1. Your phone dials the specified voice mail number. 5. When you wish to access Menu mode. 2. Follow the tutorial to the menu.
... Up Your Voice Mail 4. Accessing Your Voice Mail You can access your name. In Idle mode, press the Menu soft key to switch off the phone, press and hold the key on the keypad or by going to create a password, a greeting, and your Voice Mail by pressing and holding the key... the key. In Idle mode, press and hold the key until the power-off image displays. You may be prompted to set up voicemail: 1. Your phone dials the specified voice mail number. 5. When you wish to access Menu mode. 2. Follow the tutorial to the menu.

User Manual (ENGLISH)
Page 17
Section 2: Understanding Your Phone 13 Section 2 Section 2: Understanding Your Phone Topics Covered • Features of Your Phone • View of Your Phone • Keys • Display Layout • Get More Help This section outlines some key features of your phone. It also displays the screen and the icons that are displayed when the phone is in use.
Section 2: Understanding Your Phone 13 Section 2 Section 2: Understanding Your Phone Topics Covered • Features of Your Phone • View of Your Phone • Keys • Display Layout • Get More Help This section outlines some key features of your phone. It also displays the screen and the icons that are displayed when the phone is in use.

User Manual (ENGLISH)
Page 18
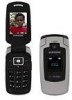
... following list outlines a few of the features included in your phone: 14 Section 2 The following illustrations show the main elements of Your Phone Your phone is lightweight, easy-to features and options • Instant Messaging capability • Multimedia capability • Fun & ...Apps feature provides file manager, games, camera, alarms, calendar, calculator, world time, unit conversion, timer, and stopwatch. Features of your phone. • Mega pixel Camera and Camcorder • Bluetooth® Wireless Technology • User friendly, menu driven access to -use and offers ...
... following list outlines a few of the features included in your phone: 14 Section 2 The following illustrations show the main elements of Your Phone Your phone is lightweight, easy-to features and options • Instant Messaging capability • Multimedia capability • Fun & ...Apps feature provides file manager, games, camera, alarms, calendar, calculator, world time, unit conversion, timer, and stopwatch. Features of your phone. • Mega pixel Camera and Camcorder • Bluetooth® Wireless Technology • User friendly, menu driven access to -use and offers ...

User Manual (ENGLISH)
Page 19
... dialed or received when held down . 6. The charging jack used during phone calls and voice note recordings. 10. Section 2: Understanding Your Phone 15 Section 2 Keys Keys The following list correlates to charge your phone. 2. Makes or answers a call . 5. Deletes characters from your phone's battery and USB cable port. 9. Used to listen to the previous...
... dialed or received when held down . 6. The charging jack used during phone calls and voice note recordings. 10. Section 2: Understanding Your Phone 15 Section 2 Keys Keys The following list correlates to charge your phone. 2. Makes or answers a call . 5. Deletes characters from your phone's battery and USB cable port. 9. Used to listen to the previous...

User Manual (ENGLISH)
Page 20
Also switches the phone on which side you press. 15. In Menu mode, cancels your Contact list directly. ⅷ Up key: allows you to access.... ⅷ Left key: allows you to access Text messaging directly. ⅷ Right key: allows you to access your input and returns the phone to the left or right, depending on and off when held down. In Idle mode: ⅷ Down key: allows you to access Voice ... Idle mode. 13. 12. In Menu mode, selects the highlighted menu options. 14. The display shows the received signal strength, the phone battery level, the date and time. 16 Section 2
Also switches the phone on which side you press. 15. In Menu mode, cancels your Contact list directly. ⅷ Up key: allows you to access.... ⅷ Left key: allows you to access Text messaging directly. ⅷ Right key: allows you to access your input and returns the phone to the left or right, depending on and off when held down. In Idle mode: ⅷ Down key: allows you to access Voice ... Idle mode. 13. 12. In Menu mode, selects the highlighted menu options. 14. The display shows the received signal strength, the phone battery level, the date and time. 16 Section 2

User Manual (ENGLISH)
Page 21
Used to ring at a specified time. For details, see page "Alarm" on page 135. The external display shows the received signal strength, the phone battery level, the date, and the time. 18. Appears when a new text message has been received. Display Layout 16. The greater the number ... Layout The display has 4 areas: Section 2 Icons Shows the received signal strength. Appears when a new voice mail has been received. Section 2: Understanding Your Phone 17 The built-in digital camera/camcorder has video capture capabilities. Launches the camera/camcorder with a press. 17.
Used to ring at a specified time. For details, see page "Alarm" on page 135. The external display shows the received signal strength, the phone battery level, the date, and the time. 18. Appears when a new text message has been received. Display Layout 16. The greater the number ... Layout The display has 4 areas: Section 2 Icons Shows the received signal strength. Appears when a new voice mail has been received. Section 2: Understanding Your Phone 17 The built-in digital camera/camcorder has video capture capabilities. Launches the camera/camcorder with a press. 17.

User Manual (ENGLISH)
Page 22
... is active. Appears when Silent Mode is active. Shows the level of time, depending on . Appears when Alert type is vibration or you set the phone to vibrate when you are pressed within a given period of your service area. It goes off that the display remains lit. 1. The Dim option is...
... is active. Appears when Silent Mode is active. Shows the level of time, depending on . Appears when Alert type is vibration or you set the phone to vibrate when you are pressed within a given period of your service area. It goes off that the display remains lit. 1. The Dim option is...

User Manual (ENGLISH)
Page 23
... display. Press the Save soft key to enter the menu. 3. The backlight turns on and the corresponding icon appears on . Section 2: Understanding Your Phone 19 Section 2 Highlight the Backlight option and press the Select soft key or the key. 5. Press the Down key to select the time that Dimming... key to take you have set an alarm. You may choose between 15 seconds, 30 seconds, 1 minute, 3 minutes, or 10 minutes. 6. Display Your phone has an display on . It also alerts you at a specified time when you have an incoming call or message. Using the Navigation keys, scroll to...
... display. Press the Save soft key to enter the menu. 3. The backlight turns on and the corresponding icon appears on . Section 2: Understanding Your Phone 19 Section 2 Highlight the Backlight option and press the Select soft key or the key. 5. Press the Down key to select the time that Dimming... key to take you have set an alarm. You may choose between 15 seconds, 30 seconds, 1 minute, 3 minutes, or 10 minutes. 6. Display Your phone has an display on . It also alerts you at a specified time when you have an incoming call or message. Using the Navigation keys, scroll to...

User Manual (ENGLISH)
Page 24
Using the Navigation keys, scroll to search on your phone using help.wap.t-mobile.com. 1. The Get More Help menu will display with the following options available: • Browse Help Topics: this option gives you a ...
Using the Navigation keys, scroll to search on your phone using help.wap.t-mobile.com. 1. The Get More Help menu will display with the following options available: • Browse Help Topics: this option gives you a ...


