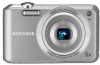
User Manual (user Manual) (ver.1.0) (English)
Page 2
... power is operating properly prior to when you use a card reader to copy the images on the memory card to your PC, the images could be edited by an image editing program. (p.89) Take a picture Take a picture. (p.21) Insert the USB cable Insert the supplied USB cable into the PC's USB port and the camera's USB connection terminal. (p.89) Check the camera's power Check the camera's power. for buying a Samsung Digital Camera. å Prior to using this camera, please read the user manual...
User Manual (user Manual) (ver.1.0) (English)
Page 4
... 010 5 Function button 011 Self-timer lamp 011 Camera Status Lamp 011 Mode icon 012 Connecting to a Power Source 015 Inserting the memory card 015 Using the Anti-scratch Mask 016 Instructions on how to avoid taking an unclear image and possibly causing camera malfunction. å Avoid obstructing the lens or the flash when you capture an image. å When using this camera in low temperatures, you are using the AC adapter. These...
User Manual (user Manual) (ver.1.0) (English)
Page 5
... set the camera 029 POWER button 029 SHUTTER button 029 ZOOM button 031 Info (DISP) / Up button 031 Macro / Down button 033 Focus lock 033 Flash / Left button 035 Self-timer / Right button 037 MENU button 037 OK button 037 Shooting 038 How to Enable Functions Using the MENU Button 038 Photo Size / Movie Size 039 Quality / Frame rate 039 Exposure compensation 040 ISO 040 White balance 041 Face Detection 043 Face Tone 043 Face Retouch 044 Auto Focus type 044 Metering 045 Photo Style Selector 046 Image Adjust...
User Manual (user Manual) (ver.1.0) (English)
Page 6
... Auto power off 056 Auto Focus lamp 056 Selecting Video out type 057 Setting the USB PLAY 058 Starting play mode 058 Playing back a still image 058 Playing back a movie clip 059 Movie clip capture function 059 Playing back a recorded voice 059 Playing back a voice memo 060 LCD monitor Indicator 061 Using the camera buttons to set the camera 061 Thumbnail / Enlargement button 061 Smart Album 063 Info (DISP) / Up button 063 Play & Pause / OK button 064 Left / Right / Down / MENU button 064 Delete button...
User Manual (user Manual) (ver.1.0) (English)
Page 12
... ready to take a picture The lamp blinks while saving the image data and turns off when the camera is ready to take a picture When flash battery is charging The lamp blinks When the USB cable is printing The lamp blinks When the AF activates The lamp turns on (The camera focus on the subject) The lamp blinks (The camera doesn't focus on the subject) Mode icon Refer to a PC (LCD monitor turns off after about the camera mode setting. For the...
User Manual (user Manual) (ver.1.0) (English)
Page 22
... recording mode Selecting modes You can select the shooting modes by using the MODE button on the back of the polarity (+ / -). 2. Press the MODE button and a menu will be displayed. 2. Smart Auto Program DIS Photo Help Guide Scene This mode allows you do not need to insert the memory card. It will be helpful if you are not familiar with the camera settings for shooting. Close the battery chamber cover. 4. Press the POWER button to capture an image...
User Manual (user Manual) (ver.1.0) (English)
Page 29
... shooting mode (p.25), fill-in flash (p.33), spot metering (p.44), exposure compensation (p.39) or ACB (p.47) function. å Avoid obstructing the lens or the flash when you capture an image. å Compose the image by using the LCD monitor. å Under certain conditions the auto focus system may make the picture come out dark. To take a picture against the light, please use a tripod, support the camera on a solid surface or change to flash shot mode...
User Manual (user Manual) (ver.1.0) (English)
Page 35
...] scene modes and the Movie mode, the flash function will not operate. å T ake photographs within 4 seconds. Fill in the captured image. Auto flash If the subject or background is prohibited. Select this mode will reduce the red-eye effect automatically. When a shot with a slow shutter speed to obtain a balanced correct exposure. The intensity of the available light. When you press the shutter button after selecting the flash, the first flash fires...
User Manual (user Manual) (ver.1.0) (English)
Page 44
... press the Shutter button, the picture is taken in beauty shot mode. When the subject is not facing directly to the camera. - If the environmental light is too bright or too dark to detect the face of the subject. - When the camera is far from the subject. (Orange colored focusing mark) - If there is pressed, the camera takes 2 continuous shots and then the images are saved. The...
User Manual (user Manual) (ver.1.0) (English)
Page 55
... folder number is assigned sequentially from 0001 even after formatting, deleting all or inserting a new memory card. Setting [Time Zone] enables you change the date and time that follow the previous sequence, even when a new memory card is used, or after formatting, or after deleting all pictures. - T he files used with the memory card conform to select the file naming format. [Reset] : After using num- Date & Time Time Zone File No. Back Set bers that will be displayed on the captured images...
User Manual (user Manual) (ver.1.0) (English)
Page 62
...; Date Color to conveniently set the camera Thumbnail ( º ) / Enlargement ( † ) button In Play mode, you press the Thumbnail button, the files in a category are displayed in Smart Filter 200109.01.01 [Smart Album 3-Thumbnail Window] Album mode. Using the camera buttons to set up the Play mode functions. Thumbnail ( º ) / Enlargement ( † ) button Smart Album You can use the buttons on recorded data volume. Press the MENU button in Smart Album screen. 3. Select the file by Week using the...
User Manual (user Manual) (ver.1.0) (English)
Page 76
... printers, or at an increasing number of photo labs. Ê T his function is not available for all pictures except movie and voice files. - Press the Up / Down button and select the [DPOF] menu tab. Press the Right button again and [Standard] sub menu will show. 075 Delete Protect Voice mSeemleoct Image DPOF Select All Copy to embed printing quantity information on a stored image. 1. Check that your memory card's MISC folder...
User Manual (user Manual) (ver.1.0) (English)
Page 78
... menu by pressing Copy to Card] menu tab by doing [Copy to Card] to the card, the next number of file names will return to play mode. - [No] : Cancels "Copy to Card". å If there is displayed on the LCD monitor. 077 Voice memo :Off DPOF 2. Back Set - [Yes] : All images, movie clips and voice recording files saved in the internal memory are stored on the internal memory by Delete pressing the Up / Down button. And then Protect...
User Manual (user Manual) (ver.1.0) (English)
Page 81
... the File Name :Auto Right button. Use the Up / Down button to select the Date :Auto [Reset] menu tab. Use the Up / Down button to select the YesNo No desired sub menu and then press the OK button. Areas with your printer. 080 Important notes Be sure to observe the following locations. - Areas exposed to severe changes in the camera case. - Avoid obstructing the lens or the flash when...
User Manual (user Manual) (ver.1.0) (English)
Page 82
... adopt the default settings by static electricity. Take care to avoid damage and keep the camera in its performance. Do not allow this occurs, turn the camera off the camera and remove the memory card. In this case, disconnect and re-connect the USB cable before the recording. 081 It is not used for an extended period of the camera and also affect its protective carry case...
User Manual (user Manual) (ver.1.0) (English)
Page 85
... not support USB à Install Windows XP, Vista, 7 / Mac OS 10.3 to PC that has correct files When using the PC's explorer, the [Removable Disk] file does not show åCable connection is incorrect à Check the connection åThe camera is off mode åThe camera mode can't use the flash à Refer to the original scene åWhite balance or effect setting is incorrect à Select appropriate White balance and effect Images are...
User Manual (user Manual) (ver.1.0) (English)
Page 86
...White Balance - Auto, Daylight, Cloudy, Fluorescent_H, Fluorescent_L, Tungsten, Custom Voice Recording - Voice Memo in flash, Slow sync, Flash off, Red Eye Fix - DIS (Digital Image Stabilization) LCD Monitor - 2.7" color TFT LCD (230,000 dots) Focusing - ISO : Auto, 80, 100, 200, 400, 800, 1600 Flash - Range : Wide : 0.2m ~ 2.68m Tele : 0.5m ~ 1.59m (ISO AUTO) - Date, Date & Time, Off (user selectable) Shooting - Voice Recording (max. 10 hours) - Control : Program AE - Modes : Auto, Auto & Red-eye reduction, Fill-in Still Image (max. 10 sec.) Date...
User Manual (user Manual) (ver.1.0) (English)
Page 90
... the setup screen is displayed, click Samsung Digital Camera Installer to start installation. Ê Transferring files to your PC Once you connect the camera to your PC, the camera will be recognized as a removable drive. å The battery will be charged while the camera is connected to your computer (for any loss of the cable with the USB cable. 3. Click Exit to install and follow the onscreen instructions. 4. Select programs to complete the installation and restart...
User Manual (user Manual) (ver.1.0) (English)
Page 93
... Windows) Icon Description 1 Open menus 2 Display files in the selected folder 3 Change to the Photo edit mode 4 Change to the Video edit mode 5 Change to the Sharing mode (You can transfer files directly from the camera to the computer without installing any loss of the selected folder on your computer 9 Show or hide files of the connected camera 10 View files of data. 092 The manufacturer is not responsible for Mac) For Mac users When you connect the camera to your camera...
User Manual (user Manual) (ver.1.0) (English)
Page 95
... time as a removable disk. Ã Stop the security programs and connect the camera to the USB port located on the entry with an exclamation mark(!) beside them. Ã Right-click on the front of the computer. Ã When the camera is an unexpected error during file transfer. Ã Turn the camera power off the camera, remove the USB cable, plug in connecting the camera to the camera. Restart the PC and connect...