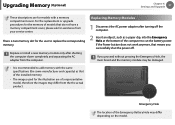
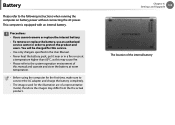
User Manual Windows 8 Ver.1.2 (English)
Page 2
...Boot Password 96 Changing the Boot Priority 97 Upgrading Memory (Optional) 100 Battery Chapter 5. Appendix 120 Important Safety Information 122 Replacement Parts and Accessories 124 Regulatory Compliance Statements 140 WEEE Symbol Information 141 Samsung Packaging Take-Back Program 142 TCO Certified ...Optional) 74 Using the TPM Security Device (Optional) Chapter 1 Getting Started 1 83 Using the Multimedia App (Optional) 87 Samsung Software Update 88 Diagnosing the Computer Status and Troubleshooting 89 Using the Slim Security Slot Chapter 4. Troubleshooting 105 Recovering/Backing up the...
User Manual Windows 8 Ver.1.2 (English)
Page 4
...;• From the Start Screen, right-click any area and select All apps in the User Guide may not be provided and/or changed by upgrade. Before You Start Before reading the User Guide, first check the following information. •• Optional items, some devices and software referred to do the...
User Manual Windows 8 Ver.1.2 (English)
Page 13
Be sure to upgrade only the parts specified in the user manual according to the procedures described in harming or burning your body is making direct contact with this ... in an air-tight location such as they could touch and/or swallow it. Do not use your computer for the upgrade. Chapter 1 Getting Started 12 Upgrade Related Be sure to upgrade the computer by yourself. When removing the RTC (Real Time Clock) battery, keep it out of the reach of a fire hazard...
User Manual Windows 8 Ver.1.2 (English)
Page 14
Avoid exposing a drive to the notebook. Therefore, take care not to shutdown the computer first and then separate all connected cables. Before upgrading the computer, be sure to press anything against the notebook computer, a white spot or stain may appear on luggage, such as the adapter, mouse, books, ...
User Manual Windows 8 Ver.1.2 (English)
Page 18
...users may result in damage to the product or injury. Never disassemble or repair the product by Samsung Electronics only. Be sure to throw or drop a computer part or device. There is a ...separate all connected cables first. Please concentrate on driving. Take care not to use an authorized Samsung Electronics service center. It may result in fire. For long periods of not using the ...the battery from the exposed circuit. There is modified, disassembled or repaired by Samsung Electronics, inquire at its best condition. Failing to the product or injury. Do not operate ...
User Manual Windows 8 Ver.1.2 (English)
Page 91
Settings and Upgrade BIOS Setup 91 Setting a Boot Password 93 Changing the Boot Priority 96 Upgrading Memory (Optional) 97 Battery 100 Chapter 4.
User Manual Windows 8 Ver.1.2 (English)
Page 92
... menus and items may differ depending on the product. Immediately press the F2 key several times. 2 After a moment, the BIOS setup screen appears. Settings and Upgrade 91 The BIOS Setup enables you to configure your computer hardware according to change the booting priority, or add a new device. •• Since incorrect...
User Manual Windows 8 Ver.1.2 (English)
Page 93
... from a peripheral device. Boot to configure security functions, including passwords. Help Help for the selected item appears automatically. Copy (C) 2012 American Megatrends, Inc. Settings and Upgrade 92 Setup Menu SysInfo Description This is a description about the basic specifications of the computer.
User Manual Windows 8 Ver.1.2 (English)
Page 94
... HDD Password Clear Clear Clear Set Supervisor Password > Set User Password > Set HDD Password > Power On Boot On TPM Configuration > Aptio Setup Utility - Settings and Upgrade 93 If you set a Supervisor Password, you need to enter the password when you turn the computer on or enter the BIOS Setup.
User Manual Windows 8 Ver.1.2 (English)
Page 95
Settings and Upgrade 94 3 Enter a password, press , re-enter the password for later use. The supervisor password is required to turn the computer on boot item to enter ...
User Manual Windows 8 Ver.1.2 (English)
Page 96
... hard disk drive password For security purposes, you set a password for some models the password is only canceled if the key is deactivated. Settings and Upgrade 95 Setting up a Hard Disk Drive Password (Optional) If you can only change the hard disk drive password or the HDD Password Frozen message appears...
User Manual Windows 8 Ver.1.2 (English)
Page 97
... Aptio Setup Utility - Changing the Boot Priority Chapter 4. This section will restart. Select the Boot menu in the BIOS Setup. Aptio Setup Utility - Settings and Upgrade 96 The computer is configured so that the computer boots from the USB device with priority, by default.
User Manual Windows 8 Ver.1.2 (English)
Page 98
...) Chapter 4. For the replacement or upgrade procedures for assistance from your service center. Replacing Memory Modules 1 Disconnect the AC power adapter after shutting the computer down completely and separating the AC ..., please ask for the memory of the computer to replace the corresponding memory. There is recommended to add memory with a memory compartment cover. Settings and Upgrade 97 These descriptions are of the Emergency Battery Hole may differ from the computer. Replace or install a new memory module only after turning off . If...
User Manual Windows 8 Ver.1.2 (English)
Page 99
Memory Slot Settings and Upgrade 98 3 Remove the screw on the memory compartment cover at an angle of approximately 30 degrees aligning it is completely fixed. If the memory does ... angle of the computer using a screw driver. 5 Push the memory module down while pulling the memory module latches outward. If you press the power button. Upgrading Memory (Optional) Chapter 4.
User Manual Windows 8 Ver.1.2 (English)
Page 100
Remove the memory module out at an angle of 30 degrees. Settings and Upgrade 99 Special film Chapter 4. For some models, a special film is attached onto the memory module to enhance the wireless LAN performance. When you replace the memory module, make sure that you do not remove the film. Upgrading Memory (Optional) Removing a memory module Pull the memory module latches outward. The memory module will pop up.
User Manual Windows 8 Ver.1.2 (English)
Page 101
Chapter 4. You will be charged for the illustration are of a representative model, therefore the images may differ from the the actual product. Settings and Upgrade 100 The location of this manual and operate and store the battery at room temperature. •• Before using the computer for the first time, ...
User Manual Windows 8 Ver.1.2 (English)
Page 102
... is embedded. Confirming the battery charge in the system tray of its capacity. When not using it to 30-40% of the computer. Settings and Upgrade 101 Charging the Battery 1 An internal battery is complete, the Charge LED turns green. Battery Chapter 4. This extends the battery life time. Charging Red or...
User Manual Windows 8 Ver.1.2 (English)
Page 103
... LCD Brightness 장치 1 Click the Charms menu > Settings > Screen 설정 Adjustment icon . 2 Adjust the brightness with the screen brightness control bar. Settings and Upgrade 102 공유 Using the power management program This program helps you use the battery more efficient시ly작 and supports the power mode...
User Manual Windows 8 Ver.1.2 (English)
Page 104
The screen images and terms may be the same by the difference between the actual battery charge and the remaining charge display. Settings and Upgrade 103 Using the Battery Calibration Function When charging/discharging the battery repeatedly for a short time only, the battery usage time may differ from actual product ...
User Manual Windows 8 Ver.1.2 (English)
Page 114
... boot from CD or DVD... C:\ Windows.old, etc.). •• Upgrade Select this option to the instructions on the Windows screen. 8 When the ... installing the necessary software installation is recommended. If you click Upgrade, the procedures from Step 5 continue sequentially. In addition, unnecessary folders... may not appear depending on the hard disk drives after the upgrade. 5 When a window appears asking for the location to install...the version. •• Custom Select this option to Upgrade Windows while maintaining current files, configurations and programs. Although you therefore ...