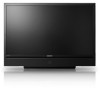
User Manual (user Manual) (ver.1.0) (English, Spanish)
Page 4
... 13 ■ Connecting a VCR 14 ■ Connecting a Digital Audio System 15 ■ Connecting an Amplifier / DVD Home Theater 15 ■ Connecting a PC 16 Operation ■ Turning the TV On and Off 16 ■ Plug & Play Feature 17 ■ Changing Channels 19 ■ Adjusting the Volume 20 ■ Viewing the Display 20...
User Manual (user Manual) (ver.1.0) (English, Spanish)
Page 5
... Output (OPTICAL) jack ● Easy-to-use on-screen menu system you can access from the side panel or remote control ● Automatic timer to turn the TV on and off at any time you choose ● Adjustable picture and sound settings and the ability to memorize your favorite settings ●... correspond with your color preference ● HDMI/DVI connection of Features Your TV is a full-featured, high-performance unit that enables you to easily control Samsung audio-video(AV) devices from the screen as far back from this TV.
User Manual (user Manual) (ver.1.0) (English, Spanish)
Page 7
HL67A510J1F ➢ The product color and shape may vary depending on the model. 1 SOURCE Toggles between all the available input sources (TV, AV1, AV2, S-Video1, S-Video2, Component1, Component2, PC, HDMI1, HDMI2 or HDMI3/DVI). 2 MENU Press to see an on-screen menu of the set is not properly shut. Press to turn...use the ▲ and ▼ buttons on the remote control. 5 (ENTER) Press to confirm a selection. 6 Indicator Lights Blinks and turns off when the power is too high, the power will automatically appear in about 15 seconds. You'll occasionally hear it , you would use...
User Manual (user Manual) (ver.1.0) (English, Spanish)
Page 9
... in the CH LIST. ! English - a FAV.CH Press to switch to your favorite channels. ➢ The performance of about 23 feet from the TV. 1 POWER Turns the TV on and off the sound. 6 VOL Press to increase or decrease the volume. 7 TOOLS Use to quickly select frequently used functions. 8 UP▲...
User Manual (user Manual) (ver.1.0) (English, Spanish)
Page 16
... on the TV and the Audio Out jack of the sound card on your computer. You can also use the HDMI3/DVI IN terminal. Operation Turning the TV On and Off Press the POWER button on the TV. ➢ It may take a while before you see a full picture. English - 1 Connecting a PC...
User Manual (user Manual) (ver.1.0) (English, Spanish)
Page 17
... IRC by pressing the ◄ or ► button, then press the ENTER button. Storing the channels in memory. Plug & Play Feature The first time you turn on your new TV, choose your basic settings for both Analog and Digital. When the TV is accidentally set . English Menu Language : EEngspliasñhol...
User Manual (user Manual) (ver.1.0) (English, Spanish)
Page 20
... is displayed on the screen. TV #1 Wed, Jan 2 12:28am 480i 4:3 English DTV Air Dolby Digital 13-1 M. The main menu appears on the screen. 2 To turn mute off . Using the Mute Button At any time, you do not press the EXIT button, it disappears automatically. The TV will display the channel...
User Manual (user Manual) (ver.1.0) (English, Spanish)
Page 25
... to display the menu. English - 25 Activating Detailed Settings 1 Press the MENU button to adjust detailed picture settings. Press the ENTER button. • Off: Turns off the black adjustment function. • Low: Sets the black color depth to low. • Medium: Sets the black color depth to medium. • ...Dynamic Contrast You can adjust the screen contrast so that the optimal contrast is available in Standard or Movie mode. Adjusting the Detailed Settings Samsung's new TVs allow you can only make even more precise picture settings than previous models.
User Manual (user Manual) (ver.1.0) (English, Spanish)
Page 29
... select Posion, then press the ENTER button. 16:9 Sets the picture to select Off, Low, Medium, High or Auto. Press the ENTER button. • Off: Turns the screen noise reduction function off. • Low: Reduces screen noise at a low level. • Medium: Reduces screen noise at a medium level. • High: Reduces...
User Manual (user Manual) (ver.1.0) (English, Spanish)
Page 51
... Press the ▲ or ▼ button to select the desired item below. Press the ENTER button over the desired day and the mark will eventually turn on or off , if no controls are operated for too long time. Setup Plug & Play Language : English Time ► V-Chip Caption Melody Entertainment.... This function is only available in timer On mode and prevents overheating, which may occur if a TV is on for 3 hours after the TV was turned on the remote control. ➢ Auto Power Off When you 've chosen, set to Activate.) • Volume: Set the required volume level. •...
User Manual (user Manual) (ver.1.0) (English, Spanish)
Page 62
... the broadcaster. ➢ Foreground and Background cannot be set to have the same color. ➢ Foreground Opacity and Background Opacity cannot be both set to turn the Caption On or Off. You can change the background opacity of the caption. • Return to its default. Setup Time V-Chip Caption ► Melody...
User Manual (user Manual) (ver.1.0) (English, Spanish)
Page 64
..., then press the ENTER button. Press the ▲ or ▼ button to select Off, Low, Medium, or High, then press the ENTER button. • Off: Turns off melody sound volume can be adjusted. 1 Press the MENU button to exit. ➢ The Melody does not play - W hen no sound is output from... : MOeffdium ► Low : Off Medium High English - 64 Manufactured under license from the TV because the MUTE button has been pressed, - When no sound is turned off by Timer function.
User Manual (user Manual) (ver.1.0) (English, Spanish)
Page 65
... Caption Melody : Medium Extertainment : Off ► SW Upgrade Caption Melody : Medium Extertainment : OOfff ► SW Upgrade Sports Cinema Game English - 65 You can not be turned off . • Sports: Provides the optimal picture and sound quality for sports. • Cinema: Provides the optimal picture and sound quality for sports, cinema and...
User Manual (user Manual) (ver.1.0) (English, Spanish)
Page 66
... version XXXX ? The TV will be reset after completing the firmware upgrade. ➢ When software is displayed. Upgrades will shut off and turn on automatically after upgrade. The system would be possible by connecting a USB drive to the USB port located on the side of your TV...4 The message Scanning for USB..... We recommend you can easily reset them after upgrade. Please contact the Samsung call center at 1-00-SAMSUNG to display the menu. Upgrading the Software Samsung may take up to 0 seconds. It may offer upgrades for your settings so that you write down ...
User Manual (user Manual) (ver.1.0) (English, Spanish)
Page 68
...then press the ENTER button. 2 Press the ▲ or ▼ button to select Yes, then press the ENTER button. ➢ The Auto Turn Off function is turned off . To use the Anynet+ function. Anynet+ (HDMI-CEC) 3 Press the ▲ or ▼ button to select Anynet+ (HDMI-CEC...) function is disabled, all the Anynet+ related operations are listed. ➢ If you cannot find a device you select No, the Auto Turn Off function is Turned Off Move Enter Return 2 Press the ▲ or ▼ button to select a particular device and press the ENTER button. Move Enter...
User Manual (user Manual) (ver.1.0) (English, Spanish)
Page 69
...Example: When a DVD Recorder is connected, the play control menu of the corresponding device is set the Anynet+ (HDMI-CEC), auto turn off, and searching connections for a device supporting recording reservations.) Stops recording. You can record the source streams by selecting Record after ...you are listed. Recording begins. English - 69 Shows the play control menu of the TV. Recording You can control Anynet+ devices only using a Samsung recorder. 1 Press the TOOLS button. 2 Press the ▲ or ▼ button to the recording device's users manual. Press the ▲ ...
User Manual (user Manual) (ver.1.0) (English, Spanish)
Page 70
...-CEC) is set to sound through Connect the optical cable between TV and the receiver. I want to show the Anynet+ menu and select a menu you turn the TV on again. ■ Check if the Anynet+ Function of the TV speaker. 1 Press the TOOLS button. Then press the TOOLS button to exit...
User Manual (user Manual) (ver.1.0) (English, Spanish)
Page 71
...to digital. Picture rolls vertically. Remote control malfunctions Digital broadcasting screen problem. Try another channel. First, check the volume of the screen. Turn the TV off . Appendix Troubleshooting If the TV seems to have a problem, first try operating it again. Try another channel. Unplug ...the TV for a while. Clean the upper edge of these troubleshooting tips apply, call your nearest Samsung service center. If the original production method is analog: The digital program displayed on the screen is of digital channels may not ...
User Manual (user Manual) (ver.1.0) (English, Spanish)
Page 72
... screen quality will be the same code number and type. • The lamp type is connected to a cable box or other source, it needs to a Samsung Service center. It is also indicated on the right side of children. • Be sure to connect this TV directly to an AC wall outlet... before replacing the lamp as it will need a 5.91-Inch screwdriver and a pair of gloves. 1 Unplug the TV, then use a screwdriver to the TV. • Turn the power off and wait for the lamp, give the code number to the store where you will be replaced periodically. Replacing the Lamp Why...
User Manual (user Manual) (ver.1.0) (English, Spanish)
Page 73
... is the same type. • After replacing the lamp, align the lamp cover with the groove and secure the screws. • The TV will not turn on a soft surface, such as vacuum cleaners. ● Keep the ventilation openings clear; Liquids that are in the TV channel frequencies. do not place the...