User Manual (ENGLISH)
Page 1
SyncMaster 913N/915N/912T/913T/913B/901B Install drivers Install programs
SyncMaster 913N/915N/912T/913T/913B/901B Install drivers Install programs
User Manual (ENGLISH)
Page 13
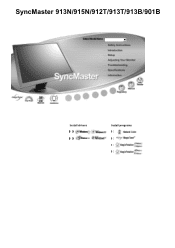
If any items are included with your dealer. Manual Monitor & Pivot stand SyncMaster 912T/913T/913B/901B Please make sure the following items are missing, contact your monitor. Contact a local dealer to buy optional items. Unpacking Option 1 Option 2 Monitor & Simple stand Bottom MagicRotation™ program can not be provided as Simple Stand does not support Pivot function.
If any items are included with your dealer. Manual Monitor & Pivot stand SyncMaster 912T/913T/913B/901B Please make sure the following items are missing, contact your monitor. Contact a local dealer to buy optional items. Unpacking Option 1 Option 2 Monitor & Simple stand Bottom MagicRotation™ program can not be provided as Simple Stand does not support Pivot function.
User Manual (ENGLISH)
Page 26
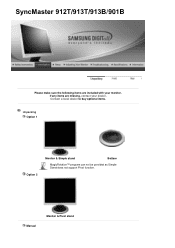
SyncMaster 912T/913T/913B/901B 1. Connected to the DVI port on the back of your monitor. 2-3. Using the D-sub (Analog) connector on the video card. In the case of your computer and monitor. Connect the D-sub cable to connect the monitor using the D-SUB connection cable. 2-4. ...to the 15-pin, D-sub connector on your monitor. 2-2. If your monitor to the Macintosh computer using a special Mac adapter. 3. Using the DVI (Digital) connector on the video card. Plug the power cord for your monitor displays an image, installation is complete. Connect the...
SyncMaster 912T/913T/913B/901B 1. Connected to the DVI port on the back of your monitor. 2-3. Using the D-sub (Analog) connector on the video card. In the case of your computer and monitor. Connect the D-sub cable to connect the monitor using the D-SUB connection cable. 2-4. ...to the 15-pin, D-sub connector on your monitor. 2-2. If your monitor to the Macintosh computer using a special Mac adapter. 3. Using the DVI (Digital) connector on the video card. Plug the power cord for your monitor displays an image, installation is complete. Connect the...
User Manual (ENGLISH)
Page 42
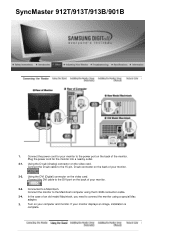
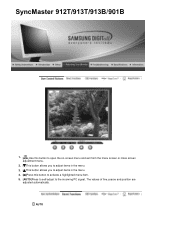
AUTO The values of fine,coarse and position are adjusted automatically. SyncMaster 912T/913T/913B/901B 1. [ ]Use this button to open the on-screen menu and exit from the menu screen or close screen adjustment menu. 2. [ ]This button allows you to adjust items in the menu. 3. [ ]This button allows you to adjust items in the menu. 4. [ ]Press this button to activate a highlighted menu item. 5. [AUTO]Press to self-adjust to the incoming PC signal.
AUTO The values of fine,coarse and position are adjusted automatically. SyncMaster 912T/913T/913B/901B 1. [ ]Use this button to open the on-screen menu and exit from the menu screen or close screen adjustment menu. 2. [ ]This button allows you to adjust items in the menu. 3. [ ]This button allows you to adjust items in the menu. 4. [ ]Press this button to activate a highlighted menu item. 5. [AUTO]Press to self-adjust to the incoming PC signal.
User Manual (ENGLISH)
Page 82
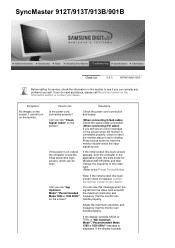
... initial screen (the login screen) does not appear, contact the Service Center or your dealer. Can you can handle properly. Symptom No images on the monitor. If the power is displayed. I cannot turn on the screen. You can see "Not Optimum Mode","Recommanded Mode 1280 x 1024 60Hz" on the ...is on, reboot the computer to see if you see this section to see "Check Signal Cable" on the screen? If the display exceeds SyncMaster 912T/913T/913B/901B Before calling for Windows ME/XP/2000) and then change the frequency of the video card. (Refer to analog. Press source button...
... initial screen (the login screen) does not appear, contact the Service Center or your dealer. Can you can handle properly. Symptom No images on the monitor. If the power is displayed. I cannot turn on the screen. You can see "Not Optimum Mode","Recommanded Mode 1280 x 1024 60Hz" on the ...is on, reboot the computer to see if you see this section to see "Check Signal Cable" on the screen? If the display exceeds SyncMaster 912T/913T/913B/901B Before calling for Windows ME/XP/2000) and then change the frequency of the video card. (Refer to analog. Press source button...