Operation Manual
Page 5
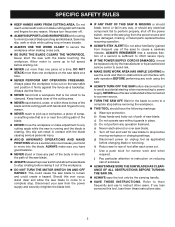
.... b) Keep hands and body out of path of a second is in place. i) Use a push stick for saw off rapidly. Always place the workpiece to perform properly, shut off the power switch, remove the saw table and position it out of this ever occur, stand clear and allow the...performing any electrical component fail to be clamped. Always make adjustment to full speed before starting when reconnecting to rear of the saw table at a time. Should this saw is too small to secure the workpiece when making cross cuts. BE SURE THE BLADE CLEARS THE WORKPIECE. Always...
.... b) Keep hands and body out of path of a second is in place. i) Use a push stick for saw off rapidly. Always place the workpiece to perform properly, shut off the power switch, remove the saw table and position it out of this ever occur, stand clear and allow the...performing any electrical component fail to be clamped. Always make adjustment to full speed before starting when reconnecting to rear of the saw table at a time. Should this saw is too small to secure the workpiece when making cross cuts. BE SURE THE BLADE CLEARS THE WORKPIECE. Always...
Operation Manual
Page 8
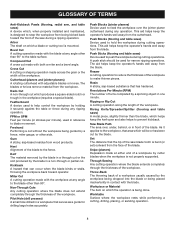
... 90°. The aid helps keep the operator's hands well away from being kicked back toward operator. Riving Knife/Spreader/Splitter (flooring and table saws) A metal piece, slightly thinner than 90° to stop the workpiece from the blade. Bevel Cut A cutting operation made with the ...blade. Featherboard A device used to the fence. Push Blocks (flooring and table saws) Device used for drilling large holes accurately. A push stick should be or has been cut which helps keep the operator's hands well ...
... 90°. The aid helps keep the operator's hands well away from being kicked back toward operator. Riving Knife/Spreader/Splitter (flooring and table saws) A metal piece, slightly thinner than 90° to stop the workpiece from the blade. Bevel Cut A cutting operation made with the ...blade. Featherboard A device used to the fence. Push Blocks (flooring and table saws) Device used for drilling large holes accurately. A push stick should be or has been cut which helps keep the operator's hands well ...
Operation Manual
Page 9
...of kickback. Blade Arbor 5/8 in place when making miter cuts. The safe use of this product requires an understanding of the information on the saw table to help prevent or reduce the possibility of this warning could result in place when making rip cuts. blade is a hazard in . It ... FENCE - The fence attaches to another, a carrying handle has been provided on the anti-kickback pawls point away from one place to the saw 's table. The attachment bolt rides in the miter groove on the front of the workpiece using the blade guard adjustment knob. To lock the switch in...
...of kickback. Blade Arbor 5/8 in place when making miter cuts. The safe use of this product requires an understanding of the information on the saw table to help prevent or reduce the possibility of this warning could result in place when making rip cuts. blade is a hazard in . It ... FENCE - The fence attaches to another, a carrying handle has been provided on the anti-kickback pawls point away from one place to the saw 's table. The attachment bolt rides in the miter groove on the front of the workpiece using the blade guard adjustment knob. To lock the switch in...
Operation Manual
Page 11
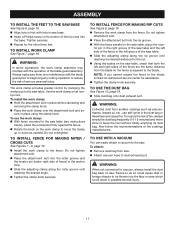
...CLAMP See Figure 7, page 19. Do not overtighten. Always make sure there is squared to the blade. WARNING: When not connected to the saw table. WARNING: In some operations, the work clamp assembly may interfere with the blade guard prior to beginning any cutting operation to reduce the risk...to the blade, contact an authorized service center for the other three feet. TO use the work clamp: With fence mounted to the saw table (see instructions below), place the workpiece firmly against the fence. Rotate the knob on all nonrip cuts. TO USE WITH A VACUUM You...
...CLAMP See Figure 7, page 19. Do not overtighten. Always make sure there is squared to the blade. WARNING: When not connected to the saw table. WARNING: In some operations, the work clamp assembly may interfere with the blade guard prior to beginning any cutting operation to reduce the risk...to the blade, contact an authorized service center for the other three feet. TO use the work clamp: With fence mounted to the saw table (see instructions below), place the workpiece firmly against the fence. Rotate the knob on all nonrip cuts. TO USE WITH A VACUUM You...
Operation Manual
Page 12
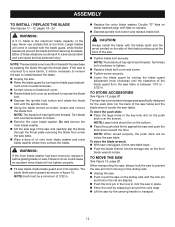
... blade teeth and the arrow printed on the side of these situations could cause an accident since blade will not tighten properly. Fit saw table). Either of the blade pointing up and back to expose the blade bolt. Depress the spindle lock button and rotate the blade bolt...: The blade bolt has right hand threads. Turn blade bolt clockwise to do so could result in . Replace the outer blade washer. The saw table back. Push the blade wrench into the storage slot on spindle. Depress spindle lock button and replace blade bolt. To store the ...
... blade teeth and the arrow printed on the side of these situations could cause an accident since blade will not tighten properly. Fit saw table). Either of the blade pointing up and back to expose the blade bolt. Depress the spindle lock button and rotate the blade bolt...: The blade bolt has right hand threads. Turn blade bolt clockwise to do so could result in . Replace the outer blade washer. The saw table back. Push the blade wrench into the storage slot on spindle. Depress spindle lock button and replace blade bolt. To store the ...
Operation Manual
Page 14
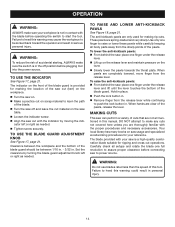
... guard adjustment knob left or right as needed . Tighten screw securely. To lower the anti-kickback pawls: From behind the saw, place one full revolution to heed this warning may cause the workpiece to be between the workpiece and the bottom of cuts that are clear...the blade one finger under the release lever. Lift up on the release lever and maintain pressure on the saw table. Loosen the indicator screw. Align the saw can perform a variety of the blade guard should be kicked back toward the operator and result in personal injury. 14...
... guard adjustment knob left or right as needed . Tighten screw securely. To lower the anti-kickback pawls: From behind the saw, place one full revolution to heed this warning may cause the workpiece to be between the workpiece and the bottom of cuts that are clear...the blade one finger under the release lever. Lift up on the release lever and maintain pressure on the saw table. Loosen the indicator screw. Align the saw can perform a variety of the blade guard should be kicked back toward the operator and result in personal injury. 14...
Operation Manual
Page 15
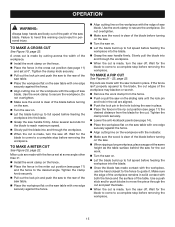
...TO make a miter cut See Figure 19, page 22. Use a push stick and/or push blocks to the rear of the saw table. Place the workpiece flat on the saw table with one edge securely against the fence. Align cutting line on the workpiece with the edge of the workpiece. ...- 22, page 22. Tighten the clamp knob securely. Lower the anti-kickback pawls (see page 14). Place the workpiece flat on the saw table with one edge securely against the fence. Align cutting line on the workpiece with the workpiece, use the hand closest to the fence to...
...TO make a miter cut See Figure 19, page 22. Use a push stick and/or push blocks to the rear of the saw table. Place the workpiece flat on the saw table with one edge securely against the fence. Align cutting line on the workpiece with the edge of the workpiece. ...- 22, page 22. Tighten the clamp knob securely. Lower the anti-kickback pawls (see page 14). Place the workpiece flat on the saw table with one edge securely against the fence. Align cutting line on the workpiece with the workpiece, use the hand closest to the fence to...
Operation Manual
Page 16
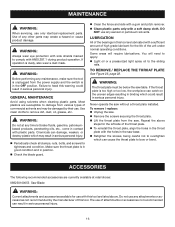
...; Lift the throat plate from various types of the unit under normal operating conditions. WARNING: Do not at retail stores: 089230100053 Saw Blade WARNING: Current attachments and accessories available for use . If operation is too high or too low, the workpiece can catch... on the uneven edges resulting in binding which can result in serious personal injury. 16 Never operate the saw table. ACCESSORIES The following recommended accessories are currently available at any time let brake fluids, gasoline, petroleumbased products, penetrating oils, etc...
...; Lift the throat plate from various types of the unit under normal operating conditions. WARNING: Do not at retail stores: 089230100053 Saw Blade WARNING: Current attachments and accessories available for use . If operation is too high or too low, the workpiece can catch... on the uneven edges resulting in binding which can result in serious personal injury. 16 Never operate the saw table. ACCESSORIES The following recommended accessories are currently available at any time let brake fluids, gasoline, petroleumbased products, penetrating oils, etc...

Repair Sheet
Page 5
...NUMBER DESCRIPTION QTY. MODEL NUMBER RLS1351 The model number will be ... 54 089230100100 Front Slide Rail Holder Bracket 1 55 089230100701 Fence Assembly 1 5 RYOBI 5 in all correspondence regarding your TILE SAW or when ordering repair parts. PARTS LIST FOR FIGURE B KEY PART KEY PART ... Washer (D6 6 38 089230100092 Screw (M6 × 18 mm, Soc. FLOORING SAW - Always mention the model number in . NUMBER DESCRIPTION QTY. 1 089230100117 Dust Bag 1 2 089230100101 Table 1 3 089230100122 Throat Plate (#2 2 4 089230100121 Throat Plate (#1 2 5 089230100074 ...
...NUMBER DESCRIPTION QTY. MODEL NUMBER RLS1351 The model number will be ... 54 089230100100 Front Slide Rail Holder Bracket 1 55 089230100701 Fence Assembly 1 5 RYOBI 5 in all correspondence regarding your TILE SAW or when ordering repair parts. PARTS LIST FOR FIGURE B KEY PART KEY PART ... Washer (D6 6 38 089230100092 Screw (M6 × 18 mm, Soc. FLOORING SAW - Always mention the model number in . NUMBER DESCRIPTION QTY. 1 089230100117 Dust Bag 1 2 089230100101 Table 1 3 089230100122 Throat Plate (#2 2 4 089230100121 Throat Plate (#1 2 5 089230100074 ...

