Manual 1
Page 2
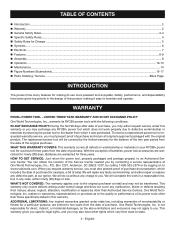
... of batteries, power tool accessories are warranted for three years. Batteries are warranted for ninety (90) days. One World Technologies, Inc. TABLE OF CONTENTS Introduction...2 Warranty...2 General Safety Rules...3-4 Specific Safety Rules...4 Safety Rules for Charger...5 Symbols...6 Electrical...7 Features...8-9 Assembly...9 Operation...10-13 Maintenance...14 ...
... of batteries, power tool accessories are warranted for three years. Batteries are warranted for ninety (90) days. One World Technologies, Inc. TABLE OF CONTENTS Introduction...2 Warranty...2 General Safety Rules...3-4 Specific Safety Rules...4 Safety Rules for Charger...5 Symbols...6 Electrical...7 Features...8-9 Assembly...9 Operation...10-13 Maintenance...14 ...
Manual 1
Page 3
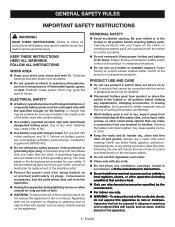
... install near water. Clean only with liquids, such as in electric shock, fire and/or serious personal injury. Always use , keep it on the switch or inserting the battery pack into your safety. Never use product if switch does not turn it away from other metal objects like: paper clips, coins, keys, nails, screws, or other . READ THESE INSTRUCTIONS. PERSONAL SAFETY Avoid accidental starting...
... install near water. Clean only with liquids, such as in electric shock, fire and/or serious personal injury. Always use , keep it on the switch or inserting the battery pack into your safety. Never use product if switch does not turn it away from other metal objects like: paper clips, coins, keys, nails, screws, or other . READ THESE INSTRUCTIONS. PERSONAL SAFETY Avoid accidental starting...

Manual 1
Page 4
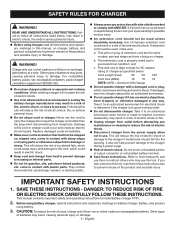
... in a risk of shock or injury. Refer all servicing to qualified service personnel. Refer to them frequently and use only identical replacement parts. English n To reduce the risk of this tool. Follow instructions in a damp or wet location. SPECIFIC SAFETY RULES IMPORTANT SAFETY INSTRUCTIONS Know your battery product or when changing accessories. Listening to music at least 10 minutes, then seek immediate...
... in a risk of shock or injury. Refer all servicing to qualified service personnel. Refer to them frequently and use only identical replacement parts. English n To reduce the risk of this tool. Follow instructions in a damp or wet location. SPECIFIC SAFETY RULES IMPORTANT SAFETY INSTRUCTIONS Know your battery product or when changing accessories. Listening to music at least 10 minutes, then seek immediate...
Manual 1
Page 5
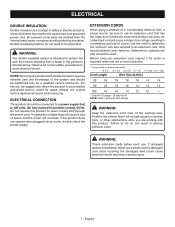
...' 100' Cord Size (AWG) 16 16 16 NOTE: AWG = American Wire Gauge Do not operate charger with side shields marked to wet or damp conditions. Take it will reduce the risk of batteries may burst, causing personal injury or damage. 5 - SAFETY RULES FOR CHARGER WARNING! IMPORTANT SAFETY INSTRUCTIONS 1. If extension cord must be used , make sure: a. Other types of injury, charge only lithium-ion or...
...' 100' Cord Size (AWG) 16 16 16 NOTE: AWG = American Wire Gauge Do not operate charger with side shields marked to wet or damp conditions. Take it will reduce the risk of batteries may burst, causing personal injury or damage. 5 - SAFETY RULES FOR CHARGER WARNING! IMPORTANT SAFETY INSTRUCTIONS 1. If extension cord must be used , make sure: a. Other types of injury, charge only lithium-ion or...
Manual 1
Page 6
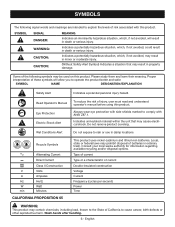
... Direct Current Class II Construction V Volts A Amperes Hz Hertz W Watt min Minutes CALIFORNIA PROPOSITION 65 This product uses nickel-cadmium and lithium-ion batteries. Local, state or federal laws may prohibit disposal of risk associated with side shields marked to operate the product better and safer. Wash hands after handling. 6 - Some of injury, user must read and understand operator's manual before using...
... Direct Current Class II Construction V Volts A Amperes Hz Hertz W Watt min Minutes CALIFORNIA PROPOSITION 65 This product uses nickel-cadmium and lithium-ion batteries. Local, state or federal laws may prohibit disposal of risk associated with side shields marked to operate the product better and safer. Wash hands after handling. 6 - Some of injury, user must read and understand operator's manual before using...
Manual 1
Page 7
... to your nearest authorized service center for repair. If damaged replace immediately. Always use an extension cord that it for the usual three-wire grounded power cord. ELECTRICAL CONNECTION This product should be connected to determine the minimum wire size required in overheating and loss of the working with protecting insulation. Use the chart to a power supply that is 120 volts, AC only (normal household...
... to your nearest authorized service center for repair. If damaged replace immediately. Always use an extension cord that it for the usual three-wire grounded power cord. ELECTRICAL CONNECTION This product should be connected to determine the minimum wire size required in overheating and loss of the working with protecting insulation. Use the chart to a power supply that is 120 volts, AC only (normal household...
Manual 1
Page 8
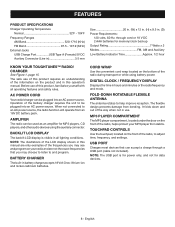
... / FREQUENCY DISPLAY Displays the time in . (D) Power Requirements: 120 volts, 60 Hz. It folds down and out of the way when not in all operating features and safety rules. TOUCHPAD CONTROLS Use the touchpad, located on the product and in battery charger accepts 18 Volt One+ lithium-ion and nickel-cadmium batteries. FEATURES PRODUCT SPECIFICATIONS Charger Operating Temperature Normal 32˚F - 104˚F Frequency...
... / FREQUENCY DISPLAY Displays the time in . (D) Power Requirements: 120 volts, 60 Hz. It folds down and out of the way when not in all operating features and safety rules. TOUCHPAD CONTROLS Use the touchpad, located on the product and in battery charger accepts 18 Volt One+ lithium-ion and nickel-cadmium batteries. FEATURES PRODUCT SPECIFICATIONS Charger Operating Temperature Normal 32˚F - 104˚F Frequency...
Manual 1
Page 9
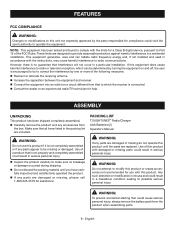
... and found to modify this product. PACKING LIST TOUGHTUNES™ Radio/Charger AAA Batteries (2) Operator's Manual WARNING: If any accessories from the product when assembling parts. 9 - n Carefully remove the product and any parts are damaged or missing, please call 1-800-525-2579 for compliance could void the user's authority to possible serious personal injury. Use of a product that to which the receiver...
... and found to modify this product. PACKING LIST TOUGHTUNES™ Radio/Charger AAA Batteries (2) Operator's Manual WARNING: If any accessories from the product when assembling parts. 9 - n Carefully remove the product and any parts are damaged or missing, please call 1-800-525-2579 for compliance could void the user's authority to possible serious personal injury. Use of a product that to which the receiver...
Manual 1
Page 10
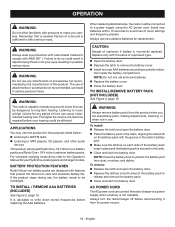
... Ryobi lithium-ion battery packs are assembling parts, making adjustments, cleaning, or when not in serious personal injury. WARNING: Always remove battery pack from the product when you careless. Always use , the battery needs to be dangerous to release and remove the battery pack. Close and latch the battery door. The use of producing sound levels that a careless fraction of a second is capable of attachments or accessories...
... Ryobi lithium-ion battery packs are assembling parts, making adjustments, cleaning, or when not in serious personal injury. WARNING: Always remove battery pack from the product when you careless. Always use , the battery needs to be dangerous to release and remove the battery pack. Close and latch the battery door. The use of producing sound levels that a careless fraction of a second is capable of attachments or accessories...
Manual 1
Page 11
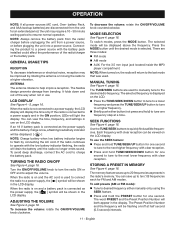
NOTE: Always remove the battery pack from the radio/ charger before plugging the unit into a power source. The flexible design prevents damage from a power source, or before unplugging the unit from bending. To switch modes, press the MODE button. There are used to manually tune to tune one second. NOTE: When turned on, the radio will be shown in use the SEEK...
NOTE: Always remove the battery pack from the radio/ charger before plugging the unit into a power source. The flexible design prevents damage from a power source, or before unplugging the unit from bending. To switch modes, press the MODE button. There are used to manually tune to tune one second. NOTE: When turned on, the radio will be shown in use the SEEK...
Manual 1
Page 12
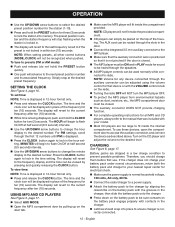
... releasing the CLOCK button. Battery packs are too large to the desired number. The display will not fit inside the provided compartment. CD players can be placed on the top of the frequency for electrical check. Make sure the power supply is normal household voltage, 120 volts, AC only, 60 Hz. Connect the radio/charger...
... releasing the CLOCK button. Battery packs are too large to the desired number. The display will not fit inside the provided compartment. CD players can be placed on the top of the frequency for electrical check. Make sure the power supply is normal household voltage, 120 volts, AC only, 60 Hz. Connect the radio/charger...
Manual 1
Page 13
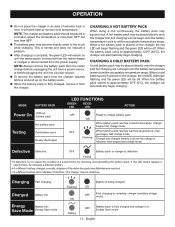
... indicate a problem. After charging is complete, the green LED will remain on the charger, the red LED will begin flashing and the green LED will automatically begin flashing and the green LED will be placed directly onto the charger port but charging will work best at normal room temperature. MODE BATTERY PACK Power On Without battery pack...
... indicate a problem. After charging is complete, the green LED will remain on the charger, the red LED will begin flashing and the green LED will automatically begin flashing and the green LED will be placed directly onto the charger port but charging will work best at normal room temperature. MODE BATTERY PACK Power On Without battery pack...
Manual 1
Page 14
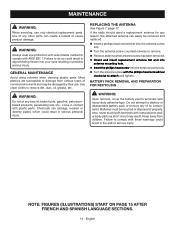
... remove dirt, dust, oil, grease, etc. If the radio should need a replacement antenna for any time let brake fluids, gasoline, petroleumbased products, penetrating oils, etc., come in serious personal injury. Failure to comply with the phillips head screwdriver clockwise to remove. Remove antenna when antenna screw has been removed. Orient and insert replacement antenna flat end into antenna mounting hole. Insert the phillips head screw...
... remove dirt, dust, oil, grease, etc. If the radio should need a replacement antenna for any time let brake fluids, gasoline, petroleumbased products, penetrating oils, etc., come in serious personal injury. Failure to comply with the phillips head screwdriver clockwise to remove. Remove antenna when antenna screw has been removed. Orient and insert replacement antenna flat end into antenna mounting hole. Insert the phillips head screw...
Manual 2
Page 3
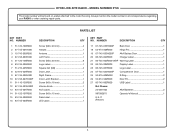
...Handle 1 Antenna 1 Left Frame 1 Screw (M6 x 30 mm 8 Logo Label 1 Square Nut (M6 4 Door Latch 1 Right Frame 1 Door Latch Bracket 1 Screw (M3 x 18 mm 2 Volume Knob 1 AUX Label 1 Screw (M3 x 15 mm 1 Data Label 1 LED Label 1 KEY PART NO. NUMBER DESCRIPTION QTY 17 67-745-035H000P Back Door 1 18 52-974-508R000 Hinge Pin 1 19 67-745-033H000P AAA Battery... Door Pin 2 27 83-745-000R000 USB Label 1 Not Shown: 24-000-002 AAA Batteries 2 987000675 Operator's Manual 1 8-9-11 (Rev:01) 3 RYOBI JOB-SITE RADIO - MODEL NUMBER P745 The model number will be...
...Handle 1 Antenna 1 Left Frame 1 Screw (M6 x 30 mm 8 Logo Label 1 Square Nut (M6 4 Door Latch 1 Right Frame 1 Door Latch Bracket 1 Screw (M3 x 18 mm 2 Volume Knob 1 AUX Label 1 Screw (M3 x 15 mm 1 Data Label 1 LED Label 1 KEY PART NO. NUMBER DESCRIPTION QTY 17 67-745-035H000P Back Door 1 18 52-974-508R000 Hinge Pin 1 19 67-745-033H000P AAA Battery... Door Pin 2 27 83-745-000R000 USB Label 1 Not Shown: 24-000-002 AAA Batteries 2 987000675 Operator's Manual 1 8-9-11 (Rev:01) 3 RYOBI JOB-SITE RADIO - MODEL NUMBER P745 The model number will be...


