
Ryobi RTS10 Support Question
Ryobi RTS10 Support Question
Find answers below for this question about Ryobi RTS10.Need a Ryobi RTS10 manual? We have 4 online manuals for this item!
Question posted by theduckfan88 on October 25th, 2014
In Manual For Ryobi Model Rts10 Instructions For Setting Blade At 0 Or 90
states that it may be necessary to remove indicator with red line to 0. How do I remove the indicator? I have the blade set at 90 degrees now. I just need to move the indicator so it is on 0 degrees.
Current Answers
Related Ryobi RTS10 Manual Pages
English Manual - Page 3
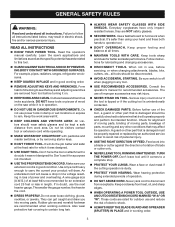
... to rain. A wire gauge size (A.W.G.) of at all instructions listed below, may risk injury.
NEVER STAND ON TOOL. Use a featherboard to hold work area well lit.
KEEP CHILDREN AND VISITORS AWAY. Keep tools sharp and clean for recommended accessories. Consult the operator's manual for better and safer performance. Check for a purpose not...
English Manual - Page 4
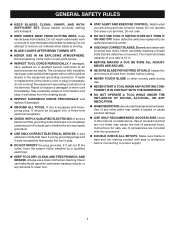
...cut material when blade is necessary, do not connect the equipment-grounding conductor to whether the tool is 10 in this manual or addendums. Use of accessories that accept the tool's plug.
...
BE SURE BLADE PATH IS FREE OF NAILS. GENERAL SAFETY RULES
KEEP BLADES CLEAN, SHARP, and with incorrect size holes. Instructions for and remove all adjustments are not ...
English Manual - Page 5
... and guide the work using a push stick. b) Use saw blade. c) Keep hands out of the line of blade path and turn switch off immediately if blade binds or stalls.
USE RIP FENCE. d) Use a push stick when required. b) Keeping rip fence parallel to them these instructions also.
SPECIFIC SAFETY RULES
FIRMLy bOLT THE SAw...
English Manual - Page 6

... contact with side shields and, as necessary, a full face shield when operating ... blade will allow you to keep your safety.
Failure to operate the tool ...better and safer.
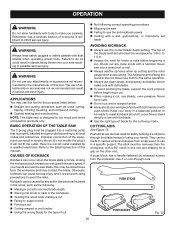
SYMBOLS
Some of the following symbols may be used on this product. Always wear safety goggles or safety glasses with any hot surface.
Please study them and learn their meaning. Read The Operator's Manual...
English Manual - Page 7
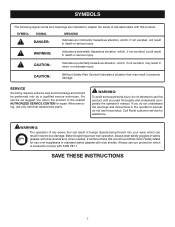
... SERVICE CENTER for assistance. Call Ryobi customer service for repair. WARNING:
The operation of risk associated with side shields and, when needed, a full face shield.
CAUTION:
Indicates a potentially hazardous situation, which is marked to comply with side shields. SAVE THESE INSTRUCTIONS
CAUTION:
(Without Safety Alert Symbol) Indicates a situation that may result in...
English Manual - Page 8

...shock. A line intended only for use . Grounding Instructions
This product must be used.
**Ampere rating (on tool data plate)...tool is indicated by the letters "W-A" or "W" on a nominal 120 volt circuit and has a grounding plug similar to the plug illustrated in doubt as to either flat blade terminal. load or with a qualified electrician or service personnel if the grounding instructions...
English Manual - Page 9

... The area over the jointer planer cutterhead during any angle to the blade other than at 90°. Set The distance that serves as a guide for table saws) Devices used to blade movement. Throw-Back The throwing back of the blade.
Bevel Cut A cutting operation made with the workpiece at any ripping operation.
Dado Cut...
English Manual - Page 11

...inserted into the blade. Detailed instructions are designed to snag the workpiece to use of the cabinet. This saw can be cut . A scale on the front of this manual for all ...set the angle of the saw table shows the distance between the rip fence and the blade. If it cannot be tilted using the blade adjusting handle, the bevel lock lever, and the bevel indicator found on the tool...
English Manual - Page 14
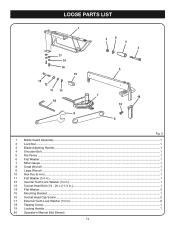
...7
19
18
8
1 2
3 4 5 6 7 8 9 10 11 12 13 14 15 16 17 18 19 20
Fig. 5
Blade Guard Assembly...1 Lock Nut...1 Blade Adjusting Handle...1 Shoulder Bolt...1 Rip Fence ...1 Flat Washer...1 Miter Gauge ...1 Small Wrench...1 Large Wrench...1 Hex Key (5 mm)...1 Flat Washer (1/4 ... Screw...2 External Tooth Lock Washer (1/4 in.)...2 Tapping Screw...1 Locking Handle...1 Operator's Manual (Not Shown)
14
English Manual - Page 16

... not reach over or across the blade. ASSEMBLY
UNPACKING
This product requires assembly. Carefully remove the tool and any parts are damaged or missing do not operate this tool until the parts are replaced. NOTE: Remove the foam block from the
box. Any such alteration or modification is factory set to a workbench or an approved...
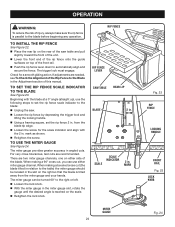
English Manual - Page 19

... BRACKET
BLADE GUARD ASSEMBLY
Fig. 13
FRAMING SQUARE
Blade adjusting
handle
Fig. 14
Reposition the blade guard assembly left . The spreader must be checked. ASSEMBLY
WARNING:
It is needed to align the spreader with the saw blade. TO INSTALL BLADE GUARD Assembly...head cap screws, flat washers, and external tooth lock washers as needed . See the following section for instructions.
English Manual - Page 20
...set
blade
AVOIDING KICKBACK
Always use of this manual. Knock out any attachments or accessories not recommended by the manufacturer of using your hands are devices used for the purposes listed below: Straight line... a 90° notch in electric shock. Improper connection of the blade teeth should...making and woodworking. Never use this tool. Never make you with
push ...
English Manual - Page 21

... angle to the blade. Carefully read and understand all sections of cut . Make allowance for making
each kind of this tool. Compound (or bevel...:
Always use blades rated less than 90°. Bevel cross cuts are across the grain of this operator's manual before making these... the wood) will be on the waste side of the measuring line.
Cut the wood with the finish side up. &#...
English Manual - Page 22

...center of the width on the workpiece. Adjust the featherboard to apply resistance to the workpiece just forward of the blade.
featherboard
push stick
push block
Bevel Locking
Lever
"c" clampS
Fig. 18
3-5/8 in. 3/4.... Set the rip fence to allow the blade to completely stop rotating before removing the stock. warning:
Do not locate the featherboard to the rear of the blade. ...
English Manual - Page 24
...; Using a framing square, set the rip fence scale indicator to set the rip fence 2 in the Adjustment section of this manual.
mark as shown. Retighten the screw. For very close tolerances, test cuts are needed, see To Check the Alignment of the Rip Fence to the Blade
See Figure 23.
Scale
Scale indicator
2 in angled cuts...
English Manual - Page 31

... unplugged from the power source. Turn the 45° positive stop adjustment screw counterclockwise 1 turn .
Rotate blade adjusting handle counterclockwise until it stops. Line up the red line on the indicator with the 0° mark on the bevel scale.
90° Positive Stop
Adjustment Screw
Fig. 34 45° Positive
Stop Adjustment
Screw
Fig. 35
31...
English Manual - Page 33

...1. Replace if necessary.
2. Remount the rip fence. 2. Adjust nut counterclockwise.
1. Blade is misaligned. 4. Clean blade or have blade sharpened. 2. Rip...Ryobi Technical Service at
1‑800-525-2579.
1. Have blade resharpened.
1. Recheck setting on a level surface and tighten all mounting hardware securely.
1. Blade is misaligned. 2. Possible Cause
1. Adjustment nut needs...
English Manual - Page 34

.... OPERATOR'S MANUAL
10 in the space provided below.
• HOW TO ORDER REPAIR PARTS
When ordering repair parts, always give the following information:
• MODEL NUMBER • SERIAL NUMBER
BTS12S
RYOBI® is a registered trademark of work with approved safety equipment, such as those dust masks that you have purchased your tool, should a need ever...
Repair Sheet - Page 5
... LEVER ASSEMBLY (INC. PAGE 4 KEY NOS. 19-22 AND 41-42 1
NO. RYOBI Table Saw - BLADE (422010025 1
35 0101010302 OUTER BLADE WASHER 1
36 0101010920 ARBOR NUT (5/8-18 1
37 0101010312 ARBOR WRENCH (15/16 in . NUMBER
DESCRIPTION
QTY. MODEL NUMBER BTS12S
The model number will be found on a plate attached to the back panel of the...
Repair Sheet - Page 7

Always mention the model number in all correspondence regarding your TABLE SAW or when ordering repair parts. NUMBER
DESCRIPTION
QTY.
1 0101210210 LOWER BLADE GUARD 1 2 451020004 WIRE CONNECTOR 2 3 ...3 23 A101010501 JACKSHAFT ASSEMBLY (ARBOR 1 987000372 OPERATOR'S MANUAL 1
9-30-08 (REV:00)
MODEL NUMBER BTS12S
The model number will be found on a plate attached to the...
Similar Questions

Ryobi Rts10 Riving Lever Won't Lock
The riving knife lever on Ryobi RTS10 won't lock. Is there anything that shows the assembly of this ...
The riving knife lever on Ryobi RTS10 won't lock. Is there anything that shows the assembly of this ...
(Posted by nsmerk 8 years ago)

Will A Ryobi Table Saw Model Rts10 Accept A Dado Blade
(Posted by arivegregon 9 years ago)


Dado Blade Size
What size dado blade can or should you use on a RTS10?
What size dado blade can or should you use on a RTS10?
(Posted by acates11 9 years ago)