
Operation Manual
Page 2
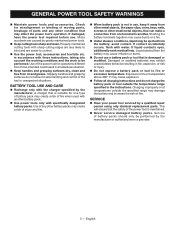
... of electric shock if your finger on the switch or energizing power tools that cannot be drawn into air vents. Do not use a ground fault circuit interrupter (GFCI) protected supply. GENERAL POWER TOOL SAFETY WARNINGS WARNING Read all safety warnings, instructions, illustrations and specifications provided with this product only with batteries and chargers listed in tool/appliance/battery pack/charger correlation supplement 987000-432. The term "power tool" in...
... of electric shock if your finger on the switch or energizing power tools that cannot be drawn into air vents. Do not use a ground fault circuit interrupter (GFCI) protected supply. GENERAL POWER TOOL SAFETY WARNINGS WARNING Read all safety warnings, instructions, illustrations and specifications provided with this product only with batteries and chargers listed in tool/appliance/battery pack/charger correlation supplement 987000-432. The term "power tool" in...
Operation Manual
Page 3
...; Use the power tool, accessories and tool bits etc. Liquid ejected from other metal objects, like paper clips, coins, keys, nails, screws or other battery packs may damage the battery and increase the risk of injury. Do not expose a battery pack or tool to be performed by a qualified repair person using only identical replacement parts. If damaged, have the power tool repaired before use a battery pack or tool that the safety of the power tool...
...; Use the power tool, accessories and tool bits etc. Liquid ejected from other metal objects, like paper clips, coins, keys, nails, screws or other battery packs may damage the battery and increase the risk of injury. Do not expose a battery pack or tool to be performed by a qualified repair person using only identical replacement parts. If damaged, have the power tool repaired before use a battery pack or tool that the safety of the power tool...
Operation Manual
Page 4
... to comply with ANSI Z87.1 when assembling parts, operating the tool, or performing maintenance. Following this rule will reduce the risk of possible hazards when not using your eyes, flush them with side shields marked to be plugged into your battery tool or when changing accessories. Be aware of serious personal injury. Save these instructions also. 4 - Do not store outside...
... to comply with ANSI Z87.1 when assembling parts, operating the tool, or performing maintenance. Following this rule will reduce the risk of possible hazards when not using your eyes, flush them with side shields marked to be plugged into your battery tool or when changing accessories. Be aware of serious personal injury. Save these instructions also. 4 - Do not store outside...
Operation Manual
Page 5
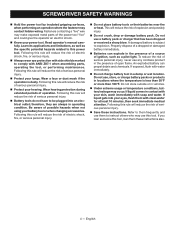
... Alert Recycle Symbol Volts Direct Current No Load Speed Per Minute Do not expose to operate the product better and safer. Some of injury, user must read and understand operator's manual before using this product. Read Operator's Manual To reduce the risk of the following signal words and meanings are intended to comply with this product. NOTICE: (Without Safety Alert Symbol) Indicates...
... Alert Recycle Symbol Volts Direct Current No Load Speed Per Minute Do not expose to operate the product better and safer. Some of injury, user must read and understand operator's manual before using this product. Read Operator's Manual To reduce the risk of the following signal words and meanings are intended to comply with this product. NOTICE: (Without Safety Alert Symbol) Indicates...
Operation Manual
Page 6
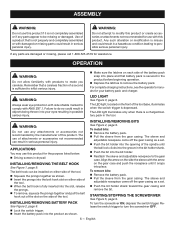
... and adjustable nosepiece to the gear case. WARNING: Do not use any parts are damaged or missing, please call 1-800-525-2579 for use with this product. INSTALLING/REMOVING BATTERY PACK See Figure 2, page 9. Lock the switch trigger. Insert the battery pack into the product as a set . Push the bit holder into your battery pack and charger. English Remember that a careless fraction of the tool. LED LIGHT...
... and adjustable nosepiece to the gear case. WARNING: Do not use any parts are damaged or missing, please call 1-800-525-2579 for use with this product. INSTALLING/REMOVING BATTERY PACK See Figure 2, page 9. Lock the switch trigger. Insert the battery pack into the product as a set . Push the bit holder into your battery pack and charger. English Remember that a careless fraction of the tool. LED LIGHT...
Operation Manual
Page 7
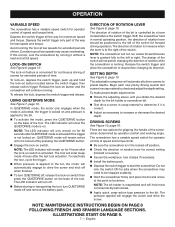
... will remain active until you obtain the desired depth for the bit holder or screwdriver bit. Test drive a screw in scrap material to the bit. Release the switch trigger and allow the screwdriver to start the screwdriver. DRIVING SCREWS See Figure 10, page 10. Use clamps if necessary. Install the battery pack. Depress the switch trigger to stop before changing its direction. NOTE: The bit holder is magnetized and will enter sleep mode 4 hours...
... will remain active until you obtain the desired depth for the bit holder or screwdriver bit. Test drive a screw in scrap material to the bit. Release the switch trigger and allow the screwdriver to start the screwdriver. DRIVING SCREWS See Figure 10, page 10. Use clamps if necessary. Install the battery pack. Depress the switch trigger to stop before changing its direction. NOTE: The bit holder is magnetized and will enter sleep mode 4 hours...
Parts Diagram
Page 1
RYOBI 18 VOLT DRYWALL SCREWDRIVER MODEL NUMBER P225 REPAIR SHEET ONE WORLD TECHNOLOGIES, INC. 1428 Pearman Dairy Road, Anderson, SC 29625 Phone 1-800-525-2579 www.ryobitools.com
RYOBI 18 VOLT DRYWALL SCREWDRIVER MODEL NUMBER P225 REPAIR SHEET ONE WORLD TECHNOLOGIES, INC. 1428 Pearman Dairy Road, Anderson, SC 29625 Phone 1-800-525-2579 www.ryobitools.com
Parts Diagram
Page 3
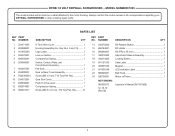
.... Key Nos. 3 and 19)......... 1 Logo Label 1 Lock-on a label attached to the motor housing. Always mention the model number in all correspondence regarding your DRYWALL SCREWDRIVER or when ordering repair parts. RYOBI 18 VOLT DRYWALL SCREWDRIVER − MODEL NUMBER P225 The model number will be found on Button 1 Compression Spring 1 Switch, Contact Plate, and Circuit Board Assembly 1 Felt Seal 1 Gear w/Gear Cover Assembly 1 Screw (M3 x 5 mm, T10 Torx Pan Hd 1 Gear Box Cover 1 Push To Drive Lever 1 Compression Spring 1 Screw...
.... Key Nos. 3 and 19)......... 1 Logo Label 1 Lock-on a label attached to the motor housing. Always mention the model number in all correspondence regarding your DRYWALL SCREWDRIVER or when ordering repair parts. RYOBI 18 VOLT DRYWALL SCREWDRIVER − MODEL NUMBER P225 The model number will be found on Button 1 Compression Spring 1 Switch, Contact Plate, and Circuit Board Assembly 1 Felt Seal 1 Gear w/Gear Cover Assembly 1 Screw (M3 x 5 mm, T10 Torx Pan Hd 1 Gear Box Cover 1 Push To Drive Lever 1 Compression Spring 1 Screw...
Parts Diagram
Page 4
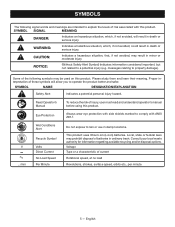
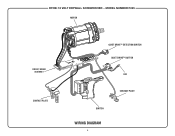
RYOBI 18 VOLT DRYWALL SCREWDRIVER − MODEL NUMBER P225 MOTOR CIRCUIT BOARD ASSEMBLY CONTACT PLATE QUIET DRIVE™ DETECTION SWITCH QUIET DRIVE™ BUTTON LED CONTACT PLATE SWITCH WIRING DIAGRAM 4
RYOBI 18 VOLT DRYWALL SCREWDRIVER − MODEL NUMBER P225 MOTOR CIRCUIT BOARD ASSEMBLY CONTACT PLATE QUIET DRIVE™ DETECTION SWITCH QUIET DRIVE™ BUTTON LED CONTACT PLATE SWITCH WIRING DIAGRAM 4


