
Warranty Card
Page 1
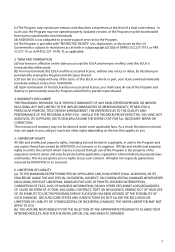
..., mishandling, misuse, neglect, accident, or by removal or defacement of the factory serial number/bar code label(s). Warranty information 12 Month Limited Warranty Applies to RCA Voice Recorders AUDIOVOX ACCESSORIES CORP. (the Company) warrants to the original retail purchaser of this product that should this product or any part thereof, under...
..., mishandling, misuse, neglect, accident, or by removal or defacement of the factory serial number/bar code label(s). Warranty information 12 Month Limited Warranty Applies to RCA Voice Recorders AUDIOVOX ACCESSORIES CORP. (the Company) warrants to the original retail purchaser of this product that should this product or any part thereof, under...
Warranty Card
Page 2
Attn: Service Department. 150 Marcus Blvd. which were originally provided with the original purchase. We recommend using the original carton and packing materials. Ship to : Audiovox Return Centre c/o Genco 6685 Kennedy Road, Unit#3, Door 16, Mississuaga, Ontario L5T 3A5 22 Hauppauge N.Y. 11788 1-800-645-4994 For Canada Customers, please ship to Audiovox Electronics Corp. However DO NOT return any remotes, memory cards, cables, etc. Include any removable batteries, even if batteries were included with the product. • Properly pack your unit.
Attn: Service Department. 150 Marcus Blvd. which were originally provided with the original purchase. We recommend using the original carton and packing materials. Ship to : Audiovox Return Centre c/o Genco 6685 Kennedy Road, Unit#3, Door 16, Mississuaga, Ontario L5T 3A5 22 Hauppauge N.Y. 11788 1-800-645-4994 For Canada Customers, please ship to Audiovox Electronics Corp. However DO NOT return any remotes, memory cards, cables, etc. Include any removable batteries, even if batteries were included with the product. • Properly pack your unit.
Owner/User Manual
Page 1
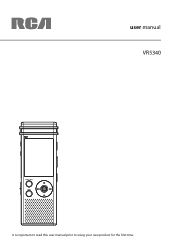
user manual VR5340 It is important to read this user manual prior to using your new product for the first time.
user manual VR5340 It is important to read this user manual prior to using your new product for the first time.
Owner/User Manual
Page 2
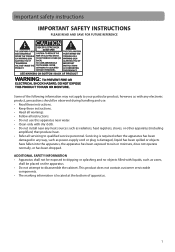
This product does not contain customer serviceable components. • The marking information is damaged, liquid has been spilled or objects have fallen into the apparatus, the apparatus has been exposed to qualified service personnel. Servicing is required when the apparatus has been damaged in any heat sources such as radiators, heat registers, stoves, or other apparatus (including amplifiers) that produce heat. • Refer all servicing to rain or moisture, does not operate normally, or has been dropped. ADDITIONAL SAFETY INFORMATION • Apparatus shall not be observed during ...
This product does not contain customer serviceable components. • The marking information is damaged, liquid has been spilled or objects have fallen into the apparatus, the apparatus has been exposed to qualified service personnel. Servicing is required when the apparatus has been damaged in any heat sources such as radiators, heat registers, stoves, or other apparatus (including amplifiers) that produce heat. • Refer all servicing to rain or moisture, does not operate normally, or has been dropped. ADDITIONAL SAFETY INFORMATION • Apparatus shall not be observed during ...
Owner/User Manual
Page 3
Do not try to charge a battery that is an open-air type designed to let you hear outside sounds, don't turn down the volume or stop using the headset. • Do not use the unit immediately after transportation from the product if you experience ringing in mind: • Do not play . • If you are inserted correctly. WARNING: The battery (battery or batteries or battery pack) shall not be exposed to excessive heat such as inside a parked car) may cause damage or malfunction. • Clean the unit with high temperature or in your headset at a high volume. we recommend that ...
Do not try to charge a battery that is an open-air type designed to let you hear outside sounds, don't turn down the volume or stop using the headset. • Do not use the unit immediately after transportation from the product if you experience ringing in mind: • Do not play . • If you are inserted correctly. WARNING: The battery (battery or batteries or battery pack) shall not be exposed to excessive heat such as inside a parked car) may cause damage or malfunction. • Clean the unit with high temperature or in your headset at a high volume. we recommend that ...
Owner/User Manual
Page 4
... norme NMB-003 du Canada. 3 FCC Information FCC Information Note: This equipment has been tested and found to comply with the limits for technical support RCA VR5340 This Class B digital apparatus complies with Canadian ICES-003. These limits are designed to radio or television reception, which can radiate radio frequency energy and...
... norme NMB-003 du Canada. 3 FCC Information FCC Information Note: This equipment has been tested and found to comply with the limits for technical support RCA VR5340 This Class B digital apparatus complies with Canadian ICES-003. These limits are designed to radio or television reception, which can radiate radio frequency energy and...
Owner/User Manual
Page 5
Contents Important safety instructions IMPORTANT SAFETY INSTRUCTIONS 1 Important battery precautions ...2 Ecology...2 Precautions for the unit ...2 Headset safety ...2 FCC Information 3 Contents 4 End user license agreement 6 Before you begin Unpacking your player...9 Installing batteries ...9 Using earphones and external microphone 9 Turning player on/off...9 Locking the player controls...9 Connecting to computer Computer system requirements...10 Connecting to computer...10 Installing Digital Voice Manager application Installing Digital Voice Manager...11 General controls Player controls...
Contents Important safety instructions IMPORTANT SAFETY INSTRUCTIONS 1 Important battery precautions ...2 Ecology...2 Precautions for the unit ...2 Headset safety ...2 FCC Information 3 Contents 4 End user license agreement 6 Before you begin Unpacking your player...9 Installing batteries ...9 Using earphones and external microphone 9 Turning player on/off...9 Locking the player controls...9 Connecting to computer Computer system requirements...10 Connecting to computer...10 Installing Digital Voice Manager application Installing Digital Voice Manager...11 General controls Player controls...

Owner/User Manual
Page 6
Deleting files 17 Bookmarks To create bookmarks...17 To delete bookmarks ...17 Editing Selecting an edit function...18 Append ...18 Cut...18 Formating To format the memory of the player 19 Settings Accessing Settings menu ...19 Troubleshooting tips Warranty information 12 Month Limited Warranty ...21 5
Deleting files 17 Bookmarks To create bookmarks...17 To delete bookmarks ...17 Editing Selecting an edit function...18 Append ...18 Cut...18 Formating To format the memory of the player 19 Settings Accessing Settings menu ...19 Troubleshooting tips Warranty information 12 Month Limited Warranty ...21 5
Owner/User Manual
Page 7
... by law), or create derivative works based upon the Program; (iii) copy the Program, except as a part of the RCA branded Portable Digital Audio/Video Device ("A/V Device"), and only if the other intellectual property rights. 6 AUDIOVOX CORPORATION END USER LICENSE...LEGAL AGREEMENT BETWEEN YOU AND AUDIOVOX CORPORATION AND, AS APPLICABLE, ANY AUDIOVOX SUBSIDIARY, AS DEFINED BELOW (COLLECTIVELY "AUDIOVOX"), FOR THE RCA BRANDED PORTABLE DIGITAL AUDIO/VIDEO DEVICE APPLICATION/DRIVER SOFTWARE PROGRAM WHICH MAY INCLUDE ASSOCIATED SOFTWARE COMPONENTS, SOFTWARE LLICENSED BY AUDIOVOX FROM THIRD PARTIES...
... by law), or create derivative works based upon the Program; (iii) copy the Program, except as a part of the RCA branded Portable Digital Audio/Video Device ("A/V Device"), and only if the other intellectual property rights. 6 AUDIOVOX CORPORATION END USER LICENSE...LEGAL AGREEMENT BETWEEN YOU AND AUDIOVOX CORPORATION AND, AS APPLICABLE, ANY AUDIOVOX SUBSIDIARY, AS DEFINED BELOW (COLLECTIVELY "AUDIOVOX"), FOR THE RCA BRANDED PORTABLE DIGITAL AUDIO/VIDEO DEVICE APPLICATION/DRIVER SOFTWARE PROGRAM WHICH MAY INCLUDE ASSOCIATED SOFTWARE COMPONENTS, SOFTWARE LLICENSED BY AUDIOVOX FROM THIRD PARTIES...
Owner/User Manual
Page 8
SHOULD THE PROGRAM PROVE DEFECTIVE, YOU (AND NOT AUDIOVOX, ITS SUPPLIERS, OR ITS DEALERS) ASSUME THE ENTIRE COST FOR ALL NECESSARY REPAIR OR CORRECTION. All title and intellectual property rights in and to provide support services for the Program. (e) The Program is provided with any of the terms of this EULA, in effect until this EULA is the property of the respective content owner and may terminate this EULA and the associated license, without notice from AUDIOVOX. (d) Upon termination of the Program is terminated by either party. (b) You may be protected by applicable ...
SHOULD THE PROGRAM PROVE DEFECTIVE, YOU (AND NOT AUDIOVOX, ITS SUPPLIERS, OR ITS DEALERS) ASSUME THE ENTIRE COST FOR ALL NECESSARY REPAIR OR CORRECTION. All title and intellectual property rights in and to provide support services for the Program. (e) The Program is provided with any of the terms of this EULA, in effect until this EULA is the property of the respective content owner and may terminate this EULA and the associated license, without notice from AUDIOVOX. (d) Upon termination of the Program is terminated by either party. (b) You may be protected by applicable ...

Owner/User Manual
Page 9
... voting stock or partnership interest, by you and AUDIOVOX, and changes from the terms and conditions of this EULA made in any ) related to the RCA Software and to verify compliance with the terms of the voting interest in the entity in accordance with Audiovox partners, technical information about your computer...
... voting stock or partnership interest, by you and AUDIOVOX, and changes from the terms and conditions of this EULA made in any ) related to the RCA Software and to verify compliance with the terms of the voting interest in the entity in accordance with Audiovox partners, technical information about your computer...
Owner/User Manual
Page 10
Insert two "AAA" batteries (included), following : • RCA voice recorder • USB cable • Two "AAA" batteries • Quick start guide Installing batteries 1. Turning player on display for battery's level. If power interruption ...
Insert two "AAA" batteries (included), following : • RCA voice recorder • USB cable • Two "AAA" batteries • Quick start guide Installing batteries 1. Turning player on display for battery's level. If power interruption ...
Owner/User Manual
Page 11
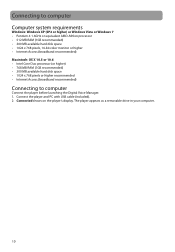
Connect the player and PC with USB cable (included). 2. Connected shows on the player's display. The player appears as a removable drive in your computer. 10 Connecting to computer Computer system requirements Windows: Windows XP (SP2 or higher) or Windows Vista or Windows 7 • Pentium 4 1.6GHz or equivalent AMD Athlon processor • 512 MB RAM (1GB recommended) • 300 MB available hard disk space • 1024 x 768 pixels, 16-bit color monitor or higher • Internet Access (broadband recommended) Macintosh: OS X 10.5 or 10.6 • Intel Core Duo processor (or higher) ...
Connect the player and PC with USB cable (included). 2. Connected shows on the player's display. The player appears as a removable drive in your computer. 10 Connecting to computer Computer system requirements Windows: Windows XP (SP2 or higher) or Windows Vista or Windows 7 • Pentium 4 1.6GHz or equivalent AMD Athlon processor • 512 MB RAM (1GB recommended) • 300 MB available hard disk space • 1024 x 768 pixels, 16-bit color monitor or higher • Internet Access (broadband recommended) Macintosh: OS X 10.5 or 10.6 • Intel Core Duo processor (or higher) ...
Owner/User Manual
Page 12
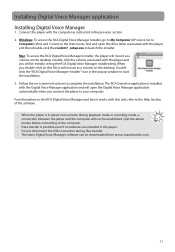
...with the player and you double-click on this unit, refer to your computer. When you will mount as a volume on the RCA Digital Voice Manager and how it will be downloaded from www.rcaaudiovideo.com. 11 Quit the above modes before connecting to launch the installer.... Installing Digital Voice Manager application Installing Digital Voice Manager 1. Doubleclick the "RCA Digital Voice Manager Installer" icon in player menu mode, during files transfer. • The latest Digital Voice Manager software can be initially ...
...with the player and you double-click on this unit, refer to your computer. When you will mount as a volume on the RCA Digital Voice Manager and how it will be downloaded from www.rcaaudiovideo.com. 11 Quit the above modes before connecting to launch the installer.... Installing Digital Voice Manager application Installing Digital Voice Manager 1. Doubleclick the "RCA Digital Voice Manager Installer" icon in player menu mode, during files transfer. • The latest Digital Voice Manager software can be initially ...

Owner/User Manual
Page 13
Recording indicator 3. MENU/INFO - Stops recording or playback; quit the main menu and go to access the player menu. To start playback or pause the playback. + / - change playback speed in microphone 2. External microphone jack 7. External earphones jack 8. Starts and pauses recording 12. - Built-in PAUSE mode. / - To confirm a setting in the menu; Power on/off; To connect the player and PC with a USB cable (included). 9. / - Bookmark - General controls Player controls 1 2 6 10 7 11 8 12 3 9 5 4 1. move left or right in the menu; Skip to fast ...
Recording indicator 3. MENU/INFO - Stops recording or playback; quit the main menu and go to access the player menu. To start playback or pause the playback. + / - change playback speed in microphone 2. External microphone jack 7. External earphones jack 8. Starts and pauses recording 12. - Built-in PAUSE mode. / - To confirm a setting in the menu; Power on/off; To connect the player and PC with a USB cable (included). 9. / - Bookmark - General controls Player controls 1 2 6 10 7 11 8 12 3 9 5 4 1. move left or right in the menu; Skip to fast ...
Owner/User Manual
Page 14
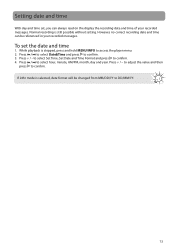
While playback is still possible without setting. Press + / - If 24hr mode is selected, date format will be referenced in your recorded messages. However, no correct recording date and time can always read on the display the recording date and time of your recorded messages. Normal recording is stopped, press and hold MENU/INFO to DD/MM/YY. 13 to select Set Time, Set Date and Time Format and press to confirm. to adjust the value and then press to confirm. 4. Press / to confirm. 3. Setting date and time With day and time set the date and time 1. Press + / - Press / to ...
While playback is still possible without setting. Press + / - If 24hr mode is selected, date format will be referenced in your recorded messages. However, no correct recording date and time can always read on the display the recording date and time of your recorded messages. Normal recording is stopped, press and hold MENU/INFO to DD/MM/YY. 13 to select Set Time, Set Date and Time Format and press to confirm. to adjust the value and then press to confirm. 4. Press / to confirm. 3. Setting date and time With day and time set the date and time 1. Press + / - Press / to ...

Owner/User Manual
Page 15
Basic operations Selecting folders and files 1. will be supported! Press to adjust volume. 5. to start playback. 3. Press or once to skip to confirm. 4. Press any buttons to turn on the screen. • The unit will be turned off automatically after one minute of Play Speed in Settings menu. to select folder and press to the previous/next file. You can also select the playback speed by adjusting the value of elapsed playback time. Accessing information While playback is in the Settings menu. Press / to select Folders and press to switch among different information....
Basic operations Selecting folders and files 1. will be supported! Press to adjust volume. 5. to start playback. 3. Press or once to skip to confirm. 4. Press any buttons to turn on the screen. • The unit will be turned off automatically after one minute of Play Speed in Settings menu. to select folder and press to the previous/next file. You can also select the playback speed by adjusting the value of elapsed playback time. Accessing information While playback is in the Settings menu. Press / to select Folders and press to switch among different information....
Owner/User Manual
Page 16
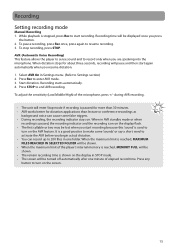
Select AVR On in STOP mode. • The screen will be turned off automatically after one folder. Recording starts automatically. 4. Press STOP to Settings section) 2. during AVR recording. • The unit will enter Stop mode if recording is shown on . When the maximum limit is reached, MAXIMUM FILES REACHED IN SELECTED FOLDER will be shown. • When the maximum limit of the player's internal memory is reached, MEMORY FULL will be shown. • The remain recording time is paused for more than 30 minutes. • AVR works better for about three seconds, recording will ...
Select AVR On in STOP mode. • The screen will be turned off automatically after one folder. Recording starts automatically. 4. Press STOP to Settings section) 2. during AVR recording. • The unit will enter Stop mode if recording is shown on . When the maximum limit is reached, MAXIMUM FILES REACHED IN SELECTED FOLDER will be shown. • When the maximum limit of the player's internal memory is reached, MEMORY FULL will be shown. • The remain recording time is paused for more than 30 minutes. • AVR works better for about three seconds, recording will ...
Owner/User Manual
Page 17
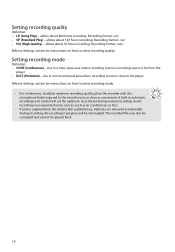
Setting recording quality Definition: • LP (Long Play) - allows about 70 hours recording. allows about 140 hours recording. Use in a more enclosed area where recording source is far from the battery fails suddenly (e.g. batteries are removed accidentally) during manual recording. Recording format: .voc • HQ (High Quality) - Refer to Settings section for instructions on how to select recording mode. • For conferences, to obtain optimum recording quality, place the recorder with the microphone freely exposed to the sound source as close to select recording ...
Setting recording quality Definition: • LP (Long Play) - allows about 70 hours recording. allows about 140 hours recording. Use in a more enclosed area where recording source is far from the battery fails suddenly (e.g. batteries are removed accidentally) during manual recording. Recording format: .voc • HQ (High Quality) - Refer to Settings section for instructions on how to select recording mode. • For conferences, to obtain optimum recording quality, place the recorder with the microphone freely exposed to the sound source as close to select recording ...

Owner/User Manual
Page 18
Press STOP to cancel deleting current file or all bookmarks created in the current file). 3. While playback is stopped, press . 2. Press + / - Press to 29 bookmarks in the current folder (ALL) and press 3. Bookmarks To create bookmarks • Press Bookmark during playback. • You can create up to confirm delete. 17 to select a bookmark or select ALL (to select one of the deleting options: • Delete the current file (Current file name) • Delete all files in a file. To delete bookmarks 1. Press + / - Press to select the desired option. to ...
Press STOP to cancel deleting current file or all bookmarks created in the current file). 3. While playback is stopped, press . 2. Press + / - Press to 29 bookmarks in the current folder (ALL) and press 3. Bookmarks To create bookmarks • Press Bookmark during playback. • You can create up to confirm delete. 17 to select a bookmark or select ALL (to select one of the deleting options: • Delete the current file (Current file name) • Delete all files in a file. To delete bookmarks 1. Press + / - Press to select the desired option. to ...