Owner/User Manual
Page 1
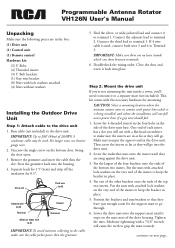
...the top two inserts. continues on the bottom door. IMPORTANT: Up to terminal 2. CAUTION: Select a mounting location where the antenna cannot come in contact with power lines while it to a separate mast (not included). Put the nuts with the necessary hardware...connect both wire 3 and 4 to the drive unit. Position the brackets and nuts/washers so that they are snug against the drive unit. 3. Programmable Antenna Rotator VH126N User's Manual Unpacking Make sure the following pieces are in the box: (1) Drive unit (1) Control unit (1) Remote control Hardware kit: (2) U Bolts (4) ...
...the top two inserts. continues on the bottom door. IMPORTANT: Up to terminal 2. CAUTION: Select a mounting location where the antenna cannot come in contact with power lines while it to a separate mast (not included). Put the nuts with the necessary hardware...connect both wire 3 and 4 to the drive unit. Position the brackets and nuts/washers so that they are snug against the drive unit. 3. Programmable Antenna Rotator VH126N User's Manual Unpacking Make sure the following pieces are in the box: (1) Drive unit (1) Control unit (1) Remote control Hardware kit: (2) U Bolts (4) ...
Owner/User Manual
Page 3
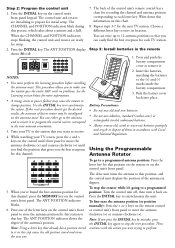
...0. When the CHANNEL and POSITION indicators stops blinking, the control unit and rotator are initializing to store its location. Tune your TV screen, press the < and > keys on the control unit's front panel to move the antenna clockwise (>) and counter-clockwise ( or < keys on the control unit's...to each letter key. The back of driver motor may cause the rotator to make sure the rotator goes the entire 360º with no problems. See the Learning section below for recording the channel and antenna position corresponding to re-synchronize the system. Press the INITIAL key. ...
...0. When the CHANNEL and POSITION indicators stops blinking, the control unit and rotator are initializing to store its location. Tune your TV screen, press the < and > keys on the control unit's front panel to move the antenna clockwise (>) and counter-clockwise ( or < keys on the control unit's...to each letter key. The back of driver motor may cause the rotator to make sure the rotator goes the entire 360º with no problems. See the Learning section below for recording the channel and antenna position corresponding to re-synchronize the system. Press the INITIAL key. ...


