

Uk Manual
Page 1
...: UK Call: 08457 089 009 From Ireland: 053 92 36102 Website: www.iconsupport.eu E-mail: [email protected] Write: ICON Health & Fitness, Ltd. USERʼS MANUAL www.iconeurope.com Serial Number Decal QUESTIONS? Write the serial number in this...
...: UK Call: 08457 089 009 From Ireland: 053 92 36102 Website: www.iconsupport.eu E-mail: [email protected] Write: ICON Health & Fitness, Ltd. USERʼS MANUAL www.iconeurope.com Serial Number Decal QUESTIONS? Write the serial number in this...

Uk Manual
Page 2
... REPLACEMENT PARTS Back Cover RECYCLING INFORMATION Back Cover WARNING DECAL PLACEMENT This drawing shows the locations of ICON IP, Inc. and other countries. PROFORM is a registered trademark of this manual and request a free replacement decal. Nike is a registered trademark of the warning decals. If a decal is not included. Note: The decals may...
... REPLACEMENT PARTS Back Cover RECYCLING INFORMATION Back Cover WARNING DECAL PLACEMENT This drawing shows the locations of ICON IP, Inc. and other countries. PROFORM is a registered trademark of this manual and request a free replacement decal. Nike is a registered trademark of the warning decals. If a decal is not included. Note: The decals may...

Uk Manual
Page 3
... any surface that could become caught in - If an extension cord is needed, use only a 3conductor, 14-gauge (1 mm2) cord that all users of this manual and all warnings on the walking belt. Do not put the treadmill in general. 3 Keep the power cord away from moisture and dust. The treadmill...
... any surface that could become caught in - If an extension cord is needed, use only a 3conductor, 14-gauge (1 mm2) cord that all users of this manual and all warnings on the walking belt. Do not put the treadmill in general. 3 Keep the power cord away from moisture and dust. The treadmill...

Uk Manual
Page 4
... or death. Always remove the key, unplug the power cord, and press the power switch into any opening on page 25.) You must be performed by an authorized ser- vice representative. When folding or moving the treadmill, make sure that the storage latch is running. Servicing other than the ... service representative only. 25. Inspect and properly tighten all parts of the power switch.) 20. Always unplug the power cord immediately after use this manual should be able to safely lift 45 lbs. (20 kg) to raise, lower, or move the treadmill until it is holding the frame securely...
... or death. Always remove the key, unplug the power cord, and press the power switch into any opening on page 25.) You must be performed by an authorized ser- vice representative. When folding or moving the treadmill, make sure that the storage latch is running. Servicing other than the ... service representative only. 25. Inspect and properly tighten all parts of the power switch.) 20. Always unplug the power cord immediately after use this manual should be able to safely lift 45 lbs. (20 kg) to raise, lower, or move the treadmill until it is holding the frame securely...

Uk Manual
Page 5
... Idler Roller Adjustment Screws Platform Cushion 5 The PERFORMANCE 1250 treadmill offers an impressive selection of this manual. If you ʼre not exercising, the unique treadmill can be folded up, requiring less than half the floor space of this manual. ing this manual carefully before contacting us assist you for selecting the revolutionary PROFORM® PERFORMANCE 1250 treadmill.
... Idler Roller Adjustment Screws Platform Cushion 5 The PERFORMANCE 1250 treadmill offers an impressive selection of this manual. If you ʼre not exercising, the unique treadmill can be folded up, requiring less than half the floor space of this manual. ing this manual carefully before contacting us assist you for selecting the revolutionary PROFORM® PERFORMANCE 1250 treadmill.

Uk Manual
Page 6
.... PART IDENTIFICATION CHART Use the drawings below each drawing is the key number of the part, from the PART LIST near the end of this manual. Some extra hardware may be included. 1/4" Star 1/4" Flat 5/16" Flat 5/16" Star Washer (35)-2 Washer (36)-2 Washer (113)-4 Washer (11)-8 3/8" Star 3/8" Nut (12)-2 Washer (13...
.... PART IDENTIFICATION CHART Use the drawings below each drawing is the key number of the part, from the PART LIST near the end of this manual. Some extra hardware may be included. 1/4" Star 1/4" Flat 5/16" Flat 5/16" Star Washer (35)-2 Washer (36)-2 Washer (113)-4 Washer (11)-8 3/8" Star 3/8" Nut (12)-2 Washer (13...

Uk Manual
Page 17
You can also connect to meet Apple performance standards. The console also features an iFit Live mode that enables the treadmill to communicate with iPod and has been certified by the developer to .... Note: The console can download personalized workouts, create your own workouts, track your workouts more effective and enjoyable. When you use the manual mode, you through the optional PROFORM SYNC. Each workout automatically controls the speed and incline of the treadmill as it guides you can change the speed and incline of...
You can also connect to meet Apple performance standards. The console also features an iFit Live mode that enables the treadmill to communicate with iPod and has been certified by the developer to .... Note: The console can download personalized workouts, create your own workouts, track your workouts more effective and enjoyable. When you use the manual mode, you through the optional PROFORM SYNC. Each workout automatically controls the speed and incline of the treadmill as it guides you can change the speed and incline of...

Uk Manual
Page 18
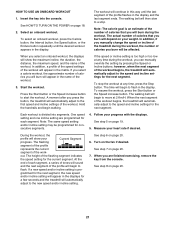
... a speed setting that includes a decimal-such as you exercise, change in the power cord and press the power switch into the reset position. Select the manual mode. After a mo- IMPORTANT: In an emer- Test the clip by carefully taking a few seconds. if the key is turned on the power. tion ... the tread- if you may take a moment for a few steps backward; To stop . mill. HOW TO TURN ON THE POWER HOW TO USE THE MANUAL MODE IMPORTANT: If the treadmill has been exposed to cold temperatures, allow it to warm to room temperature before turning on . Start the walking belt...
... a speed setting that includes a decimal-such as you exercise, change in the power cord and press the power switch into the reset position. Select the manual mode. After a mo- IMPORTANT: In an emer- Test the clip by carefully taking a few seconds. if the key is turned on the power. tion ... the tread- if you may take a moment for a few steps backward; To stop . mill. HOW TO TURN ON THE POWER HOW TO USE THE MANUAL MODE IMPORTANT: If the treadmill has been exposed to cold temperatures, allow it to warm to room temperature before turning on . Start the walking belt...

Uk Manual
Page 19
... will show your progress with the displays. Press the Home button to return to the start mode). If necessary, press the Home button again. When a PROFORM SYNC is connected to set the start mode (see step 6 on page 23 to the console, the Nike+iPod symbol near the top of the... display will show workout instructions. The Distance display-This display will display a track that you have walked or run. The matrix-When you select the manual mode, the matrix will show the incline of the treadmill for a few seconds each time the incline of the elapsed time. As you use the...
... will show your progress with the displays. Press the Home button to return to the start mode). If necessary, press the Home button again. When a PROFORM SYNC is connected to set the start mode (see step 6 on page 23 to the console, the Nike+iPod symbol near the top of the... display will show workout instructions. The Distance display-This display will display a track that you have walked or run. The matrix-When you select the manual mode, the matrix will show the incline of the treadmill for a few seconds each time the incline of the elapsed time. As you use the...
Uk Manual
Page 21
.../or incline setting will sound and the next segment of the treadmill during the workout, you manually change the speed or incline of the profile will appear in the display. In addition, if you can manually override the setting by pressing the Speed or Incline buttons; Press the Start button or the...
.../or incline setting will sound and the next segment of the treadmill during the workout, you manually change the speed or incline of the profile will appear in the display. In addition, if you can manually override the setting by pressing the Speed or Incline buttons; Press the Start button or the...

Uk Manual
Page 22
... count down to flash in your schedule, the next workout in the display. Start the workout. The time will begin to the beginning of this manual. The walking belt will begin to www.iFit.com or call the telephone number on www.iFit.com. See step 8 on page 20. 9. See HOW...
... count down to flash in your schedule, the next workout in the display. Start the workout. The time will begin to the beginning of this manual. The walking belt will begin to www.iFit.com or call the telephone number on www.iFit.com. See step 8 on page 20. 9. See HOW...

Uk Manual
Page 23
... following screens in the center display. If an iFit Live module is selected, press the decrease button next to the Enter button to select the manual mode or the iFit Live mode as the start mode will not 5. To view distance in kilometers, select METRIC. 2. The center display will appear in...
... following screens in the center display. If an iFit Live module is selected, press the decrease button next to the Enter button to select the manual mode or the iFit Live mode as the start mode will not 5. To view distance in kilometers, select METRIC. 2. The center display will appear in...
Uk Manual
Page 24
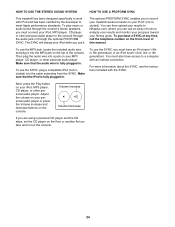
... This treadmill has been designed specifically to work with the SYNC. The optional PROFORM SYNC enables you to meet Apple performance standards. The SYNC will charge your treadmill workout results on the console. Make sure that the iPod is fully plugged in . For more information...player, CD player, or other personal audio player. To use an array of this manual. Then plug the audio wire into the cable extending from the SYNC. To play music or audio books through the optional PROFORM SYNC. To use the MP3 jack, locate the included audio wire and plug it ....
... This treadmill has been designed specifically to work with the SYNC. The optional PROFORM SYNC enables you to meet Apple performance standards. The SYNC will charge your treadmill workout results on the console. Make sure that the iPod is fully plugged in . For more information...player, CD player, or other personal audio player. To use an array of this manual. Then plug the audio wire into the cable extending from the SYNC. To play music or audio books through the optional PROFORM SYNC. To use the MP3 jack, locate the included audio wire and plug it ....

Uk Manual
Page 26
... switch, wait for a few seconds. Remove the three #8 x 1/2" Screws (1) and the two #8 x 3/4" Screws (2). Check the power switch (see the front cover of this manual. Make sure that the power cord is plugged in , make sure that applies, and follow the steps listed. If the treadmill still will not run..., please see the drawing above). SYMPTOM: The displays of this manual. SYMPTOM: The power does not turn off . To turn on page 23 to be solved by following the simple steps below. If further assistance...
... switch, wait for a few seconds. Remove the three #8 x 1/2" Screws (1) and the two #8 x 3/4" Screws (2). Check the power switch (see the front cover of this manual. Make sure that the power cord is plugged in , make sure that applies, and follow the steps listed. If the treadmill still will not run..., please see the drawing above). SYMPTOM: The displays of this manual. SYMPTOM: The power does not turn off . To turn on page 23 to be solved by following the simple steps below. If further assistance...
Uk Manual
Page 27
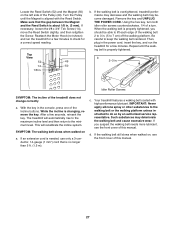
... maximum incline level and then return to the minimum level. If the walking belt still slows when walked on, see the front cover of this manual. 27 Then, plug in . (5 to check for a few seconds, reinsert the key. Idler Roller Screws SYMPTOM: The incline of a turn... extension cord is needed, use only a 3-conductor, 14-gauge (1 mm2) cord that the gap between the Magnet and the Reed Switch is aligned with high-performance lubricant. b 2-3 in . (3 mm). The treadmill will recalibrate the incline system. c. b. Using the hex key, turn . Turn the Pulley until the...
... maximum incline level and then return to the minimum level. If the walking belt still slows when walked on, see the front cover of this manual. 27 Then, plug in . (5 to check for a few seconds, reinsert the key. Idler Roller Screws SYMPTOM: The incline of a turn... extension cord is needed, use only a 3-conductor, 14-gauge (1 mm2) cord that the gap between the Magnet and the Reed Switch is aligned with high-performance lubricant. b 2-3 in . (3 mm). The treadmill will recalibrate the incline system. c. b. Using the hex key, turn . Turn the Pulley until the...

Uk Manual
Page 31
... change without notice. Description 5/16" Flat Washer UK Power Cord Receptacle Motor Bushing Filter Bracket Filter Motor Isolator Chest Strap Sensor Grounding Bracket Userʼs Manual Note: Specifications are not illustrated. 31 Qty. 101 1 102 1 103 1 104 1 105 2 106 2 107 1 108 1 109 1 110 1 111 3 112 2 Description Module Housing Console Back Console...
... change without notice. Description 5/16" Flat Washer UK Power Cord Receptacle Motor Bushing Filter Bracket Filter Motor Isolator Chest Strap Sensor Grounding Bracket Userʼs Manual Note: Specifications are not illustrated. 31 Qty. 101 1 102 1 103 1 104 1 105 2 106 2 107 1 108 1 109 1 110 1 111 3 112 2 Description Module Housing Console Back Console...

Uk Manual
Page 36
... model number and serial number of the product (see the front cover of this manual) • the name of the product (see the front cover of this manual) • the key number and description of the replacement part(s) (see the front... cover of this manual. Please use recycling facilities that are authorized to collect this type of waste in your... see the PART LIST and the EXPLODED DRAWING near the end of this manual) RECYCLING INFORMATION This electronic product must be recycled after its useful life as required by law.
... model number and serial number of the product (see the front cover of this manual) • the name of the product (see the front cover of this manual) • the key number and description of the replacement part(s) (see the front... cover of this manual. Please use recycling facilities that are authorized to collect this type of waste in your... see the PART LIST and the EXPLODED DRAWING near the end of this manual) RECYCLING INFORMATION This electronic product must be recycled after its useful life as required by law.


