
Uk Manual
Page 1
If you have questions, or if there are missing parts, please contact us: UK Call: 08457 089 009 From Ireland: 053 92 36102 Website: www.iconsupport.eu E-mail: [email protected] Write: ICON Health & Fitness, ...
If you have questions, or if there are missing parts, please contact us: UK Call: 08457 089 009 From Ireland: 053 92 36102 Website: www.iconsupport.eu E-mail: [email protected] Write: ICON Health & Fitness, ...
Uk Manual
Page 2
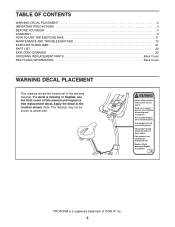
... YOU BEGIN 4 ASSEMBLY 5 HOW TO USE THE EXERCISE BIKE 11 MAINTENANCE AND TROUBLESHOOTING 19 EXERCISE GUIDELINES 21 PART LIST 22 EXPLODED DRAWING 23 ORDERING REPLACEMENT PARTS Back Cover RECYCLING INFORMATION Back Cover WARNING DECAL PLACEMENT This drawing shows the location(s) of ICON IP, Inc. 2 PROFORM is not intended for therapeutic use and follow all...
... YOU BEGIN 4 ASSEMBLY 5 HOW TO USE THE EXERCISE BIKE 11 MAINTENANCE AND TROUBLESHOOTING 19 EXERCISE GUIDELINES 21 PART LIST 22 EXPLODED DRAWING 23 ORDERING REPLACEMENT PARTS Back Cover RECYCLING INFORMATION Back Cover WARNING DECAL PLACEMENT This drawing shows the location(s) of ICON IP, Inc. 2 PROFORM is not intended for therapeutic use and follow all...

Uk Manual
Page 3
...on a level surface with pre-existing health problems. 2. Keep the exercise bike indoors, away from the exercise bike at least 2 ft. (0.6 m) of clearance around the exercise bike. do not wear loose clothes that all parts regularly. To protect the floor or carpet from damage, place a mat ...under age 12 and pets away from moisture and dust. Inspect and properly tighten all users of the exercise bike are adequately informed of this...
...on a level surface with pre-existing health problems. 2. Keep the exercise bike indoors, away from the exercise bike at least 2 ft. (0.6 m) of clearance around the exercise bike. do not wear loose clothes that all parts regularly. To protect the floor or carpet from damage, place a mat ...under age 12 and pets away from moisture and dust. Inspect and properly tighten all users of the exercise bike are adequately informed of this...

Uk Manual
Page 4
... before contacting us assist you use the exercise bike. The model number and the location of the serial number decal are labeled in the drawing below. For your workouts at home more effective and enjoyable. Before reading further, please familiarize yourself with the parts that are shown on the front cover of... Seat Adjustment Knob Seat Post Leveling Knob Leveling Foot Console Handlebar Adjustment Knob Pedal/Strap Wheel 4 Cycling is an effective exercise for selecting the new PROFORM® 300 ZLX exercise bike.
... before contacting us assist you use the exercise bike. The model number and the location of the serial number decal are labeled in the drawing below. For your workouts at home more effective and enjoyable. Before reading further, please familiarize yourself with the parts that are shown on the front cover of... Seat Adjustment Knob Seat Post Leveling Knob Leveling Foot Console Handlebar Adjustment Knob Pedal/Strap Wheel 4 Cycling is an effective exercise for selecting the new PROFORM® 300 ZLX exercise bike.
Uk Manual
Page 5
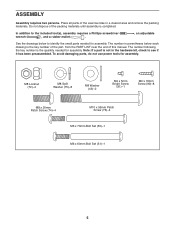
... parts of the exercise bike in parentheses below to identify the small parts needed for assembly. In addition to see if it has been preassembled. To avoid damaging parts, do not use power tools for assembly. The number in a cleared area and remove the packing materials. Note: If a part ... Phillips screwdriver wrench , and a rubber mallet . , an adjustable See the drawings below each drawing is the key number of the part, from the PART LIST near the end of the packing materials until assembly is the quantity needed for assembly. Do not dispose of this manual. M8 ...
... parts of the exercise bike in parentheses below to identify the small parts needed for assembly. In addition to see if it has been preassembled. To avoid damaging parts, do not use power tools for assembly. The number in a cleared area and remove the packing materials. Note: If a part ... Phillips screwdriver wrench , and a rubber mallet . , an adjustable See the drawings below each drawing is the key number of the part, from the PART LIST near the end of the packing materials until assembly is the quantity needed for assembly. Do not dispose of this manual. M8 ...

Uk Manual
Page 10
... wires 7 75 1 74 59 58 75 74 75 10. Identify the Right Pedal (21), which is completed. Make sure that all parts are properly tightened before you use the exercise bike. Then, slide the Front Shield Cover (7) downward to the desired position, and press the ends of the straps onto the tabs... an adjustable wrench, firmly tighten the Right Pedal (21) clockwise into the Frame (1). Adjust the strap on the Right Pedal. Place a mat under the exercise bike to the Wire Harness (58).
... wires 7 75 1 74 59 58 75 74 75 10. Identify the Right Pedal (21), which is completed. Make sure that all parts are properly tightened before you use the exercise bike. Then, slide the Front Shield Cover (7) downward to the desired position, and press the ends of the straps onto the tabs... an adjustable wrench, firmly tighten the Right Pedal (21) clockwise into the Frame (1). Adjust the strap on the Right Pedal. Place a mat under the exercise bike to the Wire Harness (58).

Uk Manual
Page 19
...left Disc Cover over the Left Crank Arm (20) and remove the left pedal. 19 Replace any worn parts immediately. IMPORTANT: To avoid damage to the console, keep the console out of the left Pedal Disc ... Next, rotate the Left Crank Arm (20) to a vertical position with the end of the exercise bike regularly. Loosen, but do not remove, the two M4 x 12.7mm Flange Screws (63). ing ... flat screwdriver, Tab Tab release the tabs on page 15. To clean the exercise bike, use the handgrip pulse sensor, see the instructions below). Rotate the left Disc Cover (18). Locate the Reed ...
...left Disc Cover over the Left Crank Arm (20) and remove the left pedal. 19 Replace any worn parts immediately. IMPORTANT: To avoid damage to the console, keep the console out of the left Pedal Disc ... Next, rotate the Left Crank Arm (20) to a vertical position with the end of the exercise bike regularly. Loosen, but do not remove, the two M4 x 12.7mm Flange Screws (63). ing ... flat screwdriver, Tab Tab release the tabs on page 15. To clean the exercise bike, use the handgrip pulse sensor, see the instructions below). Rotate the left Disc Cover (18). Locate the Reed ...
Uk Manual
Page 21
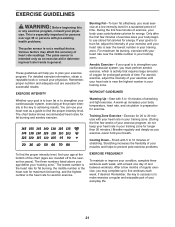
... aerobic exercise, which is activity that requires large amounts of oxygen for exercise. Aerobic Exercise-If your goal is to make exercise a regular and enjoyable part of your exercise program, do not keep your cardiovascular system, you to 30 minutes with pre-existing health problems. The pulse sensor is to strengthen...
... aerobic exercise, which is activity that requires large amounts of oxygen for exercise. Aerobic Exercise-If your goal is to make exercise a regular and enjoyable part of your exercise program, do not keep your cardiovascular system, you to 30 minutes with pre-existing health problems. The pulse sensor is to strengthen...

Uk Manual
Page 22
... Screw 92 2 Handlebar Cap 93 2 Adjustment Nut 94 1 Small Snap Ring * - Userʼs Manual Note: Specifications are not illustrated. 22 For information about ordering replacement parts, see the back cover of this manual. *These parts are subject to change without notice. Qty. Qty. PFEVEX74010.1 R1110A Key No. Description Key No. Grease Packet...
... Screw 92 2 Handlebar Cap 93 2 Adjustment Nut 94 1 Small Snap Ring * - Userʼs Manual Note: Specifications are not illustrated. 22 For information about ordering replacement parts, see the back cover of this manual. *These parts are subject to change without notice. Qty. Qty. PFEVEX74010.1 R1110A Key No. Description Key No. Grease Packet...
Uk Manual
Page 24
..., Inc. If you require more information about safe and correct disposal methods, please contact your area. In doing so, you purchased this manual. Part No. 307612 R1110A Printed in your local city office or the establishment where you will help us assist you, be prepared to provide the following...manual) • the name of the product (see the front cover of this manual) • the key number and description of the replacement part(s) (see the front cover of in municipal waste. To preserve the environment, this product must not be recycled after its useful life as required by...
..., Inc. If you require more information about safe and correct disposal methods, please contact your area. In doing so, you purchased this manual. Part No. 307612 R1110A Printed in your local city office or the establishment where you will help us assist you, be prepared to provide the following...manual) • the name of the product (see the front cover of this manual) • the key number and description of the replacement part(s) (see the front cover of in municipal waste. To preserve the environment, this product must not be recycled after its useful life as required by...


