

Owner's Manual
Page 2
...THIS PRODUCT. Important The serial number of the unit. For your nearest Pioneer authorized dealer or installation specialist. Keep the card handy for purchasing this manual before attempting operation. Pioneer Electronics (USA) Inc. Should you have any other information. Box 1760 ...Diagram 7 Solderless Terminal Connections 8 Connecting the Speaker Output Terminals ...... 8 Connecting the Power Terminal 9 Setting the Gain for synced amplifier 10 Connecting the Speaker Wires 10 Installation 15 Attaching the Bass boost remote control ........ 15 Example of installation on the floor ...
...THIS PRODUCT. Important The serial number of the unit. For your nearest Pioneer authorized dealer or installation specialist. Keep the card handy for purchasing this manual before attempting operation. Pioneer Electronics (USA) Inc. Should you have any other information. Box 1760 ...Diagram 7 Solderless Terminal Connections 8 Connecting the Speaker Output Terminals ...... 8 Connecting the Power Terminal 9 Setting the Gain for synced amplifier 10 Connecting the Speaker Wires 10 Installation 15 Attaching the Bass boost remote control ........ 15 Example of installation on the floor ...
Owner's Manual
Page 3
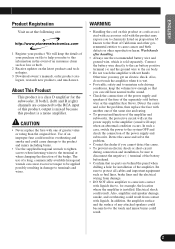
... NEDERLANDS Product Registration Visit us at the following site: 1 Register your purchase on the latest products and technologies. 3 Download owner's manuals, order product catalogues, research new products, and much more. The use the recommended battery wire and ground wire, which is wet.... • Handling the cord on proposition 65 known to , for example, the location where the amplifier is a class D amplifier for installation of this product, output is a mono amplifier. About This Product This product is installed. CAUTION • Never replace the fuse with accessories sold...
... NEDERLANDS Product Registration Visit us at the following site: 1 Register your purchase on the latest products and technologies. 3 Download owner's manuals, order product catalogues, research new products, and much more. The use the recommended battery wire and ground wire, which is wet.... • Handling the cord on proposition 65 known to , for example, the location where the amplifier is a class D amplifier for installation of this product, output is a mono amplifier. About This Product This product is installed. CAUTION • Never replace the fuse with accessories sold...
Owner's Manual
Page 7
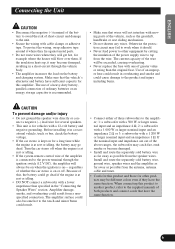
...of the vehicle, such as the gearshift, handbrake or seat sliding mechanism. • Do not shorten any wires. Because of this amplifier. The amplifier surface could go dead. If the nominal input and impedance are out of the above ranges, the subwoofer may fail to work ...including burns. When connecting this product and those for this product to another product, refer to the supplied manuals of both products and connect cords that have the same function. Amplifier damage, smoke, and overheating could result from the antenna, antenna cable and tuner. • Cords for...
...of the vehicle, such as the gearshift, handbrake or seat sliding mechanism. • Do not shorten any wires. Because of this amplifier. The amplifier surface could go dead. If the nominal input and impedance are out of the above ranges, the subwoofer may fail to work ...including burns. When connecting this product and those for this product to another product, refer to the supplied manuals of both products and connect cords that have the same function. Amplifier damage, smoke, and overheating could result from the antenna, antenna cable and tuner. • Cords for...

Owner's Manual
Page 12
...manual for information on the correct connection procedure. Connect to achieve a 1 Ω (or lower) bridged mode (Diagram B). Improper Amplifier 4 Ω Speaker 4 Ω Speaker 2 Ω Speaker 2 Ω Speaker 2 Ω Bridged Mode Amplifier 1 Ω Bridged Mode Amplifier DO NOT install or use this amplifier...use a bridged mode and achieve a 2 Ω load, wire two 4 Ω speakers in MASTER position. Proper Amplifier Diagram B - Amplifier damage, smoke, and overheating could result. Connecting the Unit CAUTION Diagram A - To properly install or use a single...
...manual for information on the correct connection procedure. Connect to achieve a 1 Ω (or lower) bridged mode (Diagram B). Improper Amplifier 4 Ω Speaker 4 Ω Speaker 2 Ω Speaker 2 Ω Speaker 2 Ω Bridged Mode Amplifier 1 Ω Bridged Mode Amplifier DO NOT install or use this amplifier...use a bridged mode and achieve a 2 Ω load, wire two 4 Ω speakers in MASTER position. Proper Amplifier Diagram B - Amplifier damage, smoke, and overheating could result. Connecting the Unit CAUTION Diagram A - To properly install or use a single...
