Owner's Manual
Page 5
... 57 AV Selection 57 Basic picture adjustments 58 Advanced picture adjustments 59 Using PureCinema 59 Using Color Temp 59 Using CTI 60 Using Color Management 60 Using Color Space 60 Using Intelligent Color 60 Eliminating noise from images 61 Using the Dynamic Range Expander (DRE) functions 61 Using the 3DYC and I-P Mode 62 Sound...
... 57 AV Selection 57 Basic picture adjustments 58 Advanced picture adjustments 59 Using PureCinema 59 Using Color Temp 59 Using CTI 60 Using Color Management 60 Using Color Space 60 Using Intelligent Color 60 Eliminating noise from images 61 Using the Dynamic Range Expander (DRE) functions 61 Using the 3DYC and I-P Mode 62 Sound...
Owner's Manual
Page 8
...Display releases infrared rays because of pixels. (A 42" panel has over 2.3 million pixels, a 50" panel has over 3.1 million pixels and a 60" panel over 3.1 million pixels). Plasma Display driving sound The screen of the Plasma Display is dimmed for long periods of the product except in ...of the fan motor at a normal viewing distance of electronic noise. not a test card, still image, or single color display) please contact Pioneer Customer Support Div. (USA) or Customer Satisfaction Dept. (CANADA). Operating the panel when there is condensation can scratch and damage the panel's ...
...Display releases infrared rays because of pixels. (A 42" panel has over 2.3 million pixels, a 50" panel has over 3.1 million pixels and a 60" panel over 3.1 million pixels). Plasma Display driving sound The screen of the Plasma Display is dimmed for long periods of the product except in ...of the fan motor at a normal viewing distance of electronic noise. not a test card, still image, or single color display) please contact Pioneer Customer Support Div. (USA) or Customer Satisfaction Dept. (CANADA). Operating the panel when there is condensation can scratch and damage the panel's ...

Owner's Manual
Page 22
...up the column supports with the PIONEER table top stand attached. Installation bolts ➁ (M8 x 60 mm: silver) 3 Tighten the installation bolts ➀ firmly using the same hexagonal wrench. 05 Preparation Attaching/detaching the PIONEER stand (for PRO-940HD only) The PRO-940HD comes with the bottom of ... bolts ➀ and ➁ for this unit. Slowly ease the panel down on the particular panel. En Installation bolts ➁ (M8 x 60 mm: silver) 3 Lift the Plasma Display from the stand. CAUTION • If mounting the panel on a flat, stable location to avoid warping...
...up the column supports with the PIONEER table top stand attached. Installation bolts ➁ (M8 x 60 mm: silver) 3 Tighten the installation bolts ➀ firmly using the same hexagonal wrench. 05 Preparation Attaching/detaching the PIONEER stand (for PRO-940HD only) The PRO-940HD comes with the bottom of ... bolts ➀ and ➁ for this unit. Slowly ease the panel down on the particular panel. En Installation bolts ➁ (M8 x 60 mm: silver) 3 Lift the Plasma Display from the stand. CAUTION • If mounting the panel on a flat, stable location to avoid warping...
Owner's Manual
Page 42
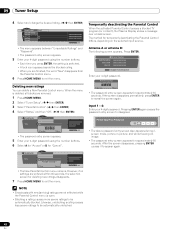
...new ratings disappears. 7 Press HOME MENU to exit the menu. However, if no settings are entered within 60 seconds, the selection screen for temporarily deactivating the Parental Control differs, depending on the selected input source. ...freezing an image. • The password entry screen appears for approximately 60 seconds. Parental Control EnxtexrxyxoxuxrxPxaxsxswxxoxrdxxxxxxxx xxxxxxxxxxxxxxxxxxxxx A Clear Entry D Cancel • The password entry screen appears for approximately 60 seconds. If the screen disappears prematurely, press ENTER to disappear. After ...
...new ratings disappears. 7 Press HOME MENU to exit the menu. However, if no settings are entered within 60 seconds, the selection screen for temporarily deactivating the Parental Control differs, depending on the selected input source. ...freezing an image. • The password entry screen appears for approximately 60 seconds. Parental Control EnxtexrxyxoxuxrxPxaxsxswxxoxrdxxxxxxxx xxxxxxxxxxxxxxxxxxxxx A Clear Entry D Cancel • The password entry screen appears for approximately 60 seconds. If the screen disappears prematurely, press ENTER to disappear. After ...
Owner's Manual
Page 57
... USER Allows you press SLEEP, the selection cycles as desired You can also use the menu to change the view, follow the directions below : 30 60 90 (cancel) Off 120 (minutes) • The factory default is shared by the external input and TV input sources. Press SLEEP to exit the menu...
... USER Allows you press SLEEP, the selection cycles as desired You can also use the menu to change the view, follow the directions below : 30 60 90 (cancel) Off 120 (minutes) • The factory default is shared by the external input and TV input sources. Press SLEEP to exit the menu...

Owner's Manual
Page 59
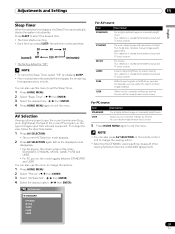
...8. • An option is unavailable for at 24 frames/second), analyzes it, then recreates each still film frame for 480p or 720p@60 Hz or 1080p@24 Hz (HDMI) signals. • "ADV" is to apply a fine adjustment. Selections High White with bluish tone... and 8. • Press / to select another item for optimizing the picture quality. Using PureCinema 1 Press HOME MENU. 2 Select "Picture". ( / then ENTER) 3 Select "Pro Adjust". ( / then ENTER) 4 Select "PureCinema". ( / then ENTER) 5 Select the desired parameter. ( / then ENTER) • For the selectable parameters, refer to step...
...8. • An option is unavailable for at 24 frames/second), analyzes it, then recreates each still film frame for 480p or 720p@60 Hz or 1080p@24 Hz (HDMI) signals. • "ADV" is to apply a fine adjustment. Selections High White with bluish tone... and 8. • Press / to select another item for optimizing the picture quality. Using PureCinema 1 Press HOME MENU. 2 Select "Picture". ( / then ENTER) 3 Select "Pro Adjust". ( / then ENTER) 4 Select "PureCinema". ( / then ENTER) 5 Select the desired parameter. ( / then ENTER) • For the selectable parameters, refer to step...

Owner's Manual
Page 60
...Color Intelligent Color (IC) automatically selects the optimum color tones for adjustment. 8 Press HOME MENU again to exit the menu. 60 En Selections Off Deactivates Intelligent Color On Activates Intelligent Color 7 Press HOME MENU again to exit the menu. 7 Select the ... then ENTER) Color Management R 0 Y 0 G 0 C 0 B 0 M 0 Using Color Space 1 Press HOME MENU. 2 Select "Picture". ( / then ENTER) 3 Select "Pro Adjust". ( / then ENTER) 4 Select "Color Detail". ( / then ENTER) 5 Select "Color Space". ( / then ENTER) 6 Select the desired parameter. ( / then ENTER) ...
...Color Intelligent Color (IC) automatically selects the optimum color tones for adjustment. 8 Press HOME MENU again to exit the menu. 60 En Selections Off Deactivates Intelligent Color On Activates Intelligent Color 7 Press HOME MENU again to exit the menu. 7 Select the ... then ENTER) Color Management R 0 Y 0 G 0 C 0 B 0 M 0 Using Color Space 1 Press HOME MENU. 2 Select "Picture". ( / then ENTER) 3 Select "Pro Adjust". ( / then ENTER) 4 Select "Color Detail". ( / then ENTER) 5 Select "Color Space". ( / then ENTER) 6 Select the desired parameter. ( / then ENTER) ...

Owner's Manual
Page 62
... left speaker 5 Press HOME MENU again to exit the menu. This works for 480p and 720p@60 Hz signals. 11 Adjustments and Settings Using the 3DYC and I-P Mode 1 Press HOME MENU. 2 Select "Picture". ( / then ENTER) 3 Select "Pro Adjust". ( / then ENTER) 4 Select "Others". ( / then ENTER) 5 Select an item to be adjusted. ( / ) 4 Select the...
... left speaker 5 Press HOME MENU again to exit the menu. This works for 480p and 720p@60 Hz signals. 11 Adjustments and Settings Using the 3DYC and I-P Mode 1 Press HOME MENU. 2 Select "Picture". ( / then ENTER) 3 Select "Pro Adjust". ( / then ENTER) 4 Select "Others". ( / then ENTER) 5 Select an item to be adjusted. ( / ) 4 Select the...
Owner's Manual
Page 69
... separately) Use when inputting analog audio signals. Input signal correlation table 1920[email protected]/60 Hz 720[email protected]/60 Hz 1280[email protected]/60 Hz 720(1440)[email protected]/60 Hz 19201080p@24 Hz For audio, the panel supports the following: • Linear...
... separately) Use when inputting analog audio signals. Input signal correlation table 1920[email protected]/60 Hz 720[email protected]/60 Hz 1280[email protected]/60 Hz 720(1440)[email protected]/60 Hz 19201080p@24 Hz For audio, the panel supports the following: • Linear...

Owner's Manual
Page 73
... × 400 640 × 480 800 × 600 1024 × 768 1360 x 768 Frequency 70 Hz 60 Hz 72 Hz 75 Hz 56 Hz 60 Hz 72 Hz 75 Hz 60 Hz 70 Hz 75 Hz 60 Hz G-LINK™ connection To record with a VCR through the TV Guide On Screen™ system, connect...
... × 400 640 × 480 800 × 600 1024 × 768 1360 x 768 Frequency 70 Hz 60 Hz 72 Hz 75 Hz 56 Hz 60 Hz 72 Hz 75 Hz 60 Hz 70 Hz 75 Hz 60 Hz G-LINK™ connection To record with a VCR through the TV Guide On Screen™ system, connect...

Owner's Manual
Page 117
... Ω SUB WOOFER OUTPUT Variable CableCARD Point of pixels Audio Amplifier Speakers Surround System Power Requirement Weight 60" Plasma Display Model: PRO-1540HD 1365 × 768 pixels 13 W + 13 W (1 kHz, 10 %, 8 Ω) - 50" Plasma Display Model: PRO-1140HD 1365 × 768 pixels 13 W + 13 W (1 kHz, 10 %, 8 Ω)... Deployment Side INPUT 4 COMPONENT VIDEO in, VIDEO in, AUDIO in USB USB in** On-screen display languages English/French/Spanish 42" Plasma Display Model: PRO-940HD 1024 × 768 pixels 13 W + 13 W (1 kHz, 10 %, 8 Ω) Woofer: 4.8 cm × 13 cm cone type...
... Ω SUB WOOFER OUTPUT Variable CableCARD Point of pixels Audio Amplifier Speakers Surround System Power Requirement Weight 60" Plasma Display Model: PRO-1540HD 1365 × 768 pixels 13 W + 13 W (1 kHz, 10 %, 8 Ω) - 50" Plasma Display Model: PRO-1140HD 1365 × 768 pixels 13 W + 13 W (1 kHz, 10 %, 8 Ω)... Deployment Side INPUT 4 COMPONENT VIDEO in, VIDEO in, AUDIO in USB USB in** On-screen display languages English/French/Spanish 42" Plasma Display Model: PRO-940HD 1024 × 768 pixels 13 W + 13 W (1 kHz, 10 %, 8 Ω) Woofer: 4.8 cm × 13 cm cone type...


