Operation Manual
Page 9
...Quality (Resize 100 Cropping Images 102 Copying Images and Sound Files 103 Using the Digital Filter 105 Using the Brightness Filter 106 Adding a Frame (Frame Composite 107 Red-... 113 Connecting the Camera to the Printer 113 Printing Single Images 114 Printing All Images 116 Printing Using the DPOF Settings 117 Disconnecting the Cable from the Printer 117...Camera Settings 121 Formatting an SD Memory Card or the Built-in Memory 121 Changing the Sound Settings 122 Changing the Date and Time 124 Changing the Display Language 126 Changing the Image Folder Name 127 Changing the USB...
...Quality (Resize 100 Cropping Images 102 Copying Images and Sound Files 103 Using the Digital Filter 105 Using the Brightness Filter 106 Adding a Frame (Frame Composite 107 Red-... 113 Connecting the Camera to the Printer 113 Printing Single Images 114 Printing All Images 116 Printing Using the DPOF Settings 117 Disconnecting the Cable from the Printer 117...Camera Settings 121 Formatting an SD Memory Card or the Built-in Memory 121 Changing the Sound Settings 122 Changing the Date and Time 124 Changing the Display Language 126 Changing the Image Folder Name 127 Changing the USB...

Operation Manual
Page 13
...USB/AV cable, you have taken. For capturing a panoramic scene. Display Images and Sound Files in calendar format. Taking panoramic pictures is also easy, as you look back at home because operating the computer was too difficult! You can enjoy printing out images directly from the camera with a frame. The Optio E50... lets you wish to play back as the camera stitches up to a Picture or Taking Panoramic Pictures! Easily print out images without Using ...
...USB/AV cable, you have taken. For capturing a panoramic scene. Display Images and Sound Files in calendar format. Taking panoramic pictures is also easy, as you look back at home because operating the computer was too difficult! You can enjoy printing out images directly from the camera with a frame. The Optio E50... lets you wish to play back as the camera stitches up to a Picture or Taking Panoramic Pictures! Easily print out images without Using ...

Operation Manual
Page 14
Names of Parts Front Power switch Shutter release button Strap lug DC coupler cable cover Back LCD monitor Speaker USB/AV terminal Tripod socket 12 Flash Self-timer lamp Lens Microphone Power lamp Battery/card cover
Names of Parts Front Power switch Shutter release button Strap lug DC coupler cable cover Back LCD monitor Speaker USB/AV terminal Tripod socket 12 Flash Self-timer lamp Lens Microphone Power lamp Battery/card cover

Operation Manual
Page 18
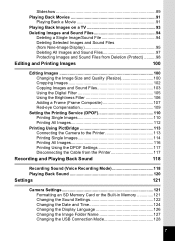
Getting Started Getting Started Checking the Contents of the Package Check that your camera comes complete with the items listed below. 1 Camera Optio E50 Strap O-ST62 (*) Software (CD-ROM) S-SW77 USB/AV cable I-UAV77 (*) Two AA alkaline batteries Operating Manual (this manual) / PC Connection Manual (CD-ROM) Quick Guide Items marked with an asterisk (*) are also available as optional accessories. For other optional accessories, refer to "Optional Accessories" (p.140). 16
Getting Started Getting Started Checking the Contents of the Package Check that your camera comes complete with the items listed below. 1 Camera Optio E50 Strap O-ST62 (*) Software (CD-ROM) S-SW77 USB/AV cable I-UAV77 (*) Two AA alkaline batteries Operating Manual (this manual) / PC Connection Manual (CD-ROM) Quick Guide Items marked with an asterisk (*) are also available as optional accessories. For other optional accessories, refer to "Optional Accessories" (p.140). 16
Operation Manual
Page 26
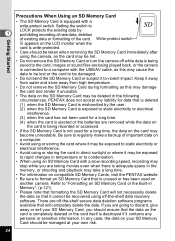
...in the memory, or shooting and playback may be hot. • Do not remove the SD Memory Card or turn the camera off -the-shelf data recovery software. PENTAX does not accept any personal or sensitive information. Setting the switch to LOCK protects the existing data by the user. (2) ...static electricity or electrical interference. (3) when the card has not been used on another camera. Getting Started Precautions When Using an SD Memory Card • The SD Memory Card is equipped with the USB/AV cable, as this may be recovered using or storing the card in direct sunlight or ...
...in the memory, or shooting and playback may be hot. • Do not remove the SD Memory Card or turn the camera off -the-shelf data recovery software. PENTAX does not accept any personal or sensitive information. Setting the switch to LOCK protects the existing data by the user. (2) ...static electricity or electrical interference. (3) when the card has not been used on another camera. Getting Started Precautions When Using an SD Memory Card • The SD Memory Card is equipped with the USB/AV cable, as this may be recovered using or storing the card in direct sunlight or ...

Operation Manual
Page 46
... Setting] Menu Item Format Sound Date Adjust Language/ Folder Name 3 USB Connection Video Out Brightness Level Power Saving Auto Power Off Guide Display ... appear For choosing how names are assigned to folders for storing images and sound files For setting the USB/AV cable connection (to PC or printer) For setting the output format to the AV equipment For setting the ...brightness of the LCD monitor For setting the time until power saving mode is activated For setting the time until the camera...
... Setting] Menu Item Format Sound Date Adjust Language/ Folder Name 3 USB Connection Video Out Brightness Level Power Saving Auto Power Off Guide Display ... appear For choosing how names are assigned to folders for storing images and sound files For setting the USB/AV cable connection (to PC or printer) For setting the output format to the AV equipment For setting the ...brightness of the LCD monitor For setting the time until power saving mode is activated For setting the time until the camera...

Operation Manual
Page 95
...129) • The LCD monitor of the equipment and select the video input terminal to AV equipment. When using the supplied USB/AV cable, you intend to the USB/AV 5 terminal on the camera. 2 Connect the other AV equipment using stereo sound equipment, insert the sound terminal into the L (white) terminal. 3...terminals (such as a TV), refer to the operation manual of the camera turns off while it is set different from the one in use the camera for review or picture taking. 1 Connect the supplied USB/AV cable to use there. You cannot adjust sound volume using the Zoom button on...
...129) • The LCD monitor of the equipment and select the video input terminal to AV equipment. When using the supplied USB/AV cable, you intend to the USB/AV 5 terminal on the camera. 2 Connect the other AV equipment using stereo sound equipment, insert the sound terminal into the L (white) terminal. 3...terminals (such as a TV), refer to the operation manual of the camera turns off while it is set different from the one in use the camera for review or picture taking. 1 Connect the supplied USB/AV cable to use there. You cannot adjust sound volume using the Zoom button on...

Operation Manual
Page 115
... or use the AC adapter kit K-AC62 (optional) when the camera is connected to the printer. Refer to "Changing the USB Connection Mode" (p.128). 2 Turn off the camera. 3 Connect the camera to the printer using the supplied USB/AV cable. 4 Turn the printer on. 5 When the printer is connected... to the printer. • Do not disconnect the USB/AV cable during data transfer. • ...
... or use the AC adapter kit K-AC62 (optional) when the camera is connected to the printer. Refer to "Changing the USB Connection Mode" (p.128). 2 Turn off the camera. 3 Connect the camera to the printer using the supplied USB/AV cable. 4 Turn the printer on. 5 When the printer is connected... to the printer. • Do not disconnect the USB/AV cable during data transfer. • ...

Operation Manual
Page 117
...the card is supported by your printed picture. The print settings screen appears after each print setting, images are reset to the defaults when the camera is saved, and the screen returns to the print settings screen. 11 Use the four-way controller (23) to choose the paper size. Paper...215;6" MENU Cancel 2L 8"×10" A4 Letter 11"×17" A3 OK OK The Paper Size setting is turned off. Do not disconnect the USB/AV cable while the power lamp is printed according to the confirmation dialog. 14 Press the 4 button. Set [Quality] and [Border Status] in the same ...
...the card is supported by your printed picture. The print settings screen appears after each print setting, images are reset to the defaults when the camera is saved, and the screen returns to the print settings screen. 11 Use the four-way controller (23) to choose the paper size. Paper...215;6" MENU Cancel 2L 8"×10" A4 Letter 11"×17" A3 OK OK The Paper Size setting is turned off. Do not disconnect the USB/AV cable while the power lamp is printed according to the confirmation dialog. 14 Press the 4 button. Set [Quality] and [Border Status] in the same ...

Operation Manual
Page 119
...) to check 100-0017 Print with DPOF setting the number of copies for each picture, whether to cancel printing. 6 Disconnecting the Cable from the Printer Disconnect the USB/AV cable from the camera and the printer when you have made appear. Printing Using the DPOF Settings 1 In the printing mode selection screen, use the... Total 10 of "Printing Single Images" (p.114, p.115) for instructions on the print settings confirmation screen. The DPOF settings you finish printing. 1 Turn off the camera. 2 Disconnect the USB/AV cable from the camera and the printer.
...) to check 100-0017 Print with DPOF setting the number of copies for each picture, whether to cancel printing. 6 Disconnecting the Cable from the Printer Disconnect the USB/AV cable from the camera and the printer when you have made appear. Printing Using the DPOF Settings 1 In the printing mode selection screen, use the... Total 10 of "Printing Single Images" (p.114, p.115) for instructions on the print settings confirmation screen. The DPOF settings you finish printing. 1 Turn off the camera. 2 Disconnect the USB/AV cable from the camera and the printer.

Operation Manual
Page 130
... the 4 button. A pull-down menu appears. And do not connect the camera to your PC while [PictBridge] is selected for the USB Connection mode. Settings Do not connect the camera to the PC Connection Manual contained in the CD-ROM that contains this option... Setting 1/2 Format Sound Date Adjust 02/02/2008 Language/ English Folder Name Date USB Connection PC MENU Exit Changing the USB Connection Mode Choose the appropriate USB connection mode depending on whether you are going to connect the USB/AV cable to a PC or a PictBridgecompatible printer. 1 2 3 8 4 For instructions on...
... the 4 button. A pull-down menu appears. And do not connect the camera to your PC while [PictBridge] is selected for the USB Connection mode. Settings Do not connect the camera to the PC Connection Manual contained in the CD-ROM that contains this option... Setting 1/2 Format Sound Date Adjust 02/02/2008 Language/ English Folder Name Date USB Connection PC MENU Exit Changing the USB Connection Mode Choose the appropriate USB connection mode depending on whether you are going to connect the USB/AV cable to a PC or a PictBridgecompatible printer. 1 2 3 8 4 For instructions on...

Operation Manual
Page 142
AC adapter kit K-AC62 This kit includes the DC coupler D-DC51, the AC adapter D-AC62 and the AC plug cord. USB/AV cable I-UAV77 (*) Strap O-ST62 (*) O-ST24 Genuine leather strap O-ST8 Silver chain strap O-ST30 Plastic coated strap Camera case O-CC58 O-CC72 Products marked with an asterisk (*) are available for this camera. Optional Accessories A number of dedicated accessories are the same as those supplied with the camera. 9 140 Appendix
AC adapter kit K-AC62 This kit includes the DC coupler D-DC51, the AC adapter D-AC62 and the AC plug cord. USB/AV cable I-UAV77 (*) Strap O-ST62 (*) O-ST24 Genuine leather strap O-ST8 Silver chain strap O-ST30 Plastic coated strap Camera case O-CC58 O-CC72 Products marked with an asterisk (*) are available for this camera. Optional Accessories A number of dedicated accessories are the same as those supplied with the camera. 9 140 Appendix

Operation Manual
Page 150
... (excluding operating or protruding parts) XX g (excluding the batteries and SD Memory Card) XX g (including the batteries and SD Memory Card) Two AA alkaline batteries, USB/AV cable, Software (CD-ROM), Strap, Operating Manual/PC Connection Manual (CD-ROM), Quick Guide 9 Appendix 148 Movie Recording Time XX min.
... (excluding operating or protruding parts) XX g (excluding the batteries and SD Memory Card) XX g (including the batteries and SD Memory Card) Two AA alkaline batteries, USB/AV cable, Software (CD-ROM), Strap, Operating Manual/PC Connection Manual (CD-ROM), Quick Guide 9 Appendix 148 Movie Recording Time XX min.

