Operation Manual
Page 2
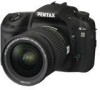
...and software help photographers to produce images more faithful to connect the printer and digital camera directly, using the unified standard for the direct printout of images. Regarding trademarks PENTAX and smc PENTAX are not PRINT Image Matching III compliant. Some functions are not available on...PictBridge allows the user to their respective companies. Thank you for purchasing this manual before using the camera in order to get the most out of all the camera capabilities. Please read this PENTAX u Digital Camera. Lenses you can use of the copyright as specified in the Copyright ...
...and software help photographers to produce images more faithful to connect the printer and digital camera directly, using the unified standard for the direct printout of images. Regarding trademarks PENTAX and smc PENTAX are not PRINT Image Matching III compliant. Some functions are not available on...PictBridge allows the user to their respective companies. Thank you for purchasing this manual before using the camera in order to get the most out of all the camera capabilities. Please read this PENTAX u Digital Camera. Lenses you can use of the copyright as specified in the Copyright ...
Operation Manual
Page 6
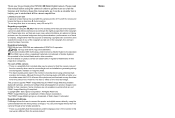
... OR HEAT ABOVE 140°F / 60°C. Regarding Product Registration In order to the PENTAX PHOTO Browser 3/PENTAX PHOTO Laboratory 3 Operating Manual (Windows users: p.9, Mac OS users: p.10) for camera use a spray blower for D-LI50 Battery Usage: - This could cause a camera breakdown. MAY CAUSE BURST OR BURN. - Thank you complete the product registration, which can...
... OR HEAT ABOVE 140°F / 60°C. Regarding Product Registration In order to the PENTAX PHOTO Browser 3/PENTAX PHOTO Laboratory 3 Operating Manual (Windows users: p.9, Mac OS users: p.10) for camera use a spray blower for D-LI50 Battery Usage: - This could cause a camera breakdown. MAY CAUSE BURST OR BURN. - Thank you complete the product registration, which can...

Operation Manual
Page 8
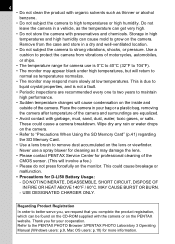
...3 Care to be Taken During Handling 3 Contents 6 Composition of the Operating Manual 11 Before Using Your Camera 13 u Camera Characteristics 14 Checking the Contents of the Package 16 Names and Functions of Working Parts 17 Camera 17 Capture Mode 18 Playback Mode 20 Display Indicators 22 Monitor 22 Viewfinder 27... 38 Using the AC Adapter (Optional 39 Inserting/Removing the SD Memory Card 40 Recorded Pixels and Quality Level 42 Turning the Camera On and Off 44 Initial Settings 45 Setting the Display Language 45 Setting the Date and Time 48 Attaching the Lens 50 Adjusting...
...3 Care to be Taken During Handling 3 Contents 6 Composition of the Operating Manual 11 Before Using Your Camera 13 u Camera Characteristics 14 Checking the Contents of the Package 16 Names and Functions of Working Parts 17 Camera 17 Capture Mode 18 Playback Mode 20 Display Indicators 22 Monitor 22 Viewfinder 27... 38 Using the AC Adapter (Optional 39 Inserting/Removing the SD Memory Card 40 Recorded Pixels and Quality Level 42 Turning the Camera On and Off 44 Initial Settings 45 Setting the Display Language 45 Setting the Date and Time 48 Attaching the Lens 50 Adjusting...
Operation Manual
Page 9
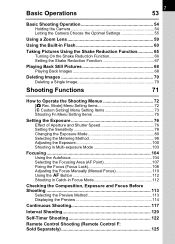
Basic Operations 7 53 Basic Shooting Operation 54 Holding the Camera 54 Letting the Camera Choose the Optimal Settings 55 Using a Zoom Lens 59 Using the Built-in Focus Mode 112 Checking the Composition, Exposure and Focus Before Shooting 113 ...-exposure Mode 103 Focusing 104 Using the Autofocus 104 Selecting the Focusing Area (AF Point 107 Fixing the Focus (Focus Lock 108 Adjusting the Focus Manually (Manual Focus 110 Using the = Button 112 Shooting in Catch-in Flash 60 Taking Pictures Using the Shake Reduction Function 65 Turning On the Shake Reduction...
Basic Operations 7 53 Basic Shooting Operation 54 Holding the Camera 54 Letting the Camera Choose the Optimal Settings 55 Using a Zoom Lens 59 Using the Built-in Focus Mode 112 Checking the Composition, Exposure and Focus Before Shooting 113 ...-exposure Mode 103 Focusing 104 Using the Autofocus 104 Selecting the Focusing Area (AF Point 107 Fixing the Focus (Focus Lock 108 Adjusting the Focus Manually (Manual Focus 110 Using the = Button 112 Shooting in Catch-in Flash 60 Taking Pictures Using the Shake Reduction Function 65 Turning On the Shake Reduction...

Operation Manual
Page 13
Be sure to their default settings. 12 Appendix Explains troubleshooting, introduces optional accessories and provides various resources. 11 Composition of the Operating Manual This Operating Manual contains the following chapters. 1 Before Using Your Camera 1 Explains camera characteristics, accessories and the names and functions of various parts. 2 Getting Started 2 Explains your first steps from purchasing the...
Be sure to their default settings. 12 Appendix Explains troubleshooting, introduces optional accessories and provides various resources. 11 Composition of the Operating Manual This Operating Manual contains the following chapters. 1 Before Using Your Camera 1 Explains camera characteristics, accessories and the names and functions of various parts. 2 Getting Started 2 Explains your first steps from purchasing the...

Operation Manual
Page 14
12 The symbols used in this Operating Manual are explained below. 1 Shows reference page number explaining a related operation. Shows useful information. Shows precautions to take when operating the camera.
12 The symbols used in this Operating Manual are explained below. 1 Shows reference page number explaining a related operation. Shows useful information. Shows precautions to take when operating the camera.
Operation Manual
Page 16
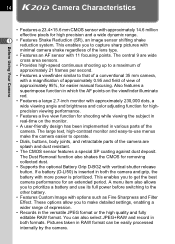
...• The CMOS sensor features a special SP coating against dust deposit. A menu item also allows you to get the best camera performance for easier manual focusing. Pictures taken in RAW format can also select JPEG+RAW and record in the versatile JPEG format or the high quality and ...fully editable RAW format. Before Using Your Camera 14 u Camera Characteristics • Features a 23.4×15.6 mm CMOS sensor with vertical shutter ...
...• The CMOS sensor features a special SP coating against dust deposit. A menu item also allows you to get the best camera performance for easier manual focusing. Pictures taken in RAW format can also select JPEG+RAW and record in the versatile JPEG format or the high quality and ...fully editable RAW format. Before Using Your Camera 14 u Camera Characteristics • Features a 23.4×15.6 mm CMOS sensor with vertical shutter ...

Operation Manual
Page 17
...manual modes that automatically adjusts sensitivity according to the set sensitivity, and Shutter & Aperture Priority mode L that let you take pictures with the intended exposure. Sizes for 35 mm film and CMOS sensor 35 mm film : 36×24 mm u CMOS sensor : 23.4×15.6 mm Before Using Your Camera...captured area (view angle) will differ between the u and 35 mm SLR cameras even if the same lens is used with the u. Example) If 300... to a 450 mm lens on the u features a PENTAX original system which uses magnetic force to a 35 mm camera 150÷1.5=100 Use a 100 mm lens with u by...
...manual modes that automatically adjusts sensitivity according to the set sensitivity, and Shutter & Aperture Priority mode L that let you take pictures with the intended exposure. Sizes for 35 mm film and CMOS sensor 35 mm film : 36×24 mm u CMOS sensor : 23.4×15.6 mm Before Using Your Camera...captured area (view angle) will differ between the u and 35 mm SLR cameras even if the same lens is used with the u. Example) If 300... to a 450 mm lens on the u features a PENTAX original system which uses magnetic force to a 35 mm camera 150÷1.5=100 Use a 100 mm lens with u by...

Operation Manual
Page 18
... cap Before Using Your Camera Sync socket 2P cap (Installed on camera) Body mount cover (Installed on camera) USB cable I-USB17 Video cable I-VC28 Software (CD-ROM) S-SW74, S-SW75 Strap O-ST53 Rechargeable lithium-ion D-LI50 battery Battery charger D-BC50 AC plug cord Operating Manual (this manual) Quick Guide PENTAX PHOTO Browser 3/ PENTAX REMOTE PENTAX PHOTO Laboratory Assistant 3 3 Operating...
... cap Before Using Your Camera Sync socket 2P cap (Installed on camera) Body mount cover (Installed on camera) USB cable I-USB17 Video cable I-VC28 Software (CD-ROM) S-SW74, S-SW75 Strap O-ST53 Rechargeable lithium-ion D-LI50 battery Battery charger D-BC50 AC plug cord Operating Manual (this manual) Quick Guide PENTAX PHOTO Browser 3/ PENTAX REMOTE PENTAX PHOTO Laboratory Assistant 3 3 Operating...

Operation Manual
Page 21
...panel. (p.29) i AF point switching dial Sets focus area. (p.107) j = button Focuses on or off. (p.65) Before Using Your Camera g 4 button Saves the setting you selected in menus and Fn menu. Press when menu is not displayed to display the currently selected sensitivity in...mode. (p.98) a ] button Sets Exposure bracket shooting. (p.129) b 3 button Displays the [A Rec. 6 Focus mode lever Switches between autofocus mode (k, l) (p.104) and manual focus mode (\) (p.110). 7 | button Saves JPEG and RAW file by default. (p.158, p.159) 8 K button Press to pop up ] menu (p.216) and [A ...
...panel. (p.29) i AF point switching dial Sets focus area. (p.107) j = button Focuses on or off. (p.65) Before Using Your Camera g 4 button Saves the setting you selected in menus and Fn menu. Press when menu is not displayed to display the currently selected sensitivity in...mode. (p.98) a ] button Sets Exposure bracket shooting. (p.129) b 3 button Displays the [A Rec. 6 Focus mode lever Switches between autofocus mode (k, l) (p.104) and manual focus mode (\) (p.110). 7 | button Saves JPEG and RAW file by default. (p.158, p.159) 8 K button Press to pop up ] menu (p.216) and [A ...

Operation Manual
Page 29
Blinks when the subject is not in focus. 8 Manual focus (p.110) Appears when focus mode is \. 9 EV bar (p.94, p.100) Shows the EV compensation values or difference between the appropriate and current exposure values ... can be adjusted with the rear e-dial). 7 Focus indicator (p.56) Appears when image is recommended but not set to a. 27 Viewfinder 23 1 Before Using Your Camera 1 1 45 67 9 13 15 16 8 10 11 12 14 1 AF frame (p.52) 2 Spot metering frame (p.98) 3 AF point (p.107) 4 Flash status (p.60) Appears when flash...
Blinks when the subject is not in focus. 8 Manual focus (p.110) Appears when focus mode is \. 9 EV bar (p.94, p.100) Shows the EV compensation values or difference between the appropriate and current exposure values ... can be adjusted with the rear e-dial). 7 Focus indicator (p.56) Appears when image is recommended but not set to a. 27 Viewfinder 23 1 Before Using Your Camera 1 1 45 67 9 13 15 16 8 10 11 12 14 1 AF frame (p.52) 2 Spot metering frame (p.98) 3 AF point (p.107) 4 Flash status (p.60) Appears when flash...

Operation Manual
Page 34
... speed and aperture to the proper exposure according to easily switch between shutter priority and aperture priority. p.85 b (Shutter Priority) Lets you set sensitivity. a (Hyper-manual) Lets you set . Use this when using an External flash that you capture images that the L (Shutter & selected shutter speed and aperture will give the... pictures. p.93 p (Bulb) Lets you set the desired shutter speed to the brightness of field. 32 Using the Mode Dial Dial indicator 1 Before Using Your Camera You can use the front and rear e-
... speed and aperture to the proper exposure according to easily switch between shutter priority and aperture priority. p.85 b (Shutter Priority) Lets you set sensitivity. a (Hyper-manual) Lets you set . Use this when using an External flash that you capture images that the L (Shutter & selected shutter speed and aperture will give the... pictures. p.93 p (Bulb) Lets you set the desired shutter speed to the brightness of field. 32 Using the Mode Dial Dial indicator 1 Before Using Your Camera You can use the front and rear e-

Operation Manual
Page 41
... (Optional) 1 2 2 Getting Started We recommend using the AC adapter D-AC50 (optional) when using the AC adapter. • The battery in your PC. 1 Make sure the camera is turned off and open the terminal cover. 2 Face the S mark on the DC terminal of the AC adapter towards the S mark on the... to the DC input terminal of the camera. 3 Connect the AC plug cord to the AC adapter. 4 Plug the AC cord into the power outlet. • Make sure the camera is recording or reading data. • Be sure to read the AC adapter D-AC50 operating manual when using the monitor for a long time...
... (Optional) 1 2 2 Getting Started We recommend using the AC adapter D-AC50 (optional) when using the AC adapter. • The battery in your PC. 1 Make sure the camera is turned off and open the terminal cover. 2 Face the S mark on the DC terminal of the AC adapter towards the S mark on the... to the DC input terminal of the camera. 3 Connect the AC plug cord to the AC adapter. 4 Plug the AC cord into the power outlet. • Make sure the camera is recording or reading data. • Be sure to read the AC adapter D-AC50 operating manual when using the monitor for a long time...

Operation Manual
Page 48
...four-way controller (3). The cursor moves to select O (On) or P (Off). 7 Press the 4 button. Large MENU C a n c e l OK OK 10 Press the 4 button twice. In this manual, the menu screens hereafter are described with [Text Size] set to the [Initial Setting] screen. 8 Press the four-way controller (3). Selecting [Large] magnifies the selected... English New York Text Size Std. Initial Setting Language English New York Text Size Std. MENU C a n c e l OK OK Press the four-way controller (3). The camera returns to [Std.]. 46 2 2 3 Press the 4 button.
...four-way controller (3). The cursor moves to select O (On) or P (Off). 7 Press the 4 button. Large MENU C a n c e l OK OK 10 Press the 4 button twice. In this manual, the menu screens hereafter are described with [Text Size] set to the [Initial Setting] screen. 8 Press the four-way controller (3). Selecting [Large] magnifies the selected... English New York Text Size Std. Initial Setting Language English New York Text Size Std. MENU C a n c e l OK OK Press the four-way controller (3). The camera returns to [Std.]. 46 2 2 3 Press the 4 button.

Operation Manual
Page 58
... the shutter release button fully. The picture is necessary, the flash status E blinks. The autofocus system operates. The flash does not pop up the flash manually. 1Operating the shutter release button (p.57) 1Subjects that are Difficult to Focus on (p.58) 1Using the Built-in Flash (p.60) 1Selecting the Focusing Area (AF...
... the shutter release button fully. The picture is necessary, the flash status E blinks. The autofocus system operates. The flash does not pop up the flash manually. 1Operating the shutter release button (p.57) 1Subjects that are Difficult to Focus on (p.58) 1Using the Built-in Flash (p.60) 1Selecting the Focusing Area (AF...

Operation Manual
Page 60
These also apply to manual focusing using the focus indicator ] in the foreground and background within the focusing area. Subject may be difficult when taking pictures under the following conditions ((a) ... cannot be focused even when ] (focus indicator) is not perfect. Focusing may not be focused automatically, set the focus mode lever to \ and use the manual focus mode to focus on The autofocus mechanism is displayed when (f) above applies. 58 Subjects that are Difficult to Focus on the subject with the...
These also apply to manual focusing using the focus indicator ] in the foreground and background within the focusing area. Subject may be difficult when taking pictures under the following conditions ((a) ... cannot be focused even when ] (focus indicator) is not perfect. Focusing may not be focused automatically, set the focus mode lever to \ and use the manual focus mode to focus on The autofocus mechanism is displayed when (f) above applies. 58 Subjects that are Difficult to Focus on the subject with the...

Operation Manual
Page 66
... function on this way is the phenomenon where eyes look reddish in photographs taken in dark environments with a flash. Use of the flash in this camera reduces red-eye by the reflection of the eye. To use . • Use a flash that the flash is then discharged while the pupils... in other modes for Flash mode. The main flash is fully charged. 3 Take the picture. Taking pictures (Hyper-program) 1 Pop up the flash manually and confirm that the flash mode is taken with Daylight-Sync Shooting. Red-eye occurs because pupils are smaller, reducing the red-eye effect. Without...
... function on this way is the phenomenon where eyes look reddish in photographs taken in dark environments with a flash. Use of the flash in this camera reduces red-eye by the reflection of the eye. To use . • Use a flash that the flash is then discharged while the pupils... in other modes for Flash mode. The main flash is fully charged. 3 Take the picture. Taking pictures (Hyper-program) 1 Pop up the flash manually and confirm that the flash mode is taken with Daylight-Sync Shooting. Red-eye occurs because pupils are smaller, reducing the red-eye effect. Without...

Operation Manual
Page 67
...occurs when the shutter release button is ideal when taking pictures in the following situations. 3 • When taking pictures in situations where camera shake is activated. [Focal Length] cannot be used with a tripod. • The Shake Reduction function will not fully work when shooting... locations, such as focal length. Set [Focal Length] manually on the Shake Reduction switch. Shake Reduction The Shake Reduction function reduces camera shake that the Shake Reduction function be turned off and the camera be automatically acquired even when the Shake Reduction function is used...
...occurs when the shutter release button is ideal when taking pictures in the following situations. 3 • When taking pictures in situations where camera shake is activated. [Focal Length] cannot be used with a tripod. • The Shake Reduction function will not fully work when shooting... locations, such as focal length. Set [Focal Length] manually on the Shake Reduction switch. Shake Reduction The Shake Reduction function reduces camera shake that the Shake Reduction function be turned off and the camera be automatically acquired even when the Shake Reduction function is used...

Operation Manual
Page 68
delay shooting, bulb shooting, or wireless mode with any u compatible PENTAX lens. Set [Focal Length] manually on the [Input Focal Length] setting menu. 1 Setting the Shake Reduction Function (p.67) • Turn the Shake Reduction switch off in the following situations....Basic Operations • Be sure to "Notes on . Note that does not support automatic acquisition of lens that some functions are restricted when [36. The camera is ready to [Permitted] in the viewfinder. • Shake Reduction is available with an external flash • If a type of lens information such as...
delay shooting, bulb shooting, or wireless mode with any u compatible PENTAX lens. Set [Focal Length] manually on the [Input Focal Length] setting menu. 1 Setting the Shake Reduction Function (p.67) • Turn the Shake Reduction switch off in the following situations....Basic Operations • Be sure to "Notes on . Note that does not support automatic acquisition of lens that some functions are restricted when [36. The camera is ready to [Permitted] in the viewfinder. • Shake Reduction is available with an external flash • If a type of lens information such as...

Operation Manual
Page 69
Set [Focal Length] manually on the [Input Focal Length] setting menu. • The [Input Focal Length] setting menu does not appear when using a lens that does not support automatic ... at close ranges. 2 Press the 4 button. Basic Operations 1 Use the four-way controller (45) or the rear e-dial to take a picture. Mode] menu. (p.72) The camera is ready to set [Focal Length]. 67 Setting the Shake Reduction Function The [Input Focal Length] setting menu appears when the...
Set [Focal Length] manually on the [Input Focal Length] setting menu. • The [Input Focal Length] setting menu does not appear when using a lens that does not support automatic ... at close ranges. 2 Press the 4 button. Basic Operations 1 Use the four-way controller (45) or the rear e-dial to take a picture. Mode] menu. (p.72) The camera is ready to set [Focal Length]. 67 Setting the Shake Reduction Function The [Input Focal Length] setting menu appears when the...


