

Operation Manual
Page 14
... Printing without using the USB/AV cable, you can be sure that supports PictBridge using a computer. 12 Gone are the days of a single button. In addition, by placing the supplied dock insert onto a Kodak EasyShare Printer Dock and then placing the camera on the screen before you... take the picture, so you can enjoy easily printing out images with the touch of not being able to a printer that the frame complements your subject perfectly. (p.58) For decorating your pictures with a frame. Choose a Frame Before Taking the Picture! The Optio E30...
... Printing without using the USB/AV cable, you can be sure that supports PictBridge using a computer. 12 Gone are the days of a single button. In addition, by placing the supplied dock insert onto a Kodak EasyShare Printer Dock and then placing the camera on the screen before you... take the picture, so you can enjoy easily printing out images with the touch of not being able to a printer that the frame complements your subject perfectly. (p.58) For decorating your pictures with a frame. Choose a Frame Before Taking the Picture! The Optio E30...

Operation Manual
Page 15
Camera Optio E30 Strap O-ST62 (*) Dock insert O-DI62 Software (CD-ROM) S-SW62 Operating Manual (this manual) / PC Connection Manual (CD-ROM) USB/AV cable I-UAV62 (*) JA EN DE FR IT ES NL SV TC SC Quick Guide Two AA alkaline batteries Items marked with the items listed below. For other optional accessories, refer to "Optional Accessories" (p.142). 13 Checking the Contents of the Package Check that your camera comes complete with an asterisk (*) are also available as optional accessories.
Camera Optio E30 Strap O-ST62 (*) Dock insert O-DI62 Software (CD-ROM) S-SW62 Operating Manual (this manual) / PC Connection Manual (CD-ROM) USB/AV cable I-UAV62 (*) JA EN DE FR IT ES NL SV TC SC Quick Guide Two AA alkaline batteries Items marked with the items listed below. For other optional accessories, refer to "Optional Accessories" (p.142). 13 Checking the Contents of the Package Check that your camera comes complete with an asterisk (*) are also available as optional accessories.

Operation Manual
Page 16
Names of Parts Front Back 14 Strap lug Shutter release button Power switch Self-timer lamp (red) Flash Lens Microphone DC coupler cable cover Speaker LCD monitor Access lamp ImageLink Terminal (Dock Terminal) Battery/card cover Tripod socket USB/AV terminal
Names of Parts Front Back 14 Strap lug Shutter release button Power switch Self-timer lamp (red) Flash Lens Microphone DC coupler cable cover Speaker LCD monitor Access lamp ImageLink Terminal (Dock Terminal) Battery/card cover Tripod socket USB/AV terminal

Operation Manual
Page 28
... on compatible SD Memory Cards, visit the PENTAX website or contact your nearest PENTAX Service Center. 26 Getting Started Precautions When Using an SD Memory Card • The SD Memory Card is being played back, or the camera is connected to a computer with the USB/AV cable, as this may damage the card and...protected. • Care should be taken when removing the SD Memory Card immediately after using the camera, as the card may be hot. • Do not remove the SD Memory Card or turn the camera off while data is being saved to the card, images or sound files are removed while ...
... on compatible SD Memory Cards, visit the PENTAX website or contact your nearest PENTAX Service Center. 26 Getting Started Precautions When Using an SD Memory Card • The SD Memory Card is being played back, or the camera is connected to a computer with the USB/AV cable, as this may damage the card and...protected. • Care should be taken when removing the SD Memory Card immediately after using the camera, as the card may be hot. • Do not remove the SD Memory Card or turn the camera off while data is being saved to the card, images or sound files are removed while ...

Operation Manual
Page 49
... messages appear p.131 Folder Name For choosing how names are assigned to folders for storing images and sound files p.132 3 USB Connection For setting the USB/AV cable connection (to PC or printer) p.133 Video Out For setting the output format to the AV equipment p.134 Power Saving ...For setting the time until the camera enters powersaving mode p.135 Auto Power Off For setting the time until the camera turns off automatically ...
... messages appear p.131 Folder Name For choosing how names are assigned to folders for storing images and sound files p.132 3 USB Connection For setting the USB/AV cable connection (to PC or printer) p.133 Video Out For setting the output format to the AV equipment p.134 Power Saving ...For setting the time until the camera enters powersaving mode p.135 Auto Power Off For setting the time until the camera turns off automatically ...

Operation Manual
Page 100
... (such as a TV. If this happens, change the video output format setting. (p.134) • The camera LCD monitor turns off before connecting the camera to the TV. 1 Connect the USB/AV cable to the USB/AV terminal. 2 Connect the other ends of the device and select the video input terminal to which the... using stereo sound equipment, insert the sound terminal into the L (white) terminal. 3 Turn the AV device on. When using the USB/AV cable, you intend to use the camera for a long time. • Depending on the country or region, images and sound files may fail to be adjusted with the zoom...
... (such as a TV. If this happens, change the video output format setting. (p.134) • The camera LCD monitor turns off before connecting the camera to the TV. 1 Connect the USB/AV cable to the USB/AV terminal. 2 Connect the other ends of the device and select the video input terminal to which the... using stereo sound equipment, insert the sound terminal into the L (white) terminal. 3 Turn the AV device on. When using the USB/AV cable, you intend to use the camera for a long time. • Depending on the country or region, images and sound files may fail to be adjusted with the zoom...
Operation Manual
Page 116
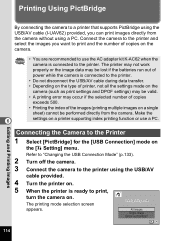
... multiple images on the [u Setting] menu. The printing mode selection screen Select printing mode appears. Refer to "Changing the USB Connection Mode" (p.133). 2 Turn off the camera. 3 Connect the camera to the printer using the USB/AV cable provided. 4 Turn the printer on. 5 When the printer is connected to the Printer 1 Select [PictBridge] for the...
... multiple images on the [u Setting] menu. The printing mode selection screen Select printing mode appears. Refer to "Changing the USB Connection Mode" (p.133). 2 Turn off the camera. 3 Connect the camera to the printer using the USB/AV cable provided. 4 Turn the printer on. 5 When the printer is connected to the Printer 1 Select [PictBridge] for the...

Operation Manual
Page 118
...Editing and Printing Images • The access lamp lights while the camera is communicating with the printer, and blinks while the card is supported by your printer. 10 Press the 4 button. Do not disconnect the USB/AV cable while the access lamp is printed according to the print settings screen.... Disconnecting the Cable from the Printer 1p.118 116 If you select [_ Setting] for changing the print settings ...
...Editing and Printing Images • The access lamp lights while the camera is communicating with the printer, and blinks while the card is supported by your printer. 10 Press the 4 button. Do not disconnect the USB/AV cable while the access lamp is printed according to the print settings screen.... Disconnecting the Cable from the Printer 1p.118 116 If you select [_ Setting] for changing the print settings ...

Operation Manual
Page 120
.... Refer to p.111 for details of copies. Editing and Printing Images 118 Disconnecting the Cable from the Printer Disconnect the USB/AV cable from the camera and printer when you have finished printing. 1 Turn off the camera. 2 Disconnect the USB/AV cable from the camera and printer. Printing Using the DPOF Settings 1 2 3 4 6 In the printing mode selection screen...
.... Refer to p.111 for details of copies. Editing and Printing Images 118 Disconnecting the Cable from the Printer Disconnect the USB/AV cable from the camera and printer when you have finished printing. 1 Turn off the camera. 2 Disconnect the USB/AV cable from the camera and printer. Printing Using the DPOF Settings 1 2 3 4 6 In the printing mode selection screen...

Operation Manual
Page 121
...6 119 Editing and Printing Images Instead of using the camera with a printer dock. • The camera cannot be connected to another printer or PC via USB/AV cable while connected to the printer dock. Printing Using ImageLink This camera is compatible with your printer dock for information on how ...print images and other details. • Some printer functions may not work when using a USB/AV cable, connect the supplied O-DI62 dock insert and Kodak EasyShare Printer Dock and place the camera on the printer dock. Refer to the Operating Manual that came with the ImageLink print system...
...6 119 Editing and Printing Images Instead of using the camera with a printer dock. • The camera cannot be connected to another printer or PC via USB/AV cable while connected to the printer dock. Printing Using ImageLink This camera is compatible with your printer dock for information on how ...print images and other details. • Some printer functions may not work when using a USB/AV cable, connect the supplied O-DI62 dock insert and Kodak EasyShare Printer Dock and place the camera on the printer dock. Refer to the Operating Manual that came with the ImageLink print system...

Operation Manual
Page 135
...Select this Operating Manual for the USB Connection mode. The USB Connection setting is selected for instructions on connecting the camera to a computer. 1 Use the four-way controller (23) to select [USB Connection] on whether you are going to connect the USB/AV cable to a PC or a PictBridgecompatible ...printer. And do not connect the camera to your PC while [PictBridge] ...
...Select this Operating Manual for the USB Connection mode. The USB Connection setting is selected for instructions on connecting the camera to a computer. 1 Use the four-way controller (23) to select [USB Connection] on whether you are going to connect the USB/AV cable to a PC or a PictBridgecompatible ...printer. And do not connect the camera to your PC while [PictBridge] ...

Operation Manual
Page 144
USB/AV cable I-UAV62 (*) Strap O-ST62 (*) O-ST24 Genuine leather strap O-ST8 Silver chain strap O-ST30 Plastic coated strap Camera case O-CC58 Products marked with an asterisk (*) are available for this camera. The ending of dedicated accessories are the same as those supplied with the camera. 9 142 Appendix Optional Accessories A number of the AC plug cord name differs depending on the country. AC adapter kit K-AC62 This kit includes the DC coupler D-DC51, the AC adapter D-AC62 and the AC plug cord D-CO2.
USB/AV cable I-UAV62 (*) Strap O-ST62 (*) O-ST24 Genuine leather strap O-ST8 Silver chain strap O-ST30 Plastic coated strap Camera case O-CC58 Products marked with an asterisk (*) are available for this camera. The ending of dedicated accessories are the same as those supplied with the camera. 9 142 Appendix Optional Accessories A number of the AC plug cord name differs depending on the country. AC adapter kit K-AC62 This kit includes the DC coupler D-DC51, the AC adapter D-AC62 and the AC plug cord D-CO2.

Operation Manual
Page 152
Size Weight Weight When Shooting Accessories 94.5 (W) × 61.5 (H) × 35.4 (D) mm (excluding operating or protruding parts) 137.5 g (excluding batteries and SD Memory Card) 185 g (including batteries and SD Memory Card) Two AA alkaline batteries, USB/AV cable, software (CD-ROM), Operating Manual/PC Connection Manual (CD-ROM), strap, dock insert, Quick Guide Appendix 9 150
Size Weight Weight When Shooting Accessories 94.5 (W) × 61.5 (H) × 35.4 (D) mm (excluding operating or protruding parts) 137.5 g (excluding batteries and SD Memory Card) 185 g (including batteries and SD Memory Card) Two AA alkaline batteries, USB/AV cable, software (CD-ROM), Operating Manual/PC Connection Manual (CD-ROM), strap, dock insert, Quick Guide Appendix 9 150

