

Basic Owners Manual
Page 1
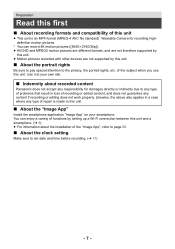
...your OS from the website. HX-A500 Please read it, download it from the following website. (As of Adobe Reader that you have any questions, visit : U.S.A. : www.panasonic.com/support Canada : www.panasonic.ca/english/support SQT0251 https://eww.pavc.panasonic.co.jp/hdw/oi/A500/ ≥ Click the desired ... download and install a version of April 2014) http://www.adobe.com/products/acrobat/readstep2.html Register online at www.panasonic.com/register (U.S. Basic Owner's Manual Wearable Camera Model No. More detailed operating instructions are available in "Owner's Manual (PDF format)".
...your OS from the website. HX-A500 Please read it, download it from the following website. (As of Adobe Reader that you have any questions, visit : U.S.A. : www.panasonic.com/support Canada : www.panasonic.ca/english/support SQT0251 https://eww.pavc.panasonic.co.jp/hdw/oi/A500/ ≥ Click the desired ... download and install a version of April 2014) http://www.adobe.com/products/acrobat/readstep2.html Register online at www.panasonic.com/register (U.S. Basic Owner's Manual Wearable Camera Model No. More detailed operating instructions are available in "Owner's Manual (PDF format)".
Basic Owners Manual
Page 2
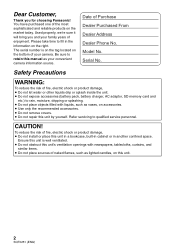
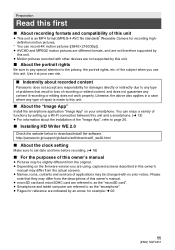
... adaptor, SD memory card and etc.) to fill in another confined space. Used properly, we're sure it will bring you for choosing Panasonic! Be sure to qualified service personnel. To reduce the risk of enjoyment. Ensure this unit is on the tag located on the right. ...Model No. Serial No. You have purchased one of Purchase Dealer Purchased From Dealer Address Dealer Phone No. Dear Customer, Thank you and your camera. The serial number is well ventilated. ≥ Do not obstruct this unit's ventilation openings with liquids, such as lighted candles, on this unit...
... adaptor, SD memory card and etc.) to fill in another confined space. Used properly, we're sure it will bring you for choosing Panasonic! Be sure to qualified service personnel. To reduce the risk of enjoyment. Ensure this unit is on the tag located on the right. ...Model No. Serial No. You have purchased one of Purchase Dealer Purchased From Dealer Address Dealer Phone No. Dear Customer, Thank you and your camera. The serial number is well ventilated. ≥ Do not obstruct this unit's ventilation openings with liquids, such as lighted candles, on this unit...

Basic Owners Manual
Page 6
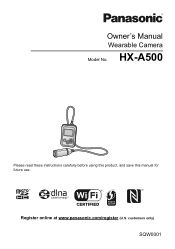
... This unit and the microSD card become warm during use this unit on top of benzine, paint thinner, alcohol, or dishwashing liquid may alter the camera body or peel the surface finish. -If you see this unit with a soft, dry cloth. ≥ Use of or near a TV, the pictures and/or...
... This unit and the microSD card become warm during use this unit on top of benzine, paint thinner, alcohol, or dishwashing liquid may alter the camera body or peel the surface finish. -If you see this unit with a soft, dry cloth. ≥ Use of or near a TV, the pictures and/or...

Basic Owners Manual
Page 10
... waterproof performance. 1 Rinse with water with the side cover closed while it thoroughly in the shade. 10 SQT0251 (ENG) Make sure to clean the camera after using it. ≥ Thoroughly wipe off any water off with a soft, dry cloth. ≥ The water droplets may seep into the water... Do not apply shock to this unit underwater. (Waterproof performance may not be applied, and it may fall. Take care not to clean the camera indoors, avoiding places where water spray or sand may cause malfunction.) ≥ This unit will deteriorate the waterproof performance or cause failure due to ...
... waterproof performance. 1 Rinse with water with the side cover closed while it thoroughly in the shade. 10 SQT0251 (ENG) Make sure to clean the camera after using it. ≥ Thoroughly wipe off any water off with a soft, dry cloth. ≥ The water droplets may seep into the water... Do not apply shock to this unit underwater. (Waterproof performance may not be applied, and it may fall. Take care not to clean the camera indoors, avoiding places where water spray or sand may cause malfunction.) ≥ This unit will deteriorate the waterproof performance or cause failure due to ...
Basic Owners Manual
Page 11
..., the above also applies in a case where any type of repair is an MP4 format (MPEG-4 AVC file standard)* Wearable Camera for damages directly or indirectly due to any type of problems that they may be changed with other devices are not supported by this... the smartphone application "Image App" on the firmware version you use this unit and a smartphone. (l 13) ≥ For information about recorded content Panasonic does not accept any responsibility for recording highdefinition motion pictures. * You can enjoy a variety of functions by setting up a Wi-Fi connection between this...
..., the above also applies in a case where any type of repair is an MP4 format (MPEG-4 AVC file standard)* Wearable Camera for damages directly or indirectly due to any type of problems that they may be changed with other devices are not supported by this... the smartphone application "Image App" on the firmware version you use this unit and a smartphone. (l 13) ≥ For information about recorded content Panasonic does not accept any responsibility for recording highdefinition motion pictures. * You can enjoy a variety of functions by setting up a Wi-Fi connection between this...

Basic Owners Manual
Page 20
..., stop the use . ≥ For the direction of the hook and loop fastener C Hook and loop fastener Wearing this unit Wear the main unit and camera unit. ≥ If a feeling of discomfort arises after use or adjust the size of the Head Mount/Armband Case/ Headband to loosen them a little... fastener. 3 Adjust the length of the band. A Hook and loop fastener 20 SQT0251 (ENG) B Hard surface of the camera, check the A Camera unit actual image on the LCD monitor.
..., stop the use . ≥ For the direction of the hook and loop fastener C Hook and loop fastener Wearing this unit Wear the main unit and camera unit. ≥ If a feeling of discomfort arises after use or adjust the size of the Head Mount/Armband Case/ Headband to loosen them a little... fastener. 3 Adjust the length of the band. A Hook and loop fastener 20 SQT0251 (ENG) B Hard surface of the camera, check the A Camera unit actual image on the LCD monitor.

Basic Owners Manual
Page 21
... When fastening the main unit, try not to drop the camera unit to avoid a shock and try not to your arm, remove the camera unit from the Armband Case. ≥ When removing the camera/main unit from the Armband Case, avoid pulling the camera/main unit connection cable. ≥ Do not forcibly bend ... of the hook and loop fastener ∫ About the Armband Case The Armband Case can be used as a portable holder. ≥ The camera unit can be stored in the camera pocket B, and the camera/main unit connection cable can be handy in various scenes. (l 33) 21 (ENG) SQT0251
... When fastening the main unit, try not to drop the camera unit to avoid a shock and try not to your arm, remove the camera unit from the Armband Case. ≥ When removing the camera/main unit from the Armband Case, avoid pulling the camera/main unit connection cable. ≥ Do not forcibly bend ... of the hook and loop fastener ∫ About the Armband Case The Armband Case can be used as a portable holder. ≥ The camera unit can be stored in the camera pocket B, and the camera/main unit connection cable can be handy in various scenes. (l 33) 21 (ENG) SQT0251

Basic Owners Manual
Page 22
...side. A Lock lever 2 Attach the Head Mount (R) to the Head Mount (L). 3 Loosen the adjustment knob, and change the direction of the camera holder. ≥ To loosen the adjustment knob, rotate it towards 2. ≥ Adjust the direction as shown in the illustration, and tighten the adjustment knob ...again. B Adjustment knob C Camera holder Attaching the camera unit to the Head Mount to make the shape of the Head Mount. B Cable holder...
...side. A Lock lever 2 Attach the Head Mount (R) to the Head Mount (L). 3 Loosen the adjustment knob, and change the direction of the camera holder. ≥ To loosen the adjustment knob, rotate it towards 2. ≥ Adjust the direction as shown in the illustration, and tighten the adjustment knob ...again. B Adjustment knob C Camera holder Attaching the camera unit to the Head Mount to make the shape of the Head Mount. B Cable holder...

Basic Owners Manual
Page 23
...the settings such as the [ANGLE OF VIEW], [LEVEL SHOT], [IMAGE STABILIZATION] and [WHITE BALANCE] before recording. ≥ Please refer to remove the camera Hold the camera holder as indicated in the direction of the arrow. ≥ Do not touch the lens or pull the... in the right figure. Things to check after adjusting the direction of the lens. ≥ If the camera unit is shaky, tighten the adjustment knob. D Adjustment knob E Camera holder ∫ How to "Owner's Manual (PDF format)" for details. 23 (ENG) SQT0251 To tighten the adjustment ...
...the settings such as the [ANGLE OF VIEW], [LEVEL SHOT], [IMAGE STABILIZATION] and [WHITE BALANCE] before recording. ≥ Please refer to remove the camera Hold the camera holder as indicated in the direction of the arrow. ≥ Do not touch the lens or pull the... in the right figure. Things to check after adjusting the direction of the lens. ≥ If the camera unit is shaky, tighten the adjustment knob. D Adjustment knob E Camera holder ∫ How to "Owner's Manual (PDF format)" for details. 23 (ENG) SQT0251 To tighten the adjustment ...

Basic Owners Manual
Page 31
...runs out. ≥ If it is not instruction for repair. This figure describes the disposal of this unit, it cannot be removed smoothly, contact Panasonic's Service Center. ≥ Keep disassembled parts out of reach of children. 1 Open the side cover, and remove all of the 6 screws ...the battery When disposing of your used products, perform [RESET Wi-Fi SETTINGS] to delete personal information from this unit. 5 Remove the connector E of the camera unit, the built-in battery connector F, and the NFC flexible circuit board G, and lift up the circuit board. ...
...runs out. ≥ If it is not instruction for repair. This figure describes the disposal of this unit, it cannot be removed smoothly, contact Panasonic's Service Center. ≥ Keep disassembled parts out of reach of children. 1 Open the side cover, and remove all of the 6 screws ...the battery When disposing of your used products, perform [RESET Wi-Fi SETTINGS] to delete personal information from this unit. 5 Remove the connector E of the camera unit, the built-in battery connector F, and the NFC flexible circuit board G, and lift up the circuit board. ...

Basic Owners Manual
Page 32
...q (W)k1.04 q (H)k2.70 q (D)] Main unit; 59.5 mm (W)k94.0 mm (H)k26.7 mm (D) [2.34 q (W)k3.70 q (H)k1.05 q (D)] Mass (Weight): Camera unit; Approx. 128 g (Approx. 0.282 lbs.) Mass (Weight) in operation: Approx. 185 g (Approx. 0.408 lbs.) [with the Color Night Rec function USB: Reader function ... length; 3.4 mm Angle of view; Approx. 31 g (Approx. 0.069 lbs.) [Excluding the cable portion] Main unit; Others Specifications Wearable camera Information for Camera File system, based on Exif 2.2 standard) ≥ For picture size of a still picture and number of recordable pictures, refer to 1/12000 ...
...q (W)k1.04 q (H)k2.70 q (D)] Main unit; 59.5 mm (W)k94.0 mm (H)k26.7 mm (D) [2.34 q (W)k3.70 q (H)k1.05 q (D)] Mass (Weight): Camera unit; Approx. 128 g (Approx. 0.282 lbs.) Mass (Weight) in operation: Approx. 185 g (Approx. 0.408 lbs.) [with the Color Night Rec function USB: Reader function ... length; 3.4 mm Angle of view; Approx. 31 g (Approx. 0.069 lbs.) [Excluding the cable portion] Main unit; Others Specifications Wearable camera Information for Camera File system, based on Exif 2.2 standard) ≥ For picture size of a still picture and number of recordable pictures, refer to 1/12000 ...

Basic Owners Manual
Page 33
... Description Multi Mount VW-CTA100 Tripod Mount VW-SCA100 Suction Cup Mount* VW-WJA100 RP-CMC10 Wind Jammer Video Camera Mount (For Handlebar)* * To use the Suction Cup Mount/VW-SCA100 and Video Camera Mount (For Handlebar)/ RP-CMC10, the Tripod Mount/VW-CTA100 is required. 33 (ENG) SQT0251 Central frequency 2412...
... Description Multi Mount VW-CTA100 Tripod Mount VW-SCA100 Suction Cup Mount* VW-WJA100 RP-CMC10 Wind Jammer Video Camera Mount (For Handlebar)* * To use the Suction Cup Mount/VW-SCA100 and Video Camera Mount (For Handlebar)/ RP-CMC10, the Tripod Mount/VW-CTA100 is required. 33 (ENG) SQT0251 Central frequency 2412...

Basic Owners Manual
Page 37
...WILL BE CHARGED FOR THE REPAIR OF ANY UNIT RECEIVED WITHOUT SUCH PROOF OF PURCHASE. 37 (ENG) SQT0251 Product or Part Name Wearable Camera Parts 1 Year Labor 1 Year All included Accessories (Except Non-Rechargeable Batteries) 90 Days Not Applicable Only Non-Rechargeable Batteries 10 Days Not... include all supplied accessories listed in the Owner's Manual, and send it with the date of original purchase ("warranty period"), at www.panasonic.com/repair. IF REPAIR IS NEEDED DURING THE WARRANTY PERIOD, THE PURCHASER WILL BE REQUIRED TO FURNISH A SALES RECEIPT/PROOF OF PURCHASE INDICATING...
...WILL BE CHARGED FOR THE REPAIR OF ANY UNIT RECEIVED WITHOUT SUCH PROOF OF PURCHASE. 37 (ENG) SQT0251 Product or Part Name Wearable Camera Parts 1 Year Labor 1 Year All included Accessories (Except Non-Rechargeable Batteries) 90 Days Not Applicable Only Non-Rechargeable Batteries 10 Days Not... include all supplied accessories listed in the Owner's Manual, and send it with the date of original purchase ("warranty period"), at www.panasonic.com/repair. IF REPAIR IS NEEDED DURING THE WARRANTY PERIOD, THE PURCHASER WILL BE REQUIRED TO FURNISH A SALES RECEIPT/PROOF OF PURCHASE INDICATING...
Owners Manual
Page 1
HX-A500 Please read these instructions carefully before using this product, and save this manual for future use. customers only) SQW0001 Register online at www.panasonic.com/register (U.S. Owner's Manual Wearable Camera Model No.
HX-A500 Please read these instructions carefully before using this product, and save this manual for future use. customers only) SQW0001 Register online at www.panasonic.com/register (U.S. Owner's Manual Wearable Camera Model No.

Owners Manual
Page 6
... use at the seaside or underwater, soak the unit in fresh water pooled in a shallow container for about 10 minutes. 2 Drain water by rinsing the camera with a dry towel or something similar, and dry it thoroughly in the shade. - 6 - Caring for this unit after using this unit at the seaside or... this unit. In case water enters this unit, stop the use and consult your hands, body, hair, etc. ≥ It is recommended to clean the camera indoors, avoiding places where water spray or sand may fall. Using this unit underwater ≥ Use this unit underwater at a depth of down to 3.0 m (10...
... use at the seaside or underwater, soak the unit in fresh water pooled in a shallow container for about 10 minutes. 2 Drain water by rinsing the camera with a dry towel or something similar, and dry it thoroughly in the shade. - 6 - Caring for this unit after using this unit at the seaside or... this unit. In case water enters this unit, stop the use and consult your hands, body, hair, etc. ≥ It is recommended to clean the camera indoors, avoiding places where water spray or sand may fall. Using this unit underwater ≥ Use this unit underwater at a depth of down to 3.0 m (10...
Owners Manual
Page 7
...in loss of recording or edited content, and does not guarantee any type of repair is an MP4 format (MPEG-4 AVC file standard)* Wearable Camera for recording highdefinition motion pictures. * You can enjoy a variety of functions by this unit. Use it at your smartphone. You can record ... unit. ∫ About the "Image App" Install the smartphone application "Image App" on your own risk. ∫ Indemnity about recorded content Panasonic does not accept any responsibility for damages directly or indirectly due to any type of problems that result in a case where any content if recording...
...in loss of recording or edited content, and does not guarantee any type of repair is an MP4 format (MPEG-4 AVC file standard)* Wearable Camera for recording highdefinition motion pictures. * You can enjoy a variety of functions by this unit. Use it at your smartphone. You can record ... unit. ∫ About the "Image App" Install the smartphone application "Image App" on your own risk. ∫ Indemnity about recorded content Panasonic does not accept any responsibility for damages directly or indirectly due to any type of problems that result in a case where any content if recording...

Owners Manual
Page 10
... 29) j Using the lock function (l 29) 7 Recording start/stop button (l 27) 8 NFC touch area [ ] (l 44, 46) 9 Speaker 10 Camera (l 24) 11 Lens (l 5) 12 Mic 13 Camera/main unit connection cable ≥ This cable is not removable. 14 USB terminal [ ] (l 11) 15 Reset button [RESET] ≥ If this unit... fails to set an item. Preparation Names and Functions of Main Parts Main unit 1 2 5 3 6 4 7 14 15 16 9 8 Camera unit 10 11 12 13 17 18 1 LCD monitor 2 Power lamp (l 13, 16) 3 Power button [ ] (l 16) 4 Wi-Fi Transmitter 5 Access lamp (l 15) ...
... 29) j Using the lock function (l 29) 7 Recording start/stop button (l 27) 8 NFC touch area [ ] (l 44, 46) 9 Speaker 10 Camera (l 24) 11 Lens (l 5) 12 Mic 13 Camera/main unit connection cable ≥ This cable is not removable. 14 USB terminal [ ] (l 11) 15 Reset button [RESET] ≥ If this unit... fails to set an item. Preparation Names and Functions of Main Parts Main unit 1 2 5 3 6 4 7 14 15 16 9 8 Camera unit 10 11 12 13 17 18 1 LCD monitor 2 Power lamp (l 13, 16) 3 Power button [ ] (l 16) 4 Wi-Fi Transmitter 5 Access lamp (l 15) ...

Owners Manual
Page 19
... up a Wi-Fi connection between this unit and a smartphone, and perform remote operation. (l 43) On the "Image App" screen, tap and set the menu item. [Camera setup] # desired menu item ≥ For more information, refer to the [Help] in the "Image App" menu. [CLOCK SET] Please refer to page 17. [DATE...
... up a Wi-Fi connection between this unit and a smartphone, and perform remote operation. (l 43) On the "Image App" screen, tap and set the menu item. [Camera setup] # desired menu item ≥ For more information, refer to the [Help] in the "Image App" menu. [CLOCK SET] Please refer to page 17. [DATE...

Owners Manual
Page 22
... Armband Case 1 Insert the main unit so that the parts may leave marks on the LCD monitor. Wearing this unit Wear the main unit and camera unit. ≥ If a feeling of discomfort arises after a long period of use, stop the use . ≥ For the direction of the... camera, check the A Camera unit actual image on your face and other body parts after use or adjust the size of the hook and loop fastener C Hook and ...
... Armband Case 1 Insert the main unit so that the parts may leave marks on the LCD monitor. Wearing this unit Wear the main unit and camera unit. ≥ If a feeling of discomfort arises after a long period of use, stop the use . ≥ For the direction of the... camera, check the A Camera unit actual image on your face and other body parts after use or adjust the size of the hook and loop fastener C Hook and ...

Owners Manual
Page 23
...; When fastening the main unit, try not to drop the camera unit to avoid a shock and try not to your arm, remove the camera unit from the Armband Case. ≥ When removing the camera/main unit from the Armband Case, avoid pulling the camera/main unit connection cable. ≥ Do not forcibly bend or... surface of the hook and loop fastener ∫ About the Armband Case The Armband Case can be used as a portable holder. ≥ The camera unit can be stored in the camera pocket B, and the camera/main unit connection cable can be handy in various scenes. (l 91) - 23 -
...; When fastening the main unit, try not to drop the camera unit to avoid a shock and try not to your arm, remove the camera unit from the Armband Case. ≥ When removing the camera/main unit from the Armband Case, avoid pulling the camera/main unit connection cable. ≥ Do not forcibly bend or... surface of the hook and loop fastener ∫ About the Armband Case The Armband Case can be used as a portable holder. ≥ The camera unit can be stored in the camera pocket B, and the camera/main unit connection cable can be handy in various scenes. (l 91) - 23 -


