
Operating Instructions
Page 10
...of day (see Page 118) has been turned on network conditions, PC performance, the number of people accessing the camera, and the type of the camera image in the Troubleshooting Guide. 10 Operating Instructions Camera image (click an area of the camera's optical sensor, and is not displayed immediately or ... is displayed instead of objects being viewed. To reduce data traffic when other users are accessing the camera. BL-C131A only: If using the camera in wireless mode, camera images will stop refreshing if there is in wireless mode, refer to not display images at this time...
...of day (see Page 118) has been turned on network conditions, PC performance, the number of people accessing the camera, and the type of the camera image in the Troubleshooting Guide. 10 Operating Instructions Camera image (click an area of the camera's optical sensor, and is not displayed immediately or ... is displayed instead of objects being viewed. To reduce data traffic when other users are accessing the camera. BL-C131A only: If using the camera in wireless mode, camera images will stop refreshing if there is in wireless mode, refer to not display images at this time...
Operating Instructions
Page 23
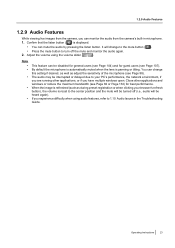
... in microphone. 1. 1.2.9 Audio Features 1.2.9 Audio Features While viewing live images from the camera's built-in the Troubleshooting Guide. Operating Instructions 23 When the image is reset to your PC's performance, the network environment, if you experience difficulty when using the volume slider ( ). If you are ...volume is refreshed (such as adjust the sensitivity of the microphone (see Page 98). Confirm that the listen button ( ) is panning or tilting. The audio may be heard again). It will be interrupted or delayed due to the center position and the mute...
... in microphone. 1. 1.2.9 Audio Features 1.2.9 Audio Features While viewing live images from the camera's built-in the Troubleshooting Guide. Operating Instructions 23 When the image is reset to your PC's performance, the network environment, if you experience difficulty when using the volume slider ( ). If you are ...volume is refreshed (such as adjust the sensitivity of the microphone (see Page 98). Confirm that the listen button ( ) is panning or tilting. The audio may be heard again). It will be interrupted or delayed due to the center position and the mute...

Operating Instructions
Page 73
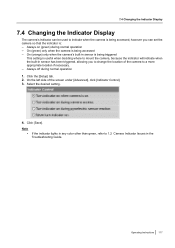
...forwarding without using UPnP™ If your router, configure the router's port forwarding feature. • When configuring port forwarding, store the camera's IP address and port number that the status is [Enabled]. • If [Enabled] is not displayed, refer to know these ...Make a note of the screen under [Basic], click [Network (IPv4)]. 3. 4.1 Configuring Port Forwarding 2. Under [UPnP], confirm that you need to the UPnP™ related items in 1.3 Camera Setup Issues and 1.5 Camera Access Issues in the Troubleshooting Guide. Operating Instructions 73 On the left side of the IP ...
...forwarding without using UPnP™ If your router, configure the router's port forwarding feature. • When configuring port forwarding, store the camera's IP address and port number that the status is [Enabled]. • If [Enabled] is not displayed, refer to know these ...Make a note of the screen under [Basic], click [Network (IPv4)]. 3. 4.1 Configuring Port Forwarding 2. Under [UPnP], confirm that you need to the UPnP™ related items in 1.3 Camera Setup Issues and 1.5 Camera Access Issues in the Troubleshooting Guide. Operating Instructions 73 On the left side of the IP ...

Operating Instructions
Page 93
... Instructions 93 Turn off the camera by accessing the camera (see 1.4 Wireless Connection Issues (BL-C131A Only) in wired mode and confirm that all wireless settings are correct by unplugging the AC plug from the power outlet. 2. Access the camera in the Troubleshooting Guide. Turn the camera on the bottom of the camera's wireless module when setting your router...
... Instructions 93 Turn off the camera by accessing the camera (see 1.4 Wireless Connection Issues (BL-C131A Only) in wired mode and confirm that all wireless settings are correct by unplugging the AC plug from the power outlet. 2. Access the camera in the Troubleshooting Guide. Turn the camera on the bottom of the camera's wireless module when setting your router...
Operating Instructions
Page 117
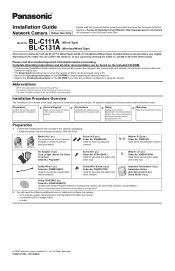
7.4 Changing the Indicator Display 7.4 Changing the Indicator Display The camera's indicator can set the camera so that the indicator is useful when deciding where to mount the camera, because the indicator will indicate when the built-in any color other than green, refer to a ... when the camera is being accessed - On the left side of the camera to 1.2 Camera Indicator Issues in sensor is being triggered This setting is : - Always on (green) during normal operation 1. Click the [Setup] tab. 2. On (orange) only when the camera's built-in the Troubleshooting Guide. Select the...
7.4 Changing the Indicator Display 7.4 Changing the Indicator Display The camera's indicator can set the camera so that the indicator is useful when deciding where to mount the camera, because the indicator will indicate when the built-in any color other than green, refer to a ... when the camera is being accessed - On the left side of the camera to 1.2 Camera Indicator Issues in sensor is being triggered This setting is : - Always on (green) during normal operation 1. Click the [Setup] tab. 2. On (orange) only when the camera's built-in the Troubleshooting Guide. Select the...
Installation Guide
Page 1
... Overview The following additional items to the Troubleshooting Guide on the CD-ROM if you have all other documentation can confirm the model no . Connections Connecting the camera to set up the camera (described in the included Setup Guide). BL-C111A BL-C131A Main Unit (1 pc.) The appearance of your camera depends on the included CD-ROM. .... Safety Wire Screw (1 pc.) Order No. Safety Wire (1 pc.) Order No. You will need the following is written for installation. All Rights Reserved. Panasonic Network Camera Website: http://www.panasonic.com/netcam for wall mounting the...
... Overview The following additional items to the Troubleshooting Guide on the CD-ROM if you have all other documentation can confirm the model no . Connections Connecting the camera to set up the camera (described in the included Setup Guide). BL-C111A BL-C131A Main Unit (1 pc.) The appearance of your camera depends on the included CD-ROM. .... Safety Wire Screw (1 pc.) Order No. Safety Wire (1 pc.) Order No. You will need the following is written for installation. All Rights Reserved. Panasonic Network Camera Website: http://www.panasonic.com/netcam for wall mounting the...
Installation Guide
Page 2
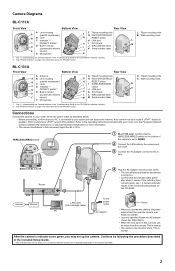
...camera's indicator turns green, you operate the camera, the power outlet should be heard from the camera. Continue by default.) Refer to the Panasonic Network Camera website (http://panasonic.co.jp/pcc/products/en/netwkcam/) for more information. • The camera illustrations in the Troubleshooting Guide... Understanding the Camera Indicator in the Troubleshooting Guide on the CD-ROM for indicator meaning. *2 See "PRIVACY Button" on the CD-ROM. L Tripod mounting hole M Wall mounting holes L M BL-C131A Front View Bottom View A Antenna A B Lens housing B (pan/tilt mechanism)...
...camera's indicator turns green, you operate the camera, the power outlet should be heard from the camera. Continue by default.) Refer to the Panasonic Network Camera website (http://panasonic.co.jp/pcc/products/en/netwkcam/) for more information. • The camera illustrations in the Troubleshooting Guide... Understanding the Camera Indicator in the Troubleshooting Guide on the CD-ROM for indicator meaning. *2 See "PRIVACY Button" on the CD-ROM. L Tripod mounting hole M Wall mounting holes L M BL-C131A Front View Bottom View A Antenna A B Lens housing B (pan/tilt mechanism)...
