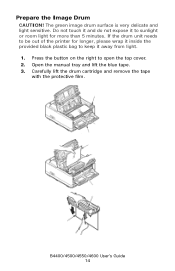
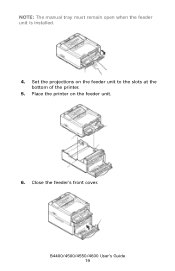
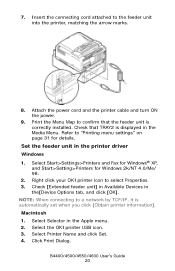
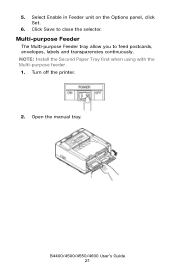
Oki Data B4600 Printers
Related Manual Pages


Similar Questions


How To Purge Memory On Okib420dn Printer
Please advise how to purge the memory on the OKI B420DN -- as printer is showing a memory overload.
Please advise how to purge the memory on the OKI B420DN -- as printer is showing a memory overload.
(Posted by jillsphillips 10 years ago)

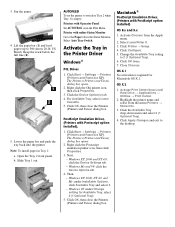
Oki Printer Manual B4600
printer says "change cartridge" when the cartridge is still 1/2 full. I have to take cartridge out a...
printer says "change cartridge" when the cartridge is still 1/2 full. I have to take cartridge out a...
(Posted by doughenry 10 years ago)
Why Does The Oki B4600 Printer Leave Streaks
It is a black streak on top of the page
It is a black streak on top of the page
(Posted by Anonymous-125875 10 years ago)
Printer Printing Lightly
We just bought a new toner for our OKI b410d and replaced the old cartridge, but the printer is prin...
We just bought a new toner for our OKI b410d and replaced the old cartridge, but the printer is prin...
(Posted by megtravis 11 years ago)