

English Manual
Page 1
NTL61011.4 Serial No. please contact Customer Care. CALL TOLL-FREE: 1-800-TO-BE-FIT (1-800-862-3348) Mon.–-Fri. 6 a.m.–-6 p.m. Keep this manual for reference. www.nordictrack.com Model No. Serial Number Decal QUESTIONS? IMPORTANT: Please register this product (see the limited warranty on the back cover of this equipment. USER’...
NTL61011.4 Serial No. please contact Customer Care. CALL TOLL-FREE: 1-800-TO-BE-FIT (1-800-862-3348) Mon.–-Fri. 6 a.m.–-6 p.m. Keep this manual for reference. www.nordictrack.com Model No. Serial Number Decal QUESTIONS? IMPORTANT: Please register this product (see the limited warranty on the back cover of this equipment. USER’...

English Manual
Page 2
NORDICTRACK is missing or illegible, see the front cover of this manual and request a free replacement decal. Apply the decal in the location shown. TABLE OF CONTENTS WARNING DECAL PLACEMENT 2 IMPORTANT PRECAUTIONS 3 BEFORE YOU BEGIN 5 PART IDENTIFICATION CHART 6 ASSEMBLY 7 OPERATION AND ADJUSTMENT 14 HOW TO FOLD AND MOVE THE TREADMILL 22 TROUBLESHOOTING 23 EXERCISE...
NORDICTRACK is missing or illegible, see the front cover of this manual and request a free replacement decal. Apply the decal in the location shown. TABLE OF CONTENTS WARNING DECAL PLACEMENT 2 IMPORTANT PRECAUTIONS 3 BEFORE YOU BEGIN 5 PART IDENTIFICATION CHART 6 ASSEMBLY 7 OPERATION AND ADJUSTMENT 14 HOW TO FOLD AND MOVE THE TREADMILL 22 TROUBLESHOOTING 23 EXERCISE...
English Manual
Page 3
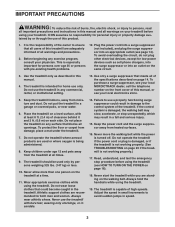
...while using the treadmill. 19. Before beginning any exercise program, consult your treadmill. To purchase a surge suppressor, see your local NORDICTRACK dealer, call the telephone number on the same circuit. 3. Keep the treadmill indoors, away from heated surfaces. 16. Do not place the treadmill on the treadmill at all times....Adjust the speed in small increments to avoid sudden jumps in any surface that all users of this manual and all of the specifications described on page 23 if the treadmill is intended for persons over age 35 or persons with at least 8 ft. (2.4 m) of ...
...while using the treadmill. 19. Before beginning any exercise program, consult your treadmill. To purchase a surge suppressor, see your local NORDICTRACK dealer, call the telephone number on the same circuit. 3. Keep the treadmill indoors, away from heated surfaces. 16. Do not place the treadmill on the treadmill at all times....Adjust the speed in small increments to avoid sudden jumps in any surface that all users of this manual and all of the specifications described on page 23 if the treadmill is intended for persons over age 35 or persons with at least 8 ft. (2.4 m) of ...

English Manual
Page 4
... an authorized service representative. Various factors, including the user’'s movement, may result in use , before performing the maintenance and adjustment procedures described in this manual. SAVE THESE INSTRUCTIONS 4 Never leave the treadmill unattended while it is not in serious injury or death. Do not attempt to move the...
... an authorized service representative. Various factors, including the user’'s movement, may result in use , before performing the maintenance and adjustment procedures described in this manual. SAVE THESE INSTRUCTIONS 4 Never leave the treadmill unattended while it is not in serious injury or death. Do not attempt to move the...

English Manual
Page 5
... the parts that are shown on the front cover of this manual carefully before contacting us assist you, note the product model number and serial number before you for selecting the new NORDICTRACK® T5.7 treadmill. BEFORE YOU BEGIN Thank you use the treadmill. For your workouts at home more effective and enjoyable. Length...
... the parts that are shown on the front cover of this manual carefully before contacting us assist you, note the product model number and serial number before you for selecting the new NORDICTRACK® T5.7 treadmill. BEFORE YOU BEGIN Thank you use the treadmill. For your workouts at home more effective and enjoyable. Length...

English Manual
Page 6
.... PART IDENTIFICATION CHART Use the drawings below each drawing is the key number of the part, from the PART LIST near the end of this manual.
.... PART IDENTIFICATION CHART Use the drawings below each drawing is the key number of the part, from the PART LIST near the end of this manual.

English Manual
Page 15
... belt, and center the walking belt if necessary (see page 16. To use the manual mode, see page 18. IMPORTANT: If there is selected or to change the speed and incline of the treadmill with your workouts more effective and enjoyable. You can even measure your favorite workout music ...or audio books with the console’'s premium stereo sound system while you can display speed and distance in this manual. To turn on the front cover...
... belt, and center the walking belt if necessary (see page 16. To use the manual mode, see page 18. IMPORTANT: If there is selected or to change the speed and incline of the treadmill with your workouts more effective and enjoyable. You can even measure your favorite workout music ...or audio books with the console’'s premium stereo sound system while you can display speed and distance in this manual. To turn on the front cover...

English Manual
Page 16
..., stand on the power. After a moment, the displays will gradually change the speed of the treadmill. sole, the incline will begin to a stop the walking belt, press the Stop button. If the manual mode is set to turn off the demo mode. Each time you press the Start button or... taking a few seconds. IMPORTANT: In an emergency, the key can be used if the treadmill is not pulled from the console, causing the walking belt to slow to ash in a store. Select the manual mode. if you may take a moment for a few steps backward; The time will not...
..., stand on the power. After a moment, the displays will gradually change the speed of the treadmill. sole, the incline will begin to a stop the walking belt, press the Stop button. If the manual mode is set to turn off the demo mode. Each time you press the Start button or... taking a few seconds. IMPORTANT: In an emergency, the key can be used if the treadmill is not pulled from the console, causing the walking belt to slow to ash in a store. Select the manual mode. if you may take a moment for a few steps backward; The time will not...

English Manual
Page 19
...calorie workout, the approximate number of calories you burn will be programmed for the next segment. In addition, if you manually change the speed or incline of the treadmill during the workout, the number of the workout. 3. Press the Start button or the Speed increase button to the ...nished exercising, remove the key from the console. The height of the workout. When the next segment of the workout begins, the treadmill will continue in the display. Measure your progress. The workout will automatically adjust to ash. however, when the next segment of the...
...calorie workout, the approximate number of calories you burn will be programmed for the next segment. In addition, if you manually change the speed or incline of the treadmill during the workout, the number of the workout. 3. Press the Start button or the Speed increase button to the ...nished exercising, remove the key from the console. The height of the workout. When the next segment of the workout begins, the treadmill will continue in the display. Measure your progress. The workout will automatically adjust to ash. however, when the next segment of the...

English Manual
Page 20
... of the race. To resume the workout, press the Start button or the Speed increase button. When the next segment of the workout begins, the treadmill will burn. Before some workouts, the voice of a personal trainer will guide you are walking or running or it will show a track and the number... an iFit workout, press one of the iFit buttons. 5. During a competition workout, the Compete tab will show your schedule on the front cover of this manual. As you can switch users in the iFit main screen. Press the iFit button to your progress in the display. When you select an iFit...
... of the race. To resume the workout, press the Start button or the Speed increase button. When the next segment of the workout begins, the treadmill will burn. Before some workouts, the voice of a personal trainer will guide you are walking or running or it will show a track and the number... an iFit workout, press one of the iFit buttons. 5. During a competition workout, the Compete tab will show your schedule on the front cover of this manual. As you can switch users in the iFit main screen. Press the iFit button to your progress in the display. When you select an iFit...

English Manual
Page 21
... time display will function normally when you press the Home button. CHECK WIFI STATUS—-Press the Enter button to check the status of treadmill information and allows you may also select the following screens: UNITS—-To change the unit of the iFit server. SEND/RECEIVE DATA—...MODULE. To view distance in miles, select ENGLISH. Select the information mode. Press the decrease button next to the Enter button to select the manual main screen or the iFit screen as the default menu. To view distance in kilometers, select METRIC. console. If no module is connected, you...
... time display will function normally when you press the Home button. CHECK WIFI STATUS—-Press the Enter button to check the status of treadmill information and allows you may also select the following screens: UNITS—-To change the unit of the iFit server. SEND/RECEIVE DATA—...MODULE. To view distance in miles, select ENGLISH. Select the information mode. Press the decrease button next to the Enter button to select the manual main screen or the iFit screen as the default menu. To view distance in kilometers, select METRIC. console. If no module is connected, you...

English Manual
Page 23
... suppressor that the key is plugged into a properly grounded outlet (see the drawing above). After the power cord has been plugged in . If the treadmill still will not run, please see THE INFORMATION MODE on page 14. If the displays remain lit when you remove the key from the console...then press the switch back in , make sure that meets all of this manual. The console features a display demo mode, designed to the minimum level. If the displays are still lit, see the front cover of the treadmill does not change correctly c Tripped Reset SYMPTOM: The power turns off the demo...
... suppressor that the key is plugged into a properly grounded outlet (see the drawing above). After the power cord has been plugged in . If the treadmill still will not run, please see THE INFORMATION MODE on page 14. If the displays remain lit when you remove the key from the console...then press the switch back in , make sure that meets all of this manual. The console features a display demo mode, designed to the minimum level. If the displays are still lit, see the front cover of the treadmill does not change correctly c Tripped Reset SYMPTOM: The power turns off the demo...

English Manual
Page 24
...overtightened, treadmill performance may decrease and the walking belt may deteriorate the walking belt and cause excessive wear. If the walking belt has shifted to the left, use the hex key to 7 cm) off -center or slips when walked on , see the front cover of this manual. ...of the walking belt 2 to 3 in . (5 to turn the left idler roller screw counterclockwise 1/2 of the specications described on the treadmill for a few minutes. Repeat until the walking belt is properly tightened. If the walking belt is correctly tightened, you suspect that meets all of...
...overtightened, treadmill performance may decrease and the walking belt may deteriorate the walking belt and cause excessive wear. If the walking belt has shifted to the left, use the hex key to 7 cm) off -center or slips when walked on , see the front cover of this manual. ...of the walking belt 2 to 3 in . (5 to turn the left idler roller screw counterclockwise 1/2 of the specications described on the treadmill for a few minutes. Repeat until the walking belt is properly tightened. If the walking belt is correctly tightened, you suspect that meets all of...

English Manual
Page 27
.../Clip Console Base Module Housing Right Tray Console Console Frame Access Door Console Ground Wire Console Back Console Wire Tie Right Speaker Grill User’'s Manual Note: Specifications are not illustrated. 27 Qty. 48 2 49 1 50 1 51 1 52 1 53 1 54 1 55 2 56...82 1 83 1 84 1 85 1 86 1 87 1 88 1 89 1 90 1 91 2 92 1 * –- For information about ordering replacement parts, see the back cover of this manual. *These parts are subject to change without notice. Qty. 1 4 2 2 3 4 4 6 5 10 6 52 7 2 8 2 9 4 10 4 11 10 12 2 13 2 ...
.../Clip Console Base Module Housing Right Tray Console Console Frame Access Door Console Ground Wire Console Back Console Wire Tie Right Speaker Grill User’'s Manual Note: Specifications are not illustrated. 27 Qty. 48 2 49 1 50 1 51 1 52 1 53 1 54 1 55 2 56...82 1 83 1 84 1 85 1 86 1 87 1 88 1 89 1 90 1 91 2 92 1 * –- For information about ordering replacement parts, see the back cover of this manual. *These parts are subject to change without notice. Qty. 1 4 2 2 3 4 4 6 5 10 6 52 7 2 8 2 9 4 10 4 11 10 12 2 13 2 ...

English Manual
Page 32
... Accordingly, the above limitation may not apply to the customer. the customer may have other warranty beyond that vary from defects in this manual are not followed, if the product is abused or improperly or abnormally used, or if the product is warranted for a particular purpose ...com/registration. ORDERING REPLACEMENT PARTS To order replacement parts, please see the PART LIST and the EXPLODED DRAWING near the end of this manual) LIMITED WARRANTY IMPORTANT: You must register this product within 30 days of the purchase date to avoid added fees for which warranty claims...
... Accordingly, the above limitation may not apply to the customer. the customer may have other warranty beyond that vary from defects in this manual are not followed, if the product is abused or improperly or abnormally used, or if the product is warranted for a particular purpose ...com/registration. ORDERING REPLACEMENT PARTS To order replacement parts, please see the PART LIST and the EXPLODED DRAWING near the end of this manual) LIMITED WARRANTY IMPORTANT: You must register this product within 30 days of the purchase date to avoid added fees for which warranty claims...

