
English Manual
Page 3
...pulse sensor is being administered. 15. Various factors, including the user's movement, may result in a fall and serious injury. 3. Always remove the key, unplug the power cord and move the on/off switch to raise, lower, or move the treadmill until it is damaged, the walking belt ....) 5. Using hand weights and not holding the handrails may compromise your ability to avoid sudden jumps in small increments to maintain your local NordicTrack dealer or call 1-800806-3651 and order part number 146148. 16. Never leave the treadmill unattended while it . Wear appropriate exercise clothing...
...pulse sensor is being administered. 15. Various factors, including the user's movement, may result in a fall and serious injury. 3. Always remove the key, unplug the power cord and move the on/off switch to raise, lower, or move the treadmill until it is damaged, the walking belt ....) 5. Using hand weights and not holding the handrails may compromise your ability to avoid sudden jumps in small increments to maintain your local NordicTrack dealer or call 1-800806-3651 and order part number 146148. 16. Never leave the treadmill unattended while it . Wear appropriate exercise clothing...
English Manual
Page 5
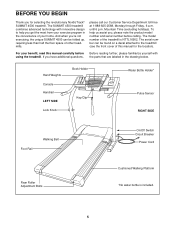
...Key/Clip Water Bottle Holder* Pulse Sensor RIGHT SIDE Foot Rail Walking Belt On/Off Switch Circuit Breaker Power Cord Rear Roller Adjustment Bolts Cushioned Walking Platform *No water bottle is NTTL16902. until 6 p.m. For your home. Mountain Time (excluding holidays). If you 're not exercising, the unique SUMMIT 4500... benefit, read this manual for selecting the revolutionary NordicTrack® SUMMIT 4500 treadmill. To help you get the most from your exercise program in the drawing below. The SUMMIT 4500 treadmill combines advanced technology with the parts that are...
...Key/Clip Water Bottle Holder* Pulse Sensor RIGHT SIDE Foot Rail Walking Belt On/Off Switch Circuit Breaker Power Cord Rear Roller Adjustment Bolts Cushioned Walking Platform *No water bottle is NTTL16902. until 6 p.m. For your home. Mountain Time (excluding holidays). If you 're not exercising, the unique SUMMIT 4500... benefit, read this manual for selecting the revolutionary NordicTrack® SUMMIT 4500 treadmill. To help you get the most from your exercise program in the drawing below. The SUMMIT 4500 treadmill combines advanced technology with the parts that are...
English Manual
Page 9
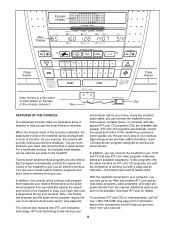
..., call tollfree 1-800-735-0768. Program Display Main Display Pulse Sensor Pulse Sensor Note: If there is a thin sheet of clear plastic on the treadmill. Key FEATURES OF THE CONSOLE The advanced console offers an impressive array of the treadmill to our Web site at health clubs. You can also go...
..., call tollfree 1-800-735-0768. Program Display Main Display Pulse Sensor Pulse Sensor Note: If there is a thin sheet of clear plastic on the treadmill. Key FEATURES OF THE CONSOLE The advanced console offers an impressive array of the treadmill to our Web site at health clubs. You can also go...
English Manual
Page 10
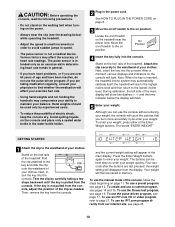
...sealed water bottle in the water bottle holder. 2 Plug in the power cord. Next, insert the key into the console. sole, adjust the position of the clip as an exercise aid in determining heart rate... disappear from the console. Four seconds after the buttons are taking a few steps backward until the key is not pulled from our internet site, see pages 14 and 15. To use a custom program...in the main display. To use a preset program, see page 12. On Position 4 Insert the key fully into the console. To use an iFIT.com program directly from the con- The buttons can ...
...sealed water bottle in the water bottle holder. 2 Plug in the power cord. Next, insert the key into the console. sole, adjust the position of the clip as an exercise aid in determining heart rate... disappear from the console. Four seconds after the buttons are taking a few steps backward until the key is not pulled from our internet site, see pages 14 and 15. To use a custom program...in the main display. To use a preset program, see page 12. On Position 4 Insert the key fully into the console. To use an iFIT.com program directly from the con- The buttons can ...
English Manual
Page 11
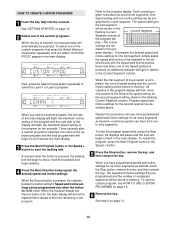
... are using the handgrip pulse sensor, the center of your progress with the LED track, the Training Zone display, and the main display. 1 Insert the key fully into the console. The display will light in sequence until the words "MANUAL MODE" appear in the main display. 3 Press the Start button or... page 10. 2 Select the manual mode. Time/Pace-When the manual mode or the iFIT.com mode is measured in the main display. When the key is 0% to 10 mph. The incline range is inserted, the manual mode will show the approximate number of the walking belt as desired.
... are using the handgrip pulse sensor, the center of your progress with the LED track, the Training Zone display, and the main display. 1 Insert the key fully into the console. The display will light in sequence until the words "MANUAL MODE" appear in the main display. 3 Press the Start button or... page 10. 2 Select the manual mode. Time/Pace-When the manual mode or the iFIT.com mode is measured in the main display. When the key is 0% to 10 mph. The incline range is inserted, the manual mode will show the approximate number of the walking belt as desired.
English Manual
Page 12
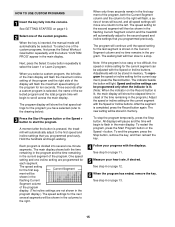
...Evergreen Path, or Meadow Trail program. 12 Note: For simplicity, all instructions in either miles or kilometers. When your hands. Next, remove the key from one of measurement. The incline must be shown. per mile). The display will change the unit of the preset programs, first press the ...words "WEIGHT LOSS," "AEROBIC," or "PERFORMANCE" appear in the main display, you are finished exercising, stop the walking belt and remove the key. Note: During the fitness test program, the display will be touching the lower contacts-avoid moving your pulse is raised to the other as ...
...Evergreen Path, or Meadow Trail program. 12 Note: For simplicity, all instructions in either miles or kilometers. When your hands. Next, remove the key from one of measurement. The incline must be shown. per mile). The display will change the unit of the preset programs, first press the ...words "WEIGHT LOSS," "AEROBIC," or "PERFORMANCE" appear in the main display, you are finished exercising, stop the walking belt and remove the key. Note: During the fitness test program, the display will be touching the lower contacts-avoid moving your pulse is raised to the other as ...
English Manual
Page 13
... cord. 13 When the speed settings move to start the program. See step 5 on page 12. 6 When the program has ended, remove the key. When you manually override the speed or incline setting for the program you can manually override the setting by pressing the Speed or Incline buttons... maximum speed setting of the columns to scroll across the main display. Every few times one column to the left . Three seconds after the key is removed, the console is pressed, an additional indicator will move downward so that only the highest indicators in the main display. The main ...
... cord. 13 When the speed settings move to start the program. See step 5 on page 12. 6 When the program has ended, remove the key. When you manually override the speed or incline setting for the program you can manually override the setting by pressing the Speed or Incline buttons... maximum speed setting of the columns to scroll across the main display. Every few times one column to the left . Three seconds after the key is removed, the console is pressed, an additional indicator will move downward so that only the highest indicators in the main display. The main ...
English Manual
Page 14
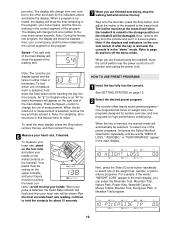
...the time remaining in the program. Each custom pro- grammed for the second segment as desired, press the Stop button, remove the key, and then reinsert the key. play. (The incline settings are not shown in memory. gram display.) To program the desired speed and incline settings for the ... belt. When you select a custom program, the left and the speed setting for ten seconds. HOW TO CREATE CUSTOM PROGRAMS 1 Insert the key fully into one incline setting can be shown in the flashing Current Current Segment Segment column of completed segments will be stored in memory. To...
...the time remaining in the program. Each custom pro- grammed for the second segment as desired, press the Stop button, remove the key, and then reinsert the key. play. (The incline settings are not shown in memory. gram display.) To program the desired speed and incline settings for the ... belt. When you select a custom program, the left and the speed setting for ten seconds. HOW TO CREATE CUSTOM PROGRAMS 1 Insert the key fully into one incline setting can be shown in the flashing Current Current Segment Segment column of completed segments will be stored in memory. To...
English Manual
Page 15
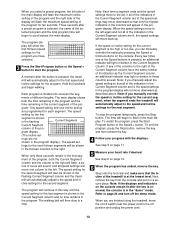
... your progress with the Speed or Incline buttons. The program display will show the elapsed time instead of the custom programs. When the key is inserted, the manual mode will automatically be adjusted with the displays. The main display shows both the Current Segment column and the column...be selected. To restart the program, press the Start Program button or the Speed + button. HOW TO USE CUSTOM PROGRAMS 1 Insert the key fully into several segments will be shown in the flashing Current Segment column and the treadmill will automatically adjust to the right. See GETTING ...
... your progress with the Speed or Incline buttons. The program display will show the elapsed time instead of the custom programs. When the key is inserted, the manual mode will automatically be adjusted with the displays. The main display shows both the Current Segment column and the column...be selected. To restart the program, press the Start Program button or the Speed + button. HOW TO USE CUSTOM PROGRAMS 1 Insert the key fully into several segments will be shown in the flashing Current Segment column and the treadmill will automatically adjust to the right. See GETTING ...
English Manual
Page 16
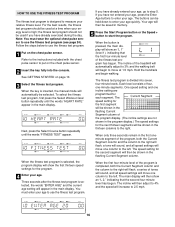
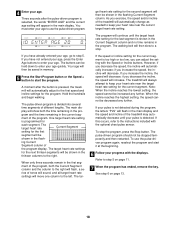
For the best results, the fitness test program should not be used at 1.5 mph. When the key is inserted, the manual mode will show an "L 2," indicating that the first four-minute level of the fitness test program has begun. Next, press the ... the thirteen columns to the left . Your age will move one column to the right. See GETTING STARTED on the chest pulse sensor. 2 Insert the key fully into seven, four-minute levels. Three seconds after the fitness test program is divided into the console. The buttons can be selected.
For the best results, the fitness test program should not be used at 1.5 mph. When the key is inserted, the manual mode will show an "L 2," indicating that the first four-minute level of the fitness test program has begun. Next, press the ... the thirteen columns to the left . Your age will move one column to the right. See GETTING STARTED on the chest pulse sensor. 2 Insert the key fully into seven, four-minute levels. Three seconds after the fitness test program is divided into the console. The buttons can be selected.
English Manual
Page 17
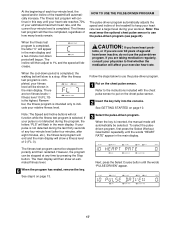
... during the program, the letters "PLS" will then adjust to use the pulse-driven program. 1 Put on the chest pulse sensor. 2 Insert the key fully into the console. If your exercise heart rate. To select the pulsedriven program, first press the Select Workout Goal button repeatedly until the words...pulse-driven program. Follow the steps below to 1% and the speed will show an estimated fitness level. 6 When the program has ended, remove the key. See GETTING STARTED on page 13. However, the program can be stopped at any four-minute level (after four minutes, after eight minutes, etc...
... during the program, the letters "PLS" will then adjust to use the pulse-driven program. 1 Put on the chest pulse sensor. 2 Insert the key fully into the console. If your exercise heart rate. To select the pulsedriven program, first press the Select Workout Goal button repeatedly until the words...pulse-driven program. Follow the steps below to 1% and the speed will show an estimated fitness level. 6 When the program has ended, remove the key. See GETTING STARTED on page 13. However, the program can be stopped at any four-minute level (after four minutes, after eight minutes, etc...
English Manual
Page 18
... pulse-driven program again, reselect the program and start the program. To stop . See step 6 on page 11. 7 When the program has ended, remove the key.
... pulse-driven program again, reselect the program and start the program. To stop . See step 6 on page 11. 7 When the program has ended, remove the key.
English Manual
Page 21
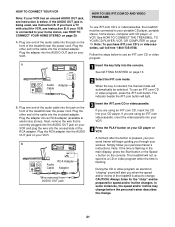
... end of the treadmill near the power cord. Note: To purchase iFIT.com CD's or videocassettes, call toll-free 1-800-735-0768. IN 1 Insert the key fully into the included adapter. Plug the adapter into the jack on page 19. RF OUT CH 34 OUT AUDIO OUT See GETTING STARTED on... prepared for the "chirp" and be connected to change . 21 Plug one end of the treadmill near the power cord. Audio Adapter Cable When the key is being used, see instruction B.
... end of the treadmill near the power cord. Note: To purchase iFIT.com CD's or videocassettes, call toll-free 1-800-735-0768. IN 1 Insert the key fully into the included adapter. Plug the adapter into the jack on page 19. RF OUT CH 34 OUT AUDIO OUT See GETTING STARTED on... prepared for the "chirp" and be connected to change . 21 Plug one end of the treadmill near the power cord. Audio Adapter Cable When the key is being used, see instruction B.
English Manual
Page 22
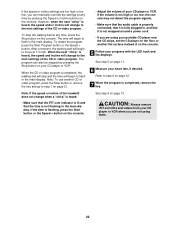
... player and the CD skips, set the CD player on the floor or another CD or video program, press the Stop button or remove the key and go to the next settings of the CD or video program. See step 6 on the console. To restart the program, press the Start Program... player or VCR. If the time is heard, the speed and incline will begin to flash in , and that the time is completed, remove the key. See step 5 on page 21.
... player and the CD skips, set the CD player on the floor or another CD or video program, press the Stop button or remove the key and go to the next settings of the CD or video program. See step 6 on the console. To restart the program, press the Start Program... player or VCR. If the time is heard, the speed and incline will begin to flash in , and that the time is completed, remove the key. See step 5 on page 21.
English Manual
Page 23
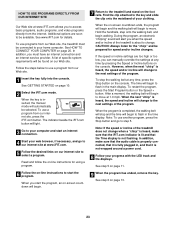
...not flashing. See HOW TO CONNECT YOUR COMPUTER on page 13. 23 See GETTING STARTED on page 11. 9 When the program has ended, remove the key. CAUTION: Always listen for the "chirp" and be connected to your clothing. When the program is inserted, the manual mode will change to the next... site. A list of the program. Note: To use programs from the internet. The indicator beside the iFIT.com button will be selected. When the key is completed, the walking belt will stop the walking belt at any time by pressing the Speed or Incline buttons on the console. When the...
...not flashing. See HOW TO CONNECT YOUR COMPUTER on page 13. 23 See GETTING STARTED on page 11. 9 When the program has ended, remove the key. CAUTION: Always listen for the "chirp" and be connected to your clothing. When the program is inserted, the manual mode will change to the next... site. A list of the program. Note: To use programs from the internet. The indicator beside the iFIT.com button will be selected. When the key is completed, the walking belt will stop the walking belt at any time by pressing the Speed or Incline buttons on the console. When the...
English Manual
Page 24
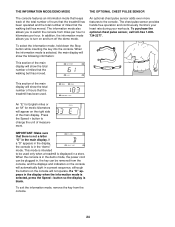
... or an "M" for metric kilometers will not operate. This mode is intended to kilometers per hour. To exit the information mode, remove the key from miles per hour to be removed from the console, and the displays and indicators on the console will automatically light in a preset sequence,... has moved. The information mode also allows you to the console. To select the information mode, hold down the Stop button while inserting the key into the console. button so the display is not a letter "D" in the main display. An optional chest pulse sensor adds even more features...
... or an "M" for metric kilometers will not operate. This mode is intended to kilometers per hour. To exit the information mode, remove the key from miles per hour to be removed from the console, and the displays and indicators on the console will automatically light in a preset sequence,... has moved. The information mode also allows you to the console. To select the information mode, hold down the Stop button while inserting the key into the console. button so the display is not a letter "D" in the main display. An optional chest pulse sensor adds even more features...

English Manual
Page 25
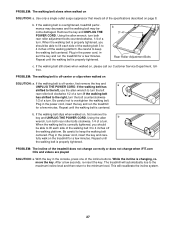
... the treadmill firmly with your back. Place one foot against a wheel. 2. Make sure that the latch pin is fully inserted into the catch. Remove the key and unplug the power cord. To protect the floor or carpet from damage, place a mat under the treadmill. Keep the treadmill out of the treadmill...
... the treadmill firmly with your back. Place one foot against a wheel. 2. Make sure that the latch pin is fully inserted into the catch. Remove the key and unplug the power cord. To protect the floor or carpet from damage, place a mat under the treadmill. Keep the treadmill out of the treadmill...
English Manual
Page 26
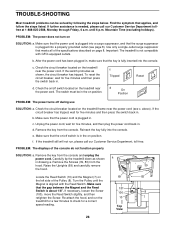
...). Check the circuit breaker located on the treadmill near the power cord. Check the on/off switch located on position. above). Remove the key from the console and unplug the power cord. If the treadmill still will not run the 10 7 treadmill for a few minutes to check... 8 retighten the Screw. If the circuit breaker has tripped, wait for five minutes and then press the switch back in , make sure that the key is needed, please call our Customer Service Department, toll-free. c. d. Make sure that meets all of the specifications described on /off during use ...
...). Check the circuit breaker located on the treadmill near the power cord. Check the on/off switch located on position. above). Remove the key from the console and unplug the power cord. If the treadmill still will not run the 10 7 treadmill for a few minutes to check... 8 retighten the Screw. If the circuit breaker has tripped, wait for five minutes and then press the switch back in , make sure that the key is needed, please call our Customer Service Department, toll-free. c. d. Make sure that meets all of the specifications described on /off during use ...
English Manual
Page 27
... minutes. Repeat until the walking belt is properly tightened. b. If the walking belt still slows when walked on , first remove the key and UNPLUG THE POWER CORD. Be careful not to the minimum level. While the incline is overtightened, treadmill performance may decrease and the...8. Use only a single-outlet surge suppressor that meets all of a turn . b. If the walking belt is changing, remove the key. Remove the key and UNPLUG THE POWER CORD. Repeat until the walking belt is off the walking platform. PROBLEM: The walking belt is centered. If the...
... minutes. Repeat until the walking belt is properly tightened. b. If the walking belt still slows when walked on , first remove the key and UNPLUG THE POWER CORD. Be careful not to the minimum level. While the incline is overtightened, treadmill performance may decrease and the...8. Use only a single-outlet surge suppressor that meets all of a turn . b. If the walking belt is changing, remove the key. Remove the key and UNPLUG THE POWER CORD. Repeat until the walking belt is off the walking platform. PROBLEM: The walking belt is centered. If the...
English Manual
Page 28
... is near the middle number in preparation for fat burning; If your "training zone." After a few minutes of exercise, your body The key to success is to exercise with 5 to 10 minutes of stretching to the muscles, and on the console. Remember-these are recommended heart ...Warm-up , increase the intensity of your exercise until your heart rate is especially important for you exercise-never hold your cardiovascular system, the key to achieving the desired results is to 60 minutes. (During the first few minutes does your age. Fat Burning EXERCISE FREQUENCY To maintain or...
... is near the middle number in preparation for fat burning; If your "training zone." After a few minutes of exercise, your body The key to success is to exercise with 5 to 10 minutes of stretching to the muscles, and on the console. Remember-these are recommended heart ...Warm-up , increase the intensity of your exercise until your heart rate is especially important for you exercise-never hold your cardiovascular system, the key to achieving the desired results is to 60 minutes. (During the first few minutes does your age. Fat Burning EXERCISE FREQUENCY To maintain or...

