Product Manual
Page 2
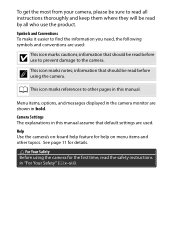
...-board help feature for help on menu items and other pages in this manual assume that should be read before using the camera for details. information that should be read before use the product. Symbols and Conventions To make it easier to other topics. See...will be read the safety instructions in bold. information that default settings are used : D This icon marks cautions; A For Your Safety Before using the camera. 0 This icon marks references to find the information you need, the following symbols and conventions are shown in "For Your Safety" (0 x-xiii). Menu ...
...-board help feature for help on menu items and other pages in this manual assume that should be read before using the camera for details. information that should be read before use the product. Symbols and Conventions To make it easier to other topics. See...will be read the safety instructions in bold. information that default settings are used : D This icon marks cautions; A For Your Safety Before using the camera. 0 This icon marks references to find the information you need, the following symbols and conventions are shown in "For Your Safety" (0 x-xiii). Menu ...

Product Manual
Page 3
Table of Contents For Your Safety x Notices xiv Introduction 1 Getting to Know the Camera 1 The Camera Body 1 The Mode Dial 4 The Viewfinder 6 The Information Display 7 Camera Menus: An Overview 10 First Steps 14 "Point-and-Shoot" Modes (i and j) 25 Framing Photos in the Viewfinder 26 Viewing Photographs 29 Deleting Unwanted Pictures 30 Framing Photos in the Monitor 32 Viewing Photographs 35 Deleting Unwanted Pictures 36 Recording Movies 37 Viewing Movies 39 Deleting Unwanted Movies 40 Guide Mode 41 The Guide 41 Guide Mode Menus 42 Using the Guide 45 i
Table of Contents For Your Safety x Notices xiv Introduction 1 Getting to Know the Camera 1 The Camera Body 1 The Mode Dial 4 The Viewfinder 6 The Information Display 7 Camera Menus: An Overview 10 First Steps 14 "Point-and-Shoot" Modes (i and j) 25 Framing Photos in the Viewfinder 26 Viewing Photographs 29 Deleting Unwanted Pictures 30 Framing Photos in the Monitor 32 Viewing Photographs 35 Deleting Unwanted Pictures 36 Recording Movies 37 Viewing Movies 39 Deleting Unwanted Movies 40 Guide Mode 41 The Guide 41 Guide Mode Menus 42 Using the Guide 45 i

Product Manual
Page 4
Matching Settings to the Subject or Situation (Scene Mode) 47 k Portrait 47 l Landscape 47 p Child 48 m Sports 48 n Close up 48 o Night Portrait 49 Special Effects 50 % Night Vision 51 S Super Vivid 51 T Pop 51 U Photo Illustration 52 g Color Sketch 52 ' Toy Camera Effect 52 ( Miniature Effect 53 3 Selective Color 53 1 Silhouette 54 2 High Key 54 3 Low Key 54 ) HDR Painting 55 I Easy Panorama 55 Options Available in Live View 56 I Easy Panorama 63 ii
Matching Settings to the Subject or Situation (Scene Mode) 47 k Portrait 47 l Landscape 47 p Child 48 m Sports 48 n Close up 48 o Night Portrait 49 Special Effects 50 % Night Vision 51 S Super Vivid 51 T Pop 51 U Photo Illustration 52 g Color Sketch 52 ' Toy Camera Effect 52 ( Miniature Effect 53 3 Selective Color 53 1 Silhouette 54 2 High Key 54 3 Low Key 54 ) HDR Painting 55 I Easy Panorama 55 Options Available in Live View 56 I Easy Panorama 63 ii

Product Manual
Page 5
More on Photography 67 Choosing a Release Mode 67 Continuous Shooting (Burst Mode 68 Quiet Shutter Release 70 Self-Timer Mode 71 Focus (Viewfinder Photography 74 Choosing How the Camera Focuses: Focus Mode 74 Choosing How the Focus Point Is Selected: AF-Area Mode 78 Focus Point Selection 80 Focus Lock 81 Manual Focus 83 Image Quality and Size 85 Image Quality 85 Image Size 87 Using the Built-in Flash 89 Auto Pop-up Modes 89 Manual Pop-up Modes 91 ISO Sensitivity 95 Remote Control Photography 97 Using an Optional ML-L3 Remote Control 97 iii
More on Photography 67 Choosing a Release Mode 67 Continuous Shooting (Burst Mode 68 Quiet Shutter Release 70 Self-Timer Mode 71 Focus (Viewfinder Photography 74 Choosing How the Camera Focuses: Focus Mode 74 Choosing How the Focus Point Is Selected: AF-Area Mode 78 Focus Point Selection 80 Focus Lock 81 Manual Focus 83 Image Quality and Size 85 Image Quality 85 Image Size 87 Using the Built-in Flash 89 Auto Pop-up Modes 89 Manual Pop-up Modes 91 ISO Sensitivity 95 Remote Control Photography 97 Using an Optional ML-L3 Remote Control 97 iii

Product Manual
Page 8
... 209 Printing Multiple Pictures 211 Creating a DPOF Print Order: Print Set 213 Viewing Pictures on TV 215 Standard Definition Devices 215 High-Definition Devices 217 Camera Menus 219 D The Playback Menu: Managing Images 219 Playback Folder 220 Playback Display Options 220 Image Review 221 Rotate Tall 221 C The Shooting Menu: Shooting...
... 209 Printing Multiple Pictures 211 Creating a DPOF Print Order: Print Set 213 Viewing Pictures on TV 215 Standard Definition Devices 215 High-Definition Devices 217 Camera Menus 219 D The Playback Menu: Managing Images 219 Playback Folder 220 Playback Display Options 220 Image Review 221 Rotate Tall 221 C The Shooting Menu: Shooting...

Product Manual
Page 9
B The Setup Menu: Camera Setup 231 Reset Setup Options 233 Format Memory Card 234 Monitor Brightness 235 Info Display Format 236 Auto Info Display 238 Image Dust Off Ref ...
B The Setup Menu: Camera Setup 231 Reset Setup Options 233 Format Memory Card 234 Monitor Brightness 235 Info Display Format 236 Auto Info Display 238 Image Dust Off Ref ...

Product Manual
Page 11
... 306 Approved Memory Cards 310 Attaching a Power Connector and AC Adapter 311 Caring for the Camera 313 Storage 313 Cleaning 313 Image Sensor Cleaning 314 Caring for the Camera and Battery: Cautions 321 Caring for the Camera 321 Caring for the Battery 324 Available Settings 326 Troubleshooting 329 Battery/Display 329 Shooting (All...
... 306 Approved Memory Cards 310 Attaching a Power Connector and AC Adapter 311 Caring for the Camera 313 Storage 313 Cleaning 313 Image Sensor Cleaning 314 Caring for the Camera and Battery: Cautions 321 Caring for the Camera 321 Caring for the Battery 324 Available Settings 326 Troubleshooting 329 Battery/Display 329 Shooting (All...

Product Manual
Page 12
The consequences that small parts constitute a choking hazard. Should you notice smoke or an Sunlight focused into the camera unusual smell coming from the when the sun is in or close to the equipment or AC adapter (available frame...operating the viewfinder inspection. this equipment. x After removing the battery, cause permanent visual impairment. For Your Safety To prevent damage to your Nikon product or injury to yourself or to avoid burns. Keep these safety instructions where all warnings before using this equipment, consult a physician immediately....
The consequences that small parts constitute a choking hazard. Should you notice smoke or an Sunlight focused into the camera unusual smell coming from the when the sun is in or close to the equipment or AC adapter (available frame...operating the viewfinder inspection. this equipment. x After removing the battery, cause permanent visual impairment. For Your Safety To prevent damage to your Nikon product or injury to yourself or to avoid burns. Keep these safety instructions where all warnings before using this equipment, consult a physician immediately....

Product Manual
Page 13
...contact with liquid crystal an infant or child Should the monitor break, care Placing the camera strap around the should be taken to avoid injury due to neck of an infant or child could ...result broken glass and to a Nikon-authorized service center be no accident, remove the battery and/or less than one meter (3 ft 4...cause damage or fire. crystal from AC adapter and then take the product the subject. camera, battery, or charger for inspection. ADo not disassemble AObserve caution when using the flash Touching the product's internal...
...contact with liquid crystal an infant or child Should the monitor break, care Placing the camera strap around the should be taken to avoid injury due to neck of an infant or child could ...result broken glass and to a Nikon-authorized service center be no accident, remove the battery and/or less than one meter (3 ft 4...cause damage or fire. crystal from AC adapter and then take the product the subject. camera, battery, or charger for inspection. ADo not disassemble AObserve caution when using the flash Touching the product's internal...

Product Manual
Page 14
... the battery to -AC inverters. this product: handling the charger • Use only batteries approved for an extended period. Before removing the battery turn the camera off before • Do not short the charger terminals. AObserve proper precautions when • Discontinue use immediately handling batteries should be hot immediately after use...
... the battery to -AC inverters. this product: handling the charger • Use only batteries approved for an extended period. Before removing the battery turn the camera off before • Do not short the charger terminals. AObserve proper precautions when • Discontinue use immediately handling batteries should be hot immediately after use...

Product Manual
Page 15
...CDROMs on audio CD equipment. In medical facilities, follow staff instructions regarding the use only the cables This camera transmits radio provided or sold by Nikon for the frequencies that could cause hearing loss or damage the equipment. Disable the wireless ACD-ROMs CD-ROMs...could interfere with medical equipment or aircraft product regulations. network feature and remove all wireless accessories from the camera before boarding an aircraft, and turn the camera off during take off and landing. xiii AUse appropriate cables AFollow the directions of airline and When ...
...CDROMs on audio CD equipment. In medical facilities, follow staff instructions regarding the use only the cables This camera transmits radio provided or sold by Nikon for the frequencies that could cause hearing loss or damage the equipment. Disable the wireless ACD-ROMs CD-ROMs...could interfere with medical equipment or aircraft product regulations. network feature and remove all wireless accessories from the camera before boarding an aircraft, and turn the camera off during take off and landing. xiii AUse appropriate cables AFollow the directions of airline and When ...

Product Manual
Page 18
... of paper money, coins, or securities which are circulated in possession of material that has been digitally copied or reproduced by means of a scanner, digital camera, or other device may be provided for business use this product for the purpose of necessary copies are stamped "Sample." coupon tickets, except when a minimum...
... of paper money, coins, or securities which are circulated in possession of material that has been digitally copied or reproduced by means of a scanner, digital camera, or other device may be provided for business use this product for the purpose of necessary copies are stamped "Sample." coupon tickets, except when a minimum...
Product Manual
Page 19
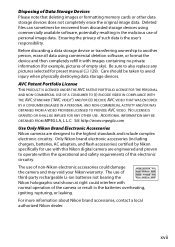
...data storage devices does not completely erase the original image data. The use of the camera or result in the malicious use of non-Nikon electronic accessories could interfere with this Nikon digital camera are designed to avoid injury when physically destroying data storage devices. xvii Disposing of such... ACTIVITY AND/OR WAS OBTAINED FROM A VIDEO PROVIDER LICENSED TO PROVIDE AVC VIDEO. SEE http://www.mpegla.com Use Only Nikon Brand Electronic Accessories Nikon cameras are engineered and proven to operate within the operational and safety requirements of empty sky).
...data storage devices does not completely erase the original image data. The use of the camera or result in the malicious use of non-Nikon electronic accessories could interfere with this Nikon digital camera are designed to avoid injury when physically destroying data storage devices. xvii Disposing of such... ACTIVITY AND/OR WAS OBTAINED FROM A VIDEO PROVIDER LICENSED TO PROVIDE AVC VIDEO. SEE http://www.mpegla.com Use Only Nikon Brand Electronic Accessories Nikon cameras are engineered and proven to operate within the operational and safety requirements of empty sky).
Product Manual
Page 20
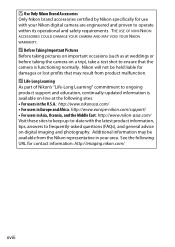
... damages or lost profits that the camera is available on-line at weddings or before taking pictures on important occasions (such as at the following URL for contact information: http://imaging.nikon.com/ xviii A Life-Long Learning As part of Nikon's "Life-Long Learning" commitment to... tips, answers to frequently-asked questions (FAQs), and general advice on digital imaging and photography. THE USE OF NON-NIKON ACCESSORIES COULD DAMAGE YOUR CAMERA AND MAY VOID YOUR NIKON WARRANTY. See the following sites: • For users in the U.S.A.: http://www.nikonusa.com/ • For users...
... damages or lost profits that the camera is available on-line at weddings or before taking pictures on important occasions (such as at the following URL for contact information: http://imaging.nikon.com/ xviii A Life-Long Learning As part of Nikon's "Life-Long Learning" commitment to... tips, answers to frequently-asked questions (FAQs), and general advice on digital imaging and photography. THE USE OF NON-NIKON ACCESSORIES COULD DAMAGE YOUR CAMERA AND MAY VOID YOUR NIKON WARRANTY. See the following sites: • For users in the U.S.A.: http://www.nikonusa.com/ • For users...

Product Manual
Page 21
... may find it helpful to bookmark this section and refer to observe this precaution could affect the data recorded on the magnetic devices. Introduction 1 The Camera Body 1 Movie-record button .......... 38, 156 8 Command dial 2 Power switch 17 9 Mode dial 4 3 Shutter-release button...........27, 28 10 ...184, 252 4 E/N button 109, 118, 120 11 Accessory shoe (for optional flash 5 R (information) button...........7, 150 units 299 6 Eyelets for camera strap 14 12 Infrared receiver for ML-L3 remote 7 Speaker control (rear 98 13 Focal plane mark (E 84 D The Speaker Do not place the...
... may find it helpful to bookmark this section and refer to observe this precaution could affect the data recorded on the magnetic devices. Introduction 1 The Camera Body 1 Movie-record button .......... 38, 156 8 Command dial 2 Power switch 17 9 Mode dial 4 3 Shutter-release button...........27, 28 10 ...184, 252 4 E/N button 109, 118, 120 11 Accessory shoe (for optional flash 5 R (information) button...........7, 150 units 299 6 Eyelets for camera strap 14 12 Infrared receiver for ML-L3 remote 7 Speaker control (rear 98 13 Focal plane mark (E 84 D The Speaker Do not place the...

Product Manual
Page 24
The Mode Dial The camera offers a choice of the following shooting modes and g mode: P, S, A, and M Modes Select these modes for full control over camera settings. • P-Programmed auto (0 102) • S -Shutter-priority auto (0 104) • A-Aperture-priority auto (0 106) • M-Manual (0 108) g Mode (0 41) Take, view, and edit pictures and adjust settings with the help of an on-screen guide. Auto Modes Select these modes for simple, point-and-shoot photography. • i Auto (0 25) • j Auto (flash off) (0 25) 4 Introduction
The Mode Dial The camera offers a choice of the following shooting modes and g mode: P, S, A, and M Modes Select these modes for full control over camera settings. • P-Programmed auto (0 102) • S -Shutter-priority auto (0 104) • A-Aperture-priority auto (0 106) • M-Manual (0 108) g Mode (0 41) Take, view, and edit pictures and adjust settings with the help of an on-screen guide. Auto Modes Select these modes for simple, point-and-shoot photography. • i Auto (0 25) • j Auto (flash off) (0 25) 4 Introduction

Product Manual
Page 25
... (0 52, 56) • 3 Low key (0 54) • g Color sketch (0 52, 57) • ) HDR painting (0 55) • ' Toy camera effect (0 52, 58) • I Easy panorama (0 55, 63) • ( Miniature effect (0 53, 59) Scene Modes The camera automatically optimizes settings to the scene being photographed. • k Portrait (0 47) • m Sports (0 48) • l Landscape (0 47...
... (0 52, 56) • 3 Low key (0 54) • g Color sketch (0 52, 57) • ) HDR painting (0 55) • ' Toy camera effect (0 52, 58) • I Easy panorama (0 55, 63) • ( Miniature effect (0 53, 59) Scene Modes The camera automatically optimizes settings to the scene being photographed. • k Portrait (0 47) • m Sports (0 48) • l Landscape (0 47...

Product Manual
Page 30
To view the menus, press the G button. Help icon (0 11) Menu options Options in current menu. 10 Introduction Camera Menus: An Overview Most shooting, playback, and setup options can be accessed from the following menus: • D: Playback (0 219) • C: Shooting (0 222) • B: Setup (0 231) G button • N: Retouch (0 263) • m: Recent settings (0 288) Current settings are shown by icons. Tabs Choose from the camera menus.
To view the menus, press the G button. Help icon (0 11) Menu options Options in current menu. 10 Introduction Camera Menus: An Overview Most shooting, playback, and setup options can be accessed from the following menus: • D: Playback (0 219) • C: Shooting (0 222) • B: Setup (0 231) G button • N: Retouch (0 263) • m: Recent settings (0 288) Current settings are shown by icons. Tabs Choose from the camera menus.

Product Manual
Page 31
... The multi selector and J button are used to display the menus. Press the G button to navigate the camera menus. G button A The d (Help) Icon If a d icon is pressed. Move cursor up J button: select highlighted item Cancel and return to previous menu Select highlighted item ...
... The multi selector and J button are used to display the menus. Press the G button to navigate the camera menus. G button A The d (Help) Icon If a d icon is pressed. Move cursor up J button: select highlighted item Cancel and return to previous menu Select highlighted item ...

Product Manual
Page 34
If a plug adapter is supplied, raise the wall plug and connect the plug adapter as shown. Insert the battery and plug the charger in about an hour and 50 minutes. Battery charging Charging complete 14 Introduction An exhausted battery will fully charge in . Attach the strap as shown below at left, making sure the plug is fully inserted. First Steps Always turn the camera off before inserting or removing batteries or memory cards. 1 Attach the strap. Repeat for the second eyelet. 2 Charge the battery.
If a plug adapter is supplied, raise the wall plug and connect the plug adapter as shown. Insert the battery and plug the charger in about an hour and 50 minutes. Battery charging Charging complete 14 Introduction An exhausted battery will fully charge in . Attach the strap as shown below at left, making sure the plug is fully inserted. First Steps Always turn the camera off before inserting or removing batteries or memory cards. 1 Attach the strap. Repeat for the second eyelet. 2 Charge the battery.


