
WNAP210 Reference Manual
Page 9
... lit on the wireless access point 5-1 The Wireless LAN activity light does not light up 5-2 The LAN light is not lit ...5-2 I cannot access the Internet or the LAN with a wireless capable computer 5-2 I cannot connect to the WNAP210 to configure lit 5-3 When I enter a URL or IP address I get a timeout error 5-3 Using the Reset Button to Restore Factory Default Settings 5-4 ix v1...
... lit on the wireless access point 5-1 The Wireless LAN activity light does not light up 5-2 The LAN light is not lit ...5-2 I cannot access the Internet or the LAN with a wireless capable computer 5-2 I cannot connect to the WNAP210 to configure lit 5-3 When I enter a URL or IP address I get a timeout error 5-3 Using the Reset Button to Restore Factory Default Settings 5-4 ix v1...

WNAP210 Reference Manual
Page 69
ProSafe Wireless-N Access Point WNAP210 Reference Manual The Web browser used to upload new firmware into the WNAP210 must support HTTP uploads, such as shown in a configuration file. Click Browse and browse to save it to factory default settings. Managing the Configuration File The WNAP210 Wireless Access Point settings are stored in the wireless access point in Figure 3-4. 3. Management 3-5 v1.0 March 2009 The upgrade process typically...
ProSafe Wireless-N Access Point WNAP210 Reference Manual The Web browser used to upload new firmware into the WNAP210 must support HTTP uploads, such as shown in a configuration file. Click Browse and browse to save it to factory default settings. Managing the Configuration File The WNAP210 Wireless Access Point settings are stored in the wireless access point in Figure 3-4. 3. Management 3-5 v1.0 March 2009 The upgrade process typically...

WNAP210 Reference Manual
Page 70
...file on your settings from the wireless access point and prompt you for Restore to locate the file. 4. Select Maintenance > Upgrade > Backup Settings to back up your computer or click the Browse button to factory default settings and then Apply. This ... to select a file where you have previously saved configuration settings. 3. Select Maintenance > Reset > Restore Defaults to upload the file. When you have located the file, click Restore to restore your settings: 1. ProSafe Wireless-N Access Point WNAP210 Reference Manual Saving the Configuration To save your settings.
...file on your settings from the wireless access point and prompt you for Restore to locate the file. 4. Select Maintenance > Upgrade > Backup Settings to back up your computer or click the Browse button to factory default settings and then Apply. This ... to select a file where you have previously saved configuration settings. 3. Select Maintenance > Reset > Restore Defaults to upload the file. When you have located the file, click Restore to restore your settings: 1. ProSafe Wireless-N Access Point WNAP210 Reference Manual Saving the Configuration To save your settings.

WNAP210 Reference Manual
Page 71
Figure 3-7 2. On the Restore Defaults screen, select the Yes radio button, as shown in Figure 3-7. To restore the factory settings: 1. Select Maintenance > Reset > Restore Defaults. The Restore Defaults screen displays. ProSafe Wireless-N Access Point WNAP210 Reference Manual Figure 3-6 Restoring the WNAP210 to the Factory Default Settings You can restore the wireless access point to the factory default settings using the Restore function.. Management 3-7 v1.0 March 2009
Figure 3-7 2. On the Restore Defaults screen, select the Yes radio button, as shown in Figure 3-7. To restore the factory settings: 1. Select Maintenance > Reset > Restore Defaults. The Restore Defaults screen displays. ProSafe Wireless-N Access Point WNAP210 Reference Manual Figure 3-6 Restoring the WNAP210 to the Factory Default Settings You can restore the wireless access point to the factory default settings using the Restore function.. Management 3-7 v1.0 March 2009
WNAP210 Reference Manual
Page 72
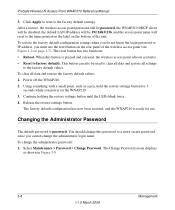
... the restore settings button. You should change the administrator password: 1. To clear all settings to the factory default settings. ProSafe Wireless-N Access Point WNAP210 Reference Manual 3. Click Apply to reset to the factory default values. The reset button has two functions: • Reboot. Using something with a small point, such as shown in Figure 3-8. 3-8 Management v1.0 March 2009 Changing the Administrator Password The...
... the restore settings button. You should change the administrator password: 1. To clear all settings to the factory default settings. ProSafe Wireless-N Access Point WNAP210 Reference Manual 3. Click Apply to reset to the factory default values. The reset button has two functions: • Reboot. Using something with a small point, such as shown in Figure 3-8. 3-8 Management v1.0 March 2009 Changing the Administrator Password The...

WNAP210 Reference Manual
Page 106
..., to factory defaults. The factory default configuration has now been restored, and the WNAP210 is pressed and released quickly, the WNAP210 reboots (restarts). • Reset to press the restore settings button in for use. 5-4 Troubleshooting and Debugging v1.0 March 2009 To clear all settings to Restore Default Settings The Restore factory settings button (see "Rear Panel" on . 2. ProSafe Wireless-N Access Point WNAP210 Reference Manual...
..., to factory defaults. The factory default configuration has now been restored, and the WNAP210 is pressed and released quickly, the WNAP210 reboots (restarts). • Reset to press the restore settings button in for use. 5-4 Troubleshooting and Debugging v1.0 March 2009 To clear all settings to Restore Default Settings The Restore factory settings button (see "Rear Panel" on . 2. ProSafe Wireless-N Access Point WNAP210 Reference Manual...
WNAP210 Reference Manual
Page 107
... blinks rapidly). This is called a hard reset. • To perform a hard reset, push and hold the restore settings button for the ProSafe Wireless-N Access Point. Your device will return to the factory configuration settings shown in Table A-1. • Pressing the restoresettings button for a shorter period of your device to their factory defaults. Factory Default Settings You can use the restore settings...
... blinks rapidly). This is called a hard reset. • To perform a hard reset, push and hold the restore settings button for the ProSafe Wireless-N Access Point. Your device will return to the factory configuration settings shown in Table A-1. • Pressing the restoresettings button for a shorter period of your device to their factory defaults. Factory Default Settings You can use the restore settings...

WNAP210 Reference Manual
Page 122
ProSafe Wireless-N Access Point WNAP210 Reference Manual crossover cable 1-5 CSMA/CD 4-5 Customer support 1-ii D Data Encryption AES 2-35, 2-38 TKIP 2-34 TKIP+AES 2-36, 2-39 Data Rate 2-11, 2-18 default login 2-4 default password 2-4, 2-12, 2-14 Default Settings A-1 default settings 2-21 default SSID 2-10 default subnet mask 255.255.255.0 2-4 default user name 2-4, 2-12, 2-14 DHCP Client 1-2, 2-7, 2-15 enabling 2-7, 2-15 DTIM Interval default setting 4-6 dynamic...
ProSafe Wireless-N Access Point WNAP210 Reference Manual crossover cable 1-5 CSMA/CD 4-5 Customer support 1-ii D Data Encryption AES 2-35, 2-38 TKIP 2-34 TKIP+AES 2-36, 2-39 Data Rate 2-11, 2-18 default login 2-4 default password 2-4, 2-12, 2-14 Default Settings A-1 default settings 2-21 default SSID 2-10 default subnet mask 255.255.255.0 2-4 default user name 2-4, 2-12, 2-14 DHCP Client 1-2, 2-7, 2-15 enabling 2-7, 2-15 DTIM Interval default setting 4-6 dynamic...

WNAP210 Reference Manual
Page 124
ProSafe Wireless-N Access Point WNAP210 Reference Manual Read-Write Community Name default name 3-2 rear panel diagram of 1-8 Reboot 3-9, 5-4 Receive Traps 3-2 reception range equipment placement 2-1 registering 1-ii Remote Console 3-1 remote management via Telenet 3-1 Remote Management screen 3-1 Repeater 4-9 repeater mode enabling 4-1 Repeater, wireless configuring 4-15 Reserve IP Address 2-14 Reset to Factory Defaults 3-9 restore configuration 3-5 restore default settings 3-8 Restore Defaults screen 3-8 restricting access MAC address, using...
ProSafe Wireless-N Access Point WNAP210 Reference Manual Read-Write Community Name default name 3-2 rear panel diagram of 1-8 Reboot 3-9, 5-4 Receive Traps 3-2 reception range equipment placement 2-1 registering 1-ii Remote Console 3-1 remote management via Telenet 3-1 Remote Management screen 3-1 Repeater 4-9 repeater mode enabling 4-1 Repeater, wireless configuring 4-15 Reserve IP Address 2-14 Reset to Factory Defaults 3-9 restore configuration 3-5 restore default settings 3-8 Restore Defaults screen 3-8 restricting access MAC address, using...


