
User Manual
Page 2
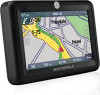
...)-Connect with your own neighborhood. • Save time and gas-Get there quickly and avoid getting lost. Your MOTONAV TN20/TN30 helps you find the best route with GPS accuracy. Search over a million businesses and other points of interest to find destinations while in clear...your favorite restaurant, nearest bank, or see what's available along your hands on the wheel, and eyes on the screen, and automatically mutes turn-by -turn . welcome Your MOTONAV™ TN20/TN30 helps you find the best route with GPS accuracy. Navigation and handsfree calling helps you keep your route. You ...
...)-Connect with your own neighborhood. • Save time and gas-Get there quickly and avoid getting lost. Your MOTONAV TN20/TN30 helps you find the best route with GPS accuracy. Search over a million businesses and other points of interest to find destinations while in clear...your favorite restaurant, nearest bank, or see what's available along your hands on the wheel, and eyes on the screen, and automatically mutes turn-by -turn . welcome Your MOTONAV™ TN20/TN30 helps you find the best route with GPS accuracy. Navigation and handsfree calling helps you keep your route. You ...

User Manual
Page 3
Map View Screen Map Control Icons Here's a quick guide for using the map view screen icons to control operation. 9 8 3 4 1 7 5 2 6 2
Map View Screen Map Control Icons Here's a quick guide for using the map view screen icons to control operation. 9 8 3 4 1 7 5 2 6 2

User Manual
Page 4
Tap to power source / Full / Partial / Low. (TN30 only) Indicates Bluetooth on 3 Tap to view a larger area in more detail. Heading indicator. Battery indicator: Connected to display main menu screen. Tap to make a handsfree call. If not, tap to display GPS Information screen. (TN30 only) Tap to adjust/mute/unmute volume. Current street indicator (if GPS connection). 1 2 3 / 4 / 5 6 7 8 /// 9 Tap to view a smaller area in less detail. Tap to change map view display (3D or 2D).
Tap to power source / Full / Partial / Low. (TN30 only) Indicates Bluetooth on 3 Tap to view a larger area in more detail. Heading indicator. Battery indicator: Connected to display main menu screen. Tap to make a handsfree call. If not, tap to display GPS Information screen. (TN30 only) Tap to adjust/mute/unmute volume. Current street indicator (if GPS connection). 1 2 3 / 4 / 5 6 7 8 /// 9 Tap to view a smaller area in less detail. Tap to change map view display (3D or 2D).

User Manual
Page 5
Route Screen Here's a quick guide for using the map view screen to view and control route information. lane information next turn next street bar route current location route status bar 4
Route Screen Here's a quick guide for using the map view screen to view and control route information. lane information next turn next street bar route current location route status bar 4

User Manual
Page 9
...your units of measure . . 31 set keyboard type 31 set voice prompts 32 connect to your phone for handsfree calls (TN30 only) . 32 manage paired phone list (TN30 only 34 handsfree calls (TN30 only) . 37 answer a call 37 reject/ignore a call 37 make a call 37 mute/unmute a call 40 transfer... a call 41 end a call 41 display in call screen 41 Safety Information 42 Driving Safety 44 Industry Canada Notice. . . . . 46 ...
...your units of measure . . 31 set keyboard type 31 set voice prompts 32 connect to your phone for handsfree calls (TN30 only) . 32 manage paired phone list (TN30 only 34 handsfree calls (TN30 only) . 37 answer a call 37 reject/ignore a call 37 make a call 37 mute/unmute a call 40 transfer... a call 41 end a call 41 display in call screen 41 Safety Information 42 Driving Safety 44 Industry Canada Notice. . . . . 46 ...

User Manual
Page 10
get started components Take a moment before you get started to familiarize yourself with the components of your MOTONAV TN30 and TN20. MOTONAV TN30 components touch display screen microphone speaker (on reverse side) Power button (on side) indicator light charger port Reset button (on side) memory card slot MOTONAV TN20 components touch display screen speaker (on reverse side) Power button (on side) indicator light memory card slot (on side) charger port Reset button (on side) get started 9
get started components Take a moment before you get started to familiarize yourself with the components of your MOTONAV TN30 and TN20. MOTONAV TN30 components touch display screen microphone speaker (on reverse side) Power button (on side) indicator light charger port Reset button (on side) memory card slot MOTONAV TN20 components touch display screen speaker (on reverse side) Power button (on side) indicator light memory card slot (on side) charger port Reset button (on side) get started 9

User Manual
Page 11
..., it must also be powered using the Power button. • If the TN20/TN30 turns off ), it will turn vehicle ignition off after 30 seconds. If you do not touch the screen, it prompts you to touch the screen to switch to battery power. initial setup Before you navigate with your TN20.../TN30, you need to perform the following initial setup steps: 1 Mount in the box. You ...
..., it must also be powered using the Power button. • If the TN20/TN30 turns off ), it will turn vehicle ignition off after 30 seconds. If you do not touch the screen, it prompts you to touch the screen to switch to battery power. initial setup Before you navigate with your TN20.../TN30, you need to perform the following initial setup steps: 1 Mount in the box. You ...

User Manual
Page 12
... you always see pages 2 and 3. For details on your TN20/TN30 may not be as effective. • The included car charger will not power Motorola phones. get started 11 To directly access the map view screen from all other menu screens, tap the Map button in red when the battery is low. &#...8226; Using another charger to charge your TN20/TN30, you turn on using the map view...
... you always see pages 2 and 3. For details on your TN20/TN30 may not be as effective. • The included car charger will not power Motorola phones. get started 11 To directly access the map view screen from all other menu screens, tap the Map button in red when the battery is low. &#...8226; Using another charger to charge your TN20/TN30, you turn on using the map view...

User Manual
Page 13
main menu screen From the map view screen, tap the Menu button to access the main menu screen. Lets you create and manage destination routes on your TN20/TN30. TN30 Displays map view screen with route and map control options. TN20 (TN30 only) Displays make a call screen. From the main menu, you can access all TN20/TN30 operations: Lets you configure TN20/TN30 options. 12 get started
main menu screen From the map view screen, tap the Menu button to access the main menu screen. Lets you create and manage destination routes on your TN20/TN30. TN30 Displays map view screen with route and map control options. TN20 (TN30 only) Displays make a call screen. From the main menu, you can access all TN20/TN30 operations: Lets you configure TN20/TN30 options. 12 get started

User Manual
Page 14
get started 13 navigation To navigate around TN20/TN30 menus and text entry screens, use the right and left arrows at the top: previous screen next screen go to map view screen From a menu screen, you can easily return to see the main menu. From the map view screen, tap Menu to the map view screen by tapping Map in the lower-right corner.
get started 13 navigation To navigate around TN20/TN30 menus and text entry screens, use the right and left arrows at the top: previous screen next screen go to map view screen From a menu screen, you can easily return to see the main menu. From the map view screen, tap Menu to the map view screen by tapping Map in the lower-right corner.

User Manual
Page 15
.... See "search and select item" on page 22 for details on searching for and selecting items using the keyboard screen. 3 Tap Address. 4 Select destination address (city, street, and address number). Note: To select the center of a city for a destination (instead of destination, tap Change and ... to generate route. You see: 14 routes Note: To change state of a specific address), use the City Center selection for a selecting items using the keyboard screen.
.... See "search and select item" on page 22 for details on searching for and selecting items using the keyboard screen. 3 Tap Address. 4 Select destination address (city, street, and address number). Note: To select the center of a city for a destination (instead of destination, tap Change and ... to generate route. You see: 14 routes Note: To change state of a specific address), use the City Center selection for a selecting items using the keyboard screen.

User Manual
Page 16
...to an intersection: From the main menu: 1 Tap Go!. 2 Tap Address. You see : details on searching for and selecting items using the keyboard screen. 3 Tap Intersection. 4 Select destination intersection (city and streets). See "search and select item" on page 22 for details on searching using the keyboard... screen. 5 Tap Go to generate route. A route screen appears. go to location on map To create a route to a location on the map: From the map view screen: 1 Tap destination location on map. routes 15 See "search and ...
...to an intersection: From the main menu: 1 Tap Go!. 2 Tap Address. You see : details on searching for and selecting items using the keyboard screen. 3 Tap Intersection. 4 Select destination intersection (city and streets). See "search and select item" on page 22 for details on searching using the keyboard... screen. 5 Tap Go to generate route. A route screen appears. go to location on map To create a route to a location on the map: From the map view screen: 1 Tap destination location on map. routes 15 See "search and ...

User Manual
Page 17
A route screen appears. A route screen appears. 16 routes go to favorite location To create a route to a favorite location: Note: To set a favorite location, see "set favorite location" on page 20. ...go to home location To create a route to your home location: Note: To set your home location, see "set home location" on page 21. A route screen appears. go to recent location To create a route to a recent location: From the main menu: 1 Tap Go!. 2 Tap Recent Locations. 3 Select location from list and...
A route screen appears. A route screen appears. 16 routes go to favorite location To create a route to a favorite location: Note: To set a favorite location, see "set favorite location" on page 20. ...go to home location To create a route to your home location: Note: To set your home location, see "set home location" on page 21. A route screen appears. go to recent location To create a route to a recent location: From the main menu: 1 Tap Go!. 2 Tap Recent Locations. 3 Select location from list and...

User Manual
Page 19
A route screen appears. You see : 5 Tap road types to avoid and tap OK. You see : 4 Select desired route type and tap right arrow. manage a route select route options To select route type (quickest, shortest), and road types to generate route. • To search for a business by name, tap Spell Place to search for and select a business. 5 Tap Go to avoid when generating a route: From the main menu: 1 Tap Settings. 2 Tap Route. 3 Tap Road Settings. The route is regenerated and appears on map screen. 18 routes
A route screen appears. You see : 5 Tap road types to avoid and tap OK. You see : 4 Select desired route type and tap right arrow. manage a route select route options To select route type (quickest, shortest), and road types to generate route. • To search for a business by name, tap Spell Place to search for and select a business. 5 Tap Go to avoid when generating a route: From the main menu: 1 Tap Settings. 2 Tap Route. 3 Tap Road Settings. The route is regenerated and appears on map screen. 18 routes

User Manual
Page 20
... see : 3 Tap a detour distance button. You see : 3 To view detail about a specific route step, select the step and do this: From the route screen: 1 Tap next street bar. 2 Tap Create Detour. Select Next/Prior to calculate an alternate route. create route detour You can have your TN20... after a distance of three miles. To do the following: • Select Turns to that takes you off your TN20/TN30 to view next or previous step on map. routes 19 view route directions list To view a driving directions list: From the route screen: 1 Tap next street bar. 2 Tap Directions List.
... see : 3 Tap a detour distance button. You see : 3 To view detail about a specific route step, select the step and do this: From the route screen: 1 Tap next street bar. 2 Tap Create Detour. Select Next/Prior to calculate an alternate route. create route detour You can have your TN20... after a distance of three miles. To do the following: • Select Turns to that takes you off your TN20/TN30 to view next or previous step on map. routes 19 view route directions list To view a driving directions list: From the route screen: 1 Tap next street bar. 2 Tap Directions List.

User Manual
Page 21
... location • Current speed and altitude The distance and estimated time of arrival are displayed at the bottom of the complete route: From the route screen: 1 Tap next street bar. 2 Tap Route Overview. You see: view route status information To view route status information from the route... screen, tap the route status bar. • Select Avoid to recalculate route to avoid selected step. • Select Route to view overall route on map. view ...
... location • Current speed and altitude The distance and estimated time of arrival are displayed at the bottom of the complete route: From the route screen: 1 Tap next street bar. 2 Tap Route Overview. You see: view route status information To view route status information from the route... screen, tap the route status bar. • Select Avoid to recalculate route to avoid selected step. • Select Route to view overall route on map. view ...

User Manual
Page 22
set favorite location To set a favorite location: From the map view screen: 2 Tap Save from the map view screen. You see : 1 Tap favorite location on map. cancel a route To cancel a route: From the route screen: 1 Tap next street bar. 2 Tap Cancel Route. You see a pop-up menu to save destination under My Locations in Settings. 2 Tap Home. The route is removed from pop-up menu: 3 Search for and select an address (city, street, and address number) by tapping Set Address. 4 Tap OK. routes 21
set favorite location To set a favorite location: From the map view screen: 2 Tap Save from the map view screen. You see : 1 Tap favorite location on map. cancel a route To cancel a route: From the route screen: 1 Tap next street bar. 2 Tap Cancel Route. You see a pop-up menu to save destination under My Locations in Settings. 2 Tap Home. The route is removed from pop-up menu: 3 Search for and select an address (city, street, and address number) by tapping Set Address. 4 Tap OK. routes 21

User Manual
Page 23
...Tap See List button to select from a complete list of items. Tap an item to select it then tap OK button. use the keyboard A keyboard screen is provided to search and select items as well as cities or streets), you select characters, matching items are listed like shown: search and select... item To search for and select from a list of items (such as enter text with your TN20/TN30. • Using keyboard, begin entering item name. To redisplay letters, tap ABC> button. 22 routes To redisplay keyboard, tap Show Keyboard button. To ...
...Tap See List button to select from a complete list of items. Tap an item to select it then tap OK button. use the keyboard A keyboard screen is provided to search and select items as well as cities or streets), you select characters, matching items are listed like shown: search and select... item To search for and select from a list of items (such as enter text with your TN20/TN30. • Using keyboard, begin entering item name. To redisplay letters, tap ABC> button. 22 routes To redisplay keyboard, tap Show Keyboard button. To ...

User Manual
Page 26
select map display options To choose the items (buttons, bars, icons) displayed on the map: From the main menu: 1 Tap Settings. 2 Tap Map Icons. The main menu screen appears. maps 25 The main menu screen appears. 3 Tap checkbox to select/unselect map icon types to select/unselect map display items. 4 Tap OK. You see : select map display icons To choose businesses and other icon types to display on the map view screen: From the main menu: 1 Tap Settings. 2 Tap Map. You see : 3 Tap checkbox to display. 4 Tap OK.
select map display options To choose the items (buttons, bars, icons) displayed on the map: From the main menu: 1 Tap Settings. 2 Tap Map Icons. The main menu screen appears. maps 25 The main menu screen appears. 3 Tap checkbox to select/unselect map icon types to select/unselect map display items. 4 Tap OK. You see : select map display icons To choose businesses and other icon types to display on the map view screen: From the main menu: 1 Tap Settings. 2 Tap Map. You see : 3 Tap checkbox to display. 4 Tap OK.

User Manual
Page 28
... Note: To change state of a specific address), use the City Center selection for a selecting items using the keyboard screen. To exit browse mode and turn off GPS and place TN20/TN30 in browse map mode. See "search and select 6 Tap Yes to browse. To exit browse mode and turn off... GPS and place TN20/TN30 in browse map mode. Note: To select the center of a city for and selecting items using the keyboard screen. 3 Tap Address. 4 Select address (city, street, and address number) from specific location: From main ...
... Note: To change state of a specific address), use the City Center selection for a selecting items using the keyboard screen. To exit browse mode and turn off GPS and place TN20/TN30 in browse map mode. See "search and select 6 Tap Yes to browse. To exit browse mode and turn off... GPS and place TN20/TN30 in browse map mode. Note: To select the center of a city for and selecting items using the keyboard screen. 3 Tap Address. 4 Select address (city, street, and address number) from specific location: From main ...